Hi Students and creators in this project I will show you how to make arduino human following robot in a very simple way.
If you are a beginner to arduino this is the best project to begin with.
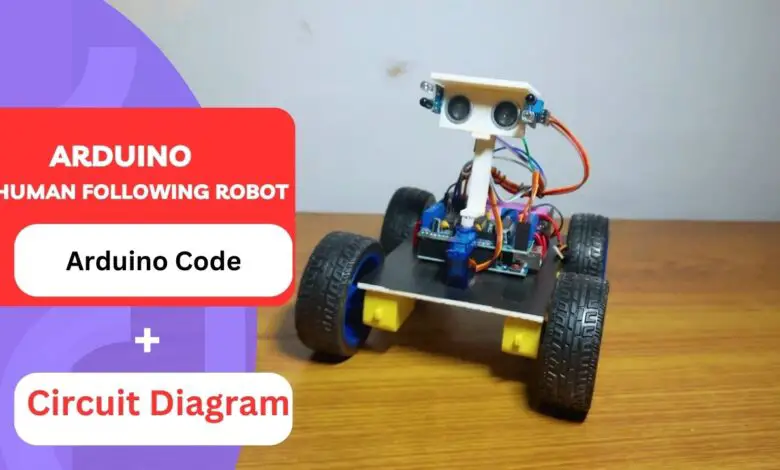
Let me give you an overview of human following robot using arduino uno that we will build.
How human following robot works
This is a 4 wheel drive robot car that has an ultrasonic sensor and it moves accordingly with a servo.
It also has an IR sensor to detect the motion, the HCSR04 sensor and IR sensor keep track of moving objects.
This is then processed by code and the wheel is directed towards the obstacle.
This mechanism makes this robotic car follow the obstacle.
By building a human follower arduino robot you will have hands on experience in building the circuit and arduino coding.
You may also like Arduino Dustbin Project
Materials to build this project
- BO motors and wheels
- Micro servo
- Arduino Uno
- Servo shield
- Ultrasonic sensor and IR sensor
- Sheet of wood
- Double sided tape
Note that I may earn a commission on qualifying purchases at no extra cost to you from the above product.
Circuit Diagram for Arduino Human following robot
This is the circuit that we are using in the human following robot, The shield that we are using holds all the components.

Building steps
Start by gluing the BO motors to the cardboard base in my case I will use double side adhesive.
Now follow the above circuit diagram to make the connections between the components.
The BO motors will be attached to the servo shield directly.
Place the servo and glue it then to its horns add the ultrasonic sensor.

I have made a small piece for this to elevate the height for better navigation.
The sides of HC-SR04 are glued with IR sensor and make sure to add a cover at the top.
This cover at the top prevents light from entering the IR module and interfering with the working.
Add a switch between the battery and arduino uno to make power on and off easier.
Jumper wires need to be organised properly as we have moving parts, Use elastic band to keep firm.
Human following robot arduino code
// You can change the pins but do this only if you know the changes it may cause //
#include<NewPing.h>
#include<Servo.h>
#include<AFMotor.h>

#define LEFT A5             // Right IR sensor connected to analog pin A2 of Arduino Uno:
#define RIGHT A1              // Left IR sensor connected to analog pin A3 of Arduino Uno:
#define TRIGGER_PIN A2        // Trigger pin connected to analog pin A1 of Arduino Uno:
#define ECHO_PIN A3           // Echo pin connected to analog pin A0 of Arduino Uno:
#define MAX_DISTANCE 200      // Maximum ping distance:

unsigned int distance = 0;    //Variable to store ultrasonic sensor distance:
unsigned int Right_Value = 0; //Variable to store Right IR sensor value:
unsigned int Left_Value = 0;  //Variable to store Left IR sensor value:
 int d=10;


NewPing sonar(TRIGGER_PIN, ECHO_PIN, MAX_DISTANCE);  //NewPing setup of pins and maximum distance:

//create motor objects
AF_DCMotor Motor1(1,MOTOR12_1KHZ);
AF_DCMotor Motor2(2,MOTOR12_1KHZ);
AF_DCMotor Motor3(3,MOTOR34_1KHZ);
AF_DCMotor Motor4(4,MOTOR34_1KHZ);

 Servo myservo; //create servo object to control the servo:
 int pos=0;     //variable to store the servo position:

void setup() { // the setup function runs only once when power on the board or reset the board:

   Serial.begin(9600); //initailize serial communication at 9600 bits per second:
   myservo.attach(10); // servo attached to pin 10 of Arduino UNO
{
for(pos = 90; pos <= 180; pos += 1){    // goes from 90 degrees to 180 degrees:
  myservo.write(pos);                   //tell servo to move according to the value of 'pos' variable:
  delay(15);                            //wait 15ms for the servo to reach the position:
  }
for(pos = 180; pos >= 0; pos-= 1) {     // goes from 180 degrees to 0 degrees:
  myservo.write(pos);                   //tell servo to move according to the value of 'pos' variable:
  delay(15);                            //wait 15ms for the servo to reach the position:
  }
for(pos = 0; pos<=90; pos += 1) {       //goes from 180 degrees to 0 degrees:
  myservo.write(pos);                   //tell servo to move according to the value of 'pos' variable:
  delay(15);                            //wait 15ms for the servo to reach the position:
  }
}
   pinMode(RIGHT, INPUT); //set analog pin RIGHT as an input:
   pinMode(LEFT, INPUT);  //set analog pin RIGHT as an input:
   stop();
}

// the lope function runs forever
void loop() {

delay(50);                                        //wait 50ms between pings:
distance = sonar.ping_cm();                       //send ping, get distance in cm and store it in 'distance' variable:
Serial.print("distance");
Serial.println(distance);                         // print the distance in serial monitor:


    Right_Value = !digitalRead(RIGHT);             // read the value from Right IR sensor:
    Left_Value = !digitalRead(LEFT);               // read the value from Left IR sensor:

Serial.print("RIGHT");
Serial.println(Right_Value);                      // print the right IR sensor value in serial monitor:
Serial.print("LEFT");
Serial.println(Left_Value);                       //print the left IR sensor value in serial monitor:

if((distance > 1) && (distance < d)){            //check wheather the ultrasonic sensor's value stays between 1 to 15.
                                                  //If the condition is 'true' then the statement below will execute:
  //Move Forward:
  Motor1.setSpeed(130);  //define motor1 speed:
  Motor1.run(FORWARD);   //rotate motor1 clockwise:
  Motor2.setSpeed(130);  //define motor2 speed:
  Motor2.run(FORWARD);   //rotate motor2 clockwise:
  Motor3.setSpeed(130);  //define motor3 speed:
  Motor3.run(FORWARD);   //rotate motor3 clockwise:
  Motor4.setSpeed(130);  //define motor4 speed:
  Motor4.run(FORWARD);   //rotate motor4 clockwise:

}else if((Right_Value==1) && (Left_Value==0)) {   //If the condition is 'true' then the statement below will execute:

  //Turn right
  Motor1.setSpeed(150);  //define motor1 speed:
  Motor1.run(FORWARD);   //rotate motor1 cloclwise:
  Motor2.setSpeed(150);  //define motor2 speed:
  Motor2.run(FORWARD);   //rotate motor2 clockwise:
  Motor3.setSpeed(150);  //define motor3 speed:
  Motor3.run(BACKWARD);  //rotate motor3 anticlockwise:
  Motor4.setSpeed(150);  //define motor4 speed:
  Motor4.run(BACKWARD);  //rotate motor4 anticlockwise:
  delay(150);

}else if((Right_Value==0)&&(Left_Value==1)) {     //If the condition is 'true' then the statement below will execute:

  //Turn left
  Motor1.setSpeed(150);  //define motor1 speed:
  Motor1.run(BACKWARD);  //rotate motor1 anticlockwise:
  Motor2.setSpeed(150);  //define motor2 speed:
  Motor2.run(BACKWARD);  //rotate motor2 anticlockwise:
  Motor3.setSpeed(150);  //define motor3 speed:
  Motor3.run(FORWARD);   //rotate motor3 clockwise:
  Motor4.setSpeed(150);  //define motor4 speed:
  Motor4.run(FORWARD);   //rotate motor4 clockwise:
  delay(150);

}else if(distance > d) {                          //If the condition is 'true' then the statement below will execute:

stop();
}

}

void stop(){
    //Stop
  Motor1.setSpeed(0);    //define motor1 speed:
  Motor1.run(RELEASE);   //stop motor1:
  Motor2.setSpeed(0);    //define motor2 speed:
  Motor2.run(RELEASE);   //stop motor2:
  Motor3.setSpeed(0);    //define motor3 speed:
  Motor3.run(RELEASE);   //stop motor3:
  Motor4.setSpeed(0);    //define motor4 speed:
  Motor4.run(RELEASE);   //stop motor4:
}
Copy and paste this Arduino Code on your IDE and connect Uno to the computer.
If you face any issues when you are uploading check if the drivers are installed.
If you don’t have the drivers you can get it here
Check for proper port number and then click on upload.
Working the follow robot project
To make this project work all you have to do is power on the battery.
Now you just place your hands in front of the sensor and the robot will move towards you.
Avoid using this project outside on a bright sunlight since it may interfere with the Infrared sensor.
If you miss connecting the BO motor wires properly to the shield try interchanging terminals.
This is about building this project, if you have any questions ask us in the comments.
You can watch the video tutorial of this project here and thanks Pratik Verma for this project
As an Amazon Associate, I earn commission from qualifying purchases.