Hi readers in this article we will see Distance Measurement using Ultrasonic Sensor and Arduino with LCD display.
This article covers the entire project with ultrasonic distance measurement codes and circuit diagrams.
To begin with, let us see some features that come with this project.
Tip: You might also like our earlier project on DIY Mini Tesla Coil
How ultrasonic distance measurement using Arduino works
As we know HCSR04 is an inexpensive sensor that uses ultrasonic signals to transmit and receive signals.
It has a transmitter that emits ultrasonic waves and has a receiver to receive the signals.
While the transmission of waves if any obstacle comes on its way the difference in signal receiving time by the receiver is noted.
These can be used to determine the distance and we are using the same principle in this project.
Materials for this Project
- Arduino Nano
- Ultrasonic distance sensor or HCSRO4
- Jumper wires
- Breadboard
- LCD module with I2C

These are the parts that make this project, you can also use Arduino Uno instead of Nano.
I chose nano because of its small size to performance factor.
After we have all these materials we can start to build the circuit using the diagram given below.
Circuit Diagram for Distance Measurement using an Ultrasonic Sensor and Arduino
We can simply divide the code into two parts one is the ultrasonic sensor part while the other is the LCD module part.
I will explain the circuit by considering each connection.

Ultrasonic Sensor with Arduino Nano
I have mounted the nano on a breadboard along with an ultrasonic sensor.
With M to M jumper wires, I connected the Gnd and Vcc of the sensor to the Gnd and 5v pin of nano.
The Echo and Trig pins of the sensor to the D4 and D3 pins of the board.
Make sure the connections are firm and do not come off while testing.
You can simplify this circuit been more by using a PCB.
With the use of PCB we can mount the sensor on the board and LCD panel in line with the sensor.
The PCB will definitely make the project look even more cooler, if you have access to it feel free to implement.
LCD module with Arduino Nano
This is a 16×2 LCD display module and instead of connecting wires directly from LCD I will be using I2C
With I2c the connections will be a lot easier instead of 16 pins you have to connect only 4 pins.
Scl and Sda of LCD to A5 and A4 of the nano, whereas GND and Vcc to Gns and 5v pin of the board.

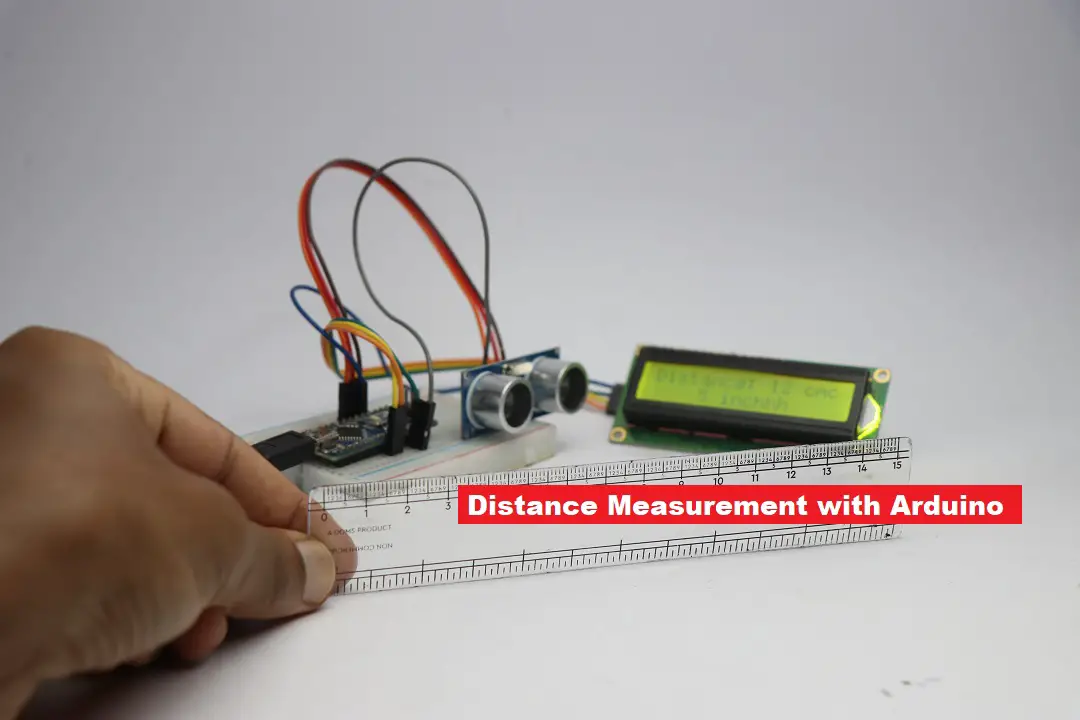
The above visual shows the complete circuit for this project.
You can also add the LCD module to the larger breadboard but I found this is sufficient.
Also, make sure the ultrasonic sensor is away from the USB cable since while powering it on and off your hands might interfere.
After the circuit only thing pending is adding the Arduino codes for this project.
Ultrasonic Sensor Distance Measurement Arduino Code
The program for this project is very simple and easy to understand.
If you are new to programming you can see that the modules to control the component are directly given in the code.
#include <Wire.h>
#include <LiquidCrystal_I2C.h>
LiquidCrystal_I2C lcd(0x27, 16,2);
const int trigPin = 3;
const int echoPin = 2;
long duration;
int distanceCm, distanceInch;
void setup() {
  lcd.init();
  lcd.begin(16, 2); // Initializes the interface to the LCD display
  lcd.backlight();
  pinMode(trigPin, OUTPUT);
  pinMode(echoPin, INPUT);
  Serial.begin(9600);
}
void loop() {
  digitalWrite(trigPin, LOW);
  delayMicroseconds(2);
  digitalWrite(trigPin, HIGH);
  delayMicroseconds(10);
  digitalWrite(trigPin, LOW);
  duration = pulseIn(echoPin, HIGH);
  distanceCm = duration * 0.0340 / 2;
  distanceInch = duration * 0.01330 / 2;
  lcd.setCursor(0, 0);
  lcd.print("Distance: ");
  Serial.println(distanceCm);
  lcd.print(distanceCm);
  lcd.print(" cm");
  lcd.setCursor(0, 1);
  lcd.print("    ");
  lcd.print(distanceInch);
  lcd.print(" inch");
  delay(1000);
}
Connect the power supply to the Arduino with a USB cable and open the IDE on your computer.
Copy and Paste the above code to the board, Now select Arduino Nano from the board section.
If you have not used the ultrasonic sensor library before you can get it from here.
Select the proper com port click on OK and then upload the program.
Now as soon as the code is not uploading the LCD lights will be on and the measuring device is ready for use.
How To Use Arduino and Ultrasonic sensor measuring device
Using this is like a regular measuring meter but the only difference is here we are mearuing it digitally.
Connect power supply to nano via USB and show the object in front of the HCSR04.
You can see the measured values or distance in both inches and cms on the LCD screen.
There are lot of room for improvements of this project that i will be trying to make in the future.
Hope you will build this project soon or later and if you have any questions reach out to us via comments.
Check the working of this project in this video
As an Amazon Associate, I earn commission from qualifying purchases.