Hi readers in this article we will see how to make an Arduino laser light security system in a very easy way.
This Arduino nano laser security alarm is simple and I have given all the instructions for building it.
To begin with, let us see some basic information about this project.
Note: A working video of this project is given in the post below
What is a Laser Security system using Arduino
By the name itself, you might have guessed or already know what this is all about.
Let me explain anyway, There are multiple ways of security systems.
The good old one is lock and key, it has its own pros and cons.
Here we will use the laser to detect trespassing hence the name laser security.
An onboard buzzer to give real-time alerts is suitable for your farm to keep the animals away.
You might also like Automatic Solar Tracker project which is best for your garden.
How laser light Arduino security system works
Though the project looks super technical it works with a very simple principle.
It has an LDR and a toy laser, the laser light is directed to the LDR when it cuts off the alarm makes a noise.
The principle here is when any kind of object passes over this laser light it causes LDR to act as a switch which in return activates the alarm.
It is a prototype that can be installed on your actual farm or the gate of your home.
The best part is you can use mirrors to make any shape.
Say your house is rectangular in shape and you want to add this system.
All you have to do is use the reflection of the mirror to create a square, in the end, it should reach the LDR.
Materials
- Arduino Nano from here
- Buzzer
- Toy laser diode modules
- LDR
- Breadboard and jumper wires got it here
- Switch
- 3d printed laser diode holder(optional)
- Piece of cardboard
- Rechargeable Battery
- Arduino IDE and programming cable
- Hot Glue
Note that few are affiliate links and on successful purchase I may receive a commission at no extra cost to you.

After you gather all the above shown supplies we can start to build a circuit.
Here we are using 2 different kinds of circuits.
One is the laser light circuit with its own battery and switch, this is the transmitter circuit.
The other one is the receiver circuit made up of Arduino, LDR, and Buzzer.
Arduino laser light security system circuit diagram
The circuit is very simple and easy to build.
I will go through the first circuit aka Arduino nano circuit first.
LDR comes with 2 terminals out of which one goes with A0 and the other to GND.
Buzzer one terminal to D11 or nano and the other to GND.
This completes the first or primary circuit.

The secondary circuit known as the transmitter circuit made with basic circuitry.
One end of the laser diode module goes to the battery directly.
The other end of the laser connects to the battery via the switch.
Insulate the joint with hot glue or insulation tape.
This completes the secondary circuit part, now we will feed some Arduino programs to the nano.
Arduino laser light security system code
Open your Arduino IDE, and Connect the programming cable to your Nano.
Copy and paste this code to the IDE, Select the type of board and port, and click on upload.
int laserPin = 3;
int sensorPin = A0;
int buzzerPin = 11;

int laserThreshold = 10;

void setup() {
  pinMode(laserPin, OUTPUT);
  pinMode(sensorPin, INPUT);  // Define sensorPin as INPUT

  Serial.begin(9600);
}

boolean alarmState = false;

void loop() {
  if (!alarmState) {
    delay(1000);
    digitalWrite(laserPin, HIGH);
    delay(10);
    unsigned long startTime = millis();
    while (millis() - startTime < 1000) {
      int sensorValue = analogRead(sensorPin);
      Serial.println(sensorValue);
      if (sensorValue > laserThreshold) {
        alarmState = true;
        break;

      }
      delay(10);

    }
    digitalWrite(laserPin, LOW);
  } else {
    tone(buzzerPin, 440);
    delay(1000);  // Keep the buzzer on for 1 second
    alarmState = false;
    noTone(buzzerPin);
  }
}
If you want to make some changes to the duration of the buzzer you can make changes in the delay section i the end of the program.
Click on the upload and wait until the code uploads to nano
Now unplug the cable from the board.
All we have to do now is set the electronics on a board, Here you can choose the type of gate or places where you want to install this.
How to use laser security project
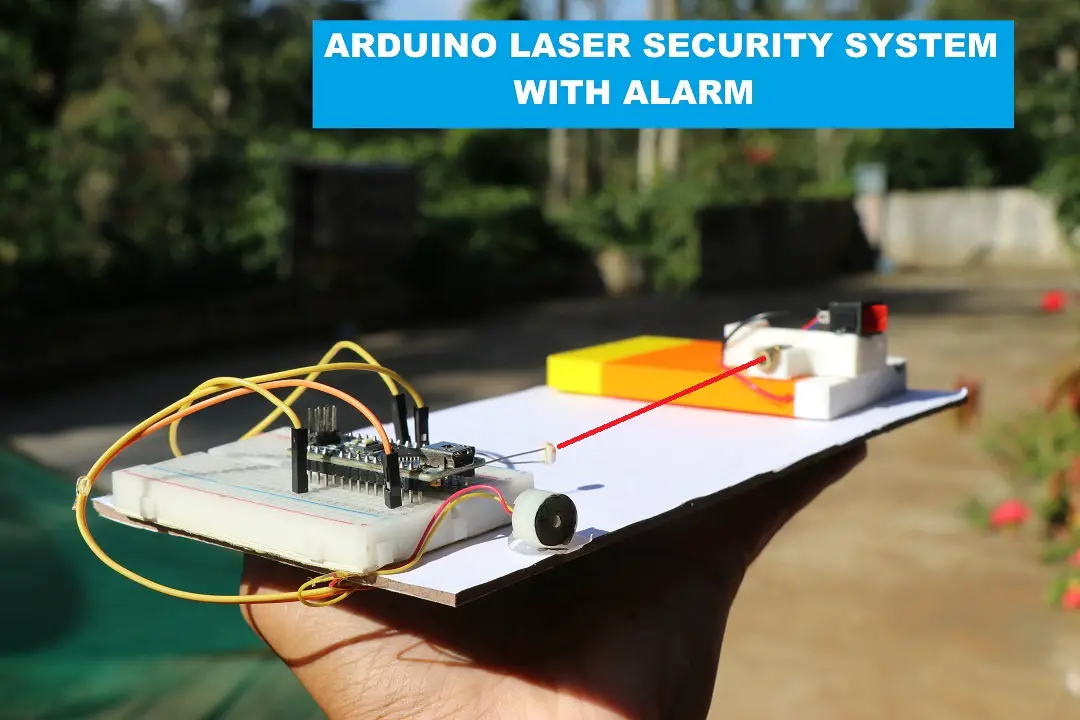
This is the setup I made, the only thing here is the laser should directly fall on the LDR.

It took me some time to calibrate the LDR and light falling from the laser after which I secured both the components with hot glue.
Lastly hot glue the buzzer, you can still add additional features like adding a home so this project resembles a house gate security.
To make this project work all you have to do is switch on the laser light first.
Now via USB cable connect power to the nano, the laser light falling on the LDR shows that the security system is active.
When an obstacle is sense by laser light(an obstacle that interferes with the continuous light supply) the buzzer starts to make a sound.
Complete video of this project is here
As an Amazon Associate, I earn commission from qualifying purchases.