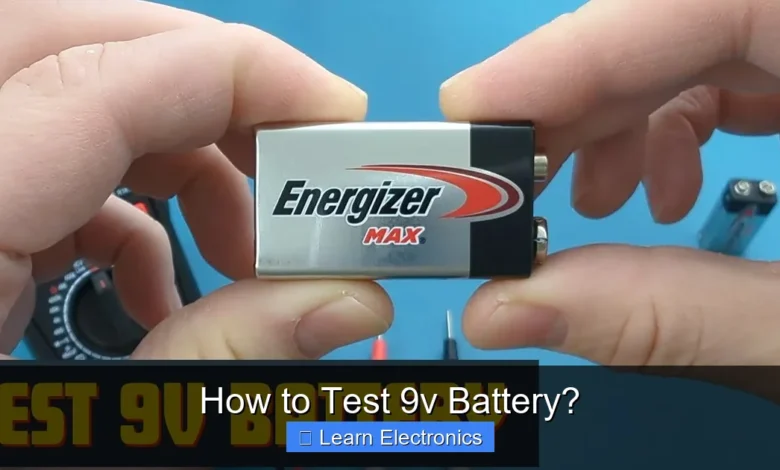
How to Test 9V Battery? involves using a digital multimeter to measure its voltage or a dedicated battery tester for a quick assessment of its charge. Understanding the health of these ubiquitous power sources is crucial for the reliable operation of many household and electronic devices. This simple practice ensures your gadgets function optimally and prevents unexpected power loss.
Whether you’re dealing with smoke detectors, guitar pedals, or remote control toys, a dead 9-volt cell can bring operations to a halt. Learning the proper techniques for checking these batteries not only saves you time and frustration but also helps you make informed decisions about replacement, ensuring your electronics are always powered up and ready to go.
Quick Answers to Common Questions
What’s the quickest way to test a 9V battery?
The fastest and most reliable method for How to Test 9V Battery is using a multimeter! Just set it to DC Volts and touch the red probe to the positive (+) terminal and the black probe to the negative (-) terminal for an instant reading.
What voltage should a good 9V battery show?
A brand new 9V battery typically reads around 9.0 to 9.6 volts. If your reading is consistently 8V or lower, especially under a slight load, your battery is likely nearing its end and might need replacing soon.
Can I test a 9V battery without a multimeter?
While not as precise, you can try plugging it into a device you know requires a 9V battery, like a smoke detector, to see if it powers up. For a more accurate understanding of its remaining life, however, a multimeter is truly indispensable.
📑 Table of Contents
Understanding the 9V Battery
The 9V battery, commonly known as a transistor radio battery, is a popular choice for devices requiring a compact power source with moderate current drain. Unlike AA or AAA batteries, which are typically 1.5V, a standard 9V battery contains six individual 1.5V cells connected in series inside its rectangular casing, producing a nominal 9-volt output.
Anatomy and Characteristics
Most 9V batteries are either alkaline or lithium. Alkaline versions are the most common and offer a good balance of cost and performance for general use. Lithium 9V batteries, while more expensive, provide a longer shelf life, better performance in extreme temperatures, and a more stable voltage output throughout their discharge cycle. Rechargeable NiMH (Nickel-Metal Hydride) 9V batteries are also available for those who prefer an eco-friendlier and more cost-effective long-term solution.
Key characteristics to remember for any 9-volt power source include its open-circuit voltage (voltage when no load is applied) and its voltage under load (voltage when powering a device). While a new 9V alkaline battery might measure around 9.6 volts fresh out of the pack, its voltage will gradually decrease as it discharges. The true indicator of a battery’s health often lies in its ability to maintain a sufficient voltage under a load, which is why a simple voltage reading is a good starting point but not always the full picture.
When to Test Your 9V Battery
It’s a good practice to test these batteries in several scenarios:
- Before Installation: Always test new batteries before putting them into critical devices like smoke detectors to ensure they are at full capacity.
- Device Malfunction: If a device powered by a 9-volt cell isn’t working or is acting erratically, the battery is usually the first suspect.
- Regular Maintenance: For items like smoke alarms, manufacturers often recommend changing batteries every six months to a year. A quick check can confirm if a replacement is truly needed.
- After Storage: Batteries, especially alkaline ones, can slowly self-discharge over time. Testing them after prolonged storage ensures they are still viable.
Essential Tools for Testing a 9V Battery
To accurately assess the condition of your 9-volt power cells, you’ll need the right tools. While some methods are more precise than others, all offer valuable insights into battery health.
Digital Multimeter (DMM)
A digital multimeter is the most versatile and accurate tool for measuring battery voltage. It can measure various electrical properties, including voltage, current, and resistance. For testing batteries, you’ll primarily use its DC voltage (VDC) setting. DMMs are widely available, relatively inexpensive, and an essential tool for any DIY enthusiast or electronics hobbyist.
Dedicated Battery Testers
Dedicated battery testers are designed specifically for the task of checking battery health. They are often simpler to use than a multimeter, with clear indicators (like a needle gauge or LED lights) showing whether a battery is good, weak, or dead. Some advanced testers can also apply a small load during testing, providing a more realistic assessment of the battery’s performance under working conditions.
Basic Devices and Other Methods
For a very quick, albeit less precise, check, you might use a simple LED light or a small motor. Connecting a battery to such a component can give you a visual indication of whether it still has enough power to light the LED or spin the motor. However, this method doesn’t provide numerical data and can be misleading, as a battery might light an LED but not provide enough power for a more demanding device.
The infamous “bounce test” is another common but unreliable method. This involves dropping a 9-volt cell from a small height onto a hard surface. The theory is that a dead battery will bounce more than a fully charged one. While there’s some scientific basis related to internal impedance, this is generally not a recommended or accurate way to determine battery health and can even damage the battery or surface.
Step-by-Step Guide: Testing with a Digital Multimeter
Using a digital multimeter is the most reliable method for accurately measuring the voltage of your 9V battery. Follow these steps for precise results.
Setting Up Your Multimeter
- Turn On the Multimeter: Power on your digital multimeter.
- Select DC Voltage Mode: Rotate the dial to the DC voltage setting. This is usually denoted by a “V” with a straight line and three dots above it (V–).
- Choose the Right Range: For a 9V battery, select a range that is higher than 9 volts but as close as possible without being too low. Common ranges might be 20V DC or 10V DC, depending on your multimeter model. If you’re unsure, start with a higher range (e.g., 20V) and adjust down if necessary for more precision.
- Connect the Probes: Insert the red (positive) test lead into the “VΩmA” or “V” jack and the black (negative) test lead into the “COM” (common) jack.
Performing the Voltage Measurement
- Identify Battery Terminals: Locate the positive (+) and negative (-) terminals on the 9V battery. The larger hexagonal terminal is usually negative, and the smaller circular terminal is positive.
- Connect Probes to Battery: Press the red multimeter probe against the positive terminal of the 9V battery. At the same time, press the black multimeter probe against the negative terminal. Ensure good contact between the probes and the battery terminals.
- Read the Display: The voltage reading will appear on the multimeter’s digital display.
Interpreting Multimeter Readings
The voltage reading gives you a direct indication of the battery’s charge level. Here’s a general guide:
- 9.0V – 9.6V: This typically indicates a new or fully charged alkaline 9V battery. Lithium 9V batteries may read slightly higher.
- 8.0V – 9.0V: The battery is in good condition with a decent amount of charge remaining. It’s suitable for most devices.
- 7.0V – 8.0V: The battery is starting to weaken. It might still power low-drain devices but could cause issues in higher-drain applications (e.g., audio equipment with active pickups).
- Below 7.0V: The battery is largely discharged and should be replaced or recharged (if it’s a rechargeable type). Devices may not function or will perform poorly.
Remember that this is an “open-circuit” voltage reading. The voltage under a load (when powering a device) will always be slightly lower than the open-circuit voltage.
Alternative Testing Methods
While a multimeter offers the most precise voltage reading, other tools and techniques can provide quick assessments or different types of information about your 9-volt cells.
Using a Dedicated Battery Tester
Dedicated battery testers are designed for simplicity and speed. They typically feature two contacts that match the battery terminals. To use one:
- Place Battery in Tester: Align the 9V battery’s terminals with the corresponding contacts on the tester.
- Read Indicator: The tester will display the battery’s status, often using a color-coded gauge (green for good, yellow for weak, red for dead) or LED lights. Some digital testers provide an actual voltage reading.
Many dedicated testers also incorporate a small internal load, which means they can give you a more accurate indication of how the battery will perform when actively powering a device, rather than just its open-circuit voltage.
Simple Load Test
A simple load test provides a more practical assessment of a 9V battery’s ability to deliver current. This involves connecting the battery to a small, known resistive load, such as an incandescent flashlight bulb (rated for 9V) or a small motor, and then measuring the voltage while the load is active.
- Connect Load: Carefully connect the battery to your chosen load (e.g., a flashlight bulb).
- Measure Voltage Under Load: While the load is connected and drawing current, use your multimeter to measure the voltage across the battery terminals.
A healthy battery will maintain a relatively high voltage under this load. If the voltage drops significantly (e.g., from 8.5V open-circuit to 7V or less under load), the battery is weak, even if its open-circuit voltage initially seemed acceptable. Always ensure your chosen load is appropriate for a 9V battery to avoid damage to the load or battery.
Interpreting Results and Battery Health Assessment
Once you’ve obtained your readings, understanding what they mean for the battery’s health and its suitability for your devices is key.
What Do the Numbers Mean?
The voltage readings offer a clear picture of a 9V battery’s charge level. Here’s a more detailed breakdown:
Table: 9V Battery Voltage Ranges (Alkaline)
| 9V Battery Condition | Open Circuit Voltage (Approx.) | Suitability |
|---|---|---|
| New/Full Charge | 9.0V – 9.6V | Ideal for all devices, including high-drain and critical applications. |
| Good | 8.0V – 9.0V | Good for most devices; may show slight performance dip in very high-drain applications. |
| Weak | 7.0V – 8.0V | Suitable only for very low-drain devices; may cause erratic behavior or failures in others. |
| Dead/Discharged | Below 7.0V | Replace immediately. Will not power most devices reliably, if at all. |
For rechargeable NiMH 9V batteries, a fully charged voltage might be closer to 8.4V-9.0V, and their voltage drops more gradually during discharge compared to alkalines.
Factors Affecting Battery Life
Several factors influence how long a 9-volt cell lasts and its measured voltage:
- Discharge Rate: High-drain devices (e.g., active guitar pickups) deplete batteries faster than low-drain devices (e.g., smoke detectors).
- Temperature: Extreme heat or cold can reduce battery performance and lifespan.
- Shelf Life: Batteries naturally lose charge over time, even when not in use. Always check the “best before” date.
- Age: Batteries degrade with age, regardless of use.
Tips for Prolonging 9V Battery Life and Safe Handling
Proper care and handling can extend the life of your 9V batteries and ensure safe usage.
Storage Best Practices
To maximize the shelf life of your 9-volt power cells:
- Store in a Cool, Dry Place: Avoid extreme temperatures, humidity, and direct sunlight. A cabinet or drawer at room temperature is ideal.
- Keep Terminals Separated: Store batteries in their original packaging or a dedicated battery organizer to prevent the terminals from coming into contact with metal objects, which can cause short circuits, discharge, and even overheating.
- Avoid Mixing Old and New: Do not mix new and old batteries in a device, as the older battery will drain the newer one, and both may underperform.
- Remove from Unused Devices: If a device won’t be used for an extended period, remove the batteries to prevent leakage and corrosion, which can damage the device.
Proper Disposal
Once a 9V battery is depleted, proper disposal is important:
- Recycle: Many communities have battery recycling programs. Check with your local waste management facility or electronics retailers for collection points. Alkaline batteries are often considered non-hazardous in many places, but recycling is always preferred to keep metals out of landfills.
- Tape Terminals: Before disposal or recycling, it’s a good practice to place a piece of electrical tape over both terminals of a 9V battery. This prevents accidental short circuits if the battery comes into contact with other metallic items, reducing fire risk.
Safety Considerations
Always prioritize safety when handling batteries:
- Avoid Short Circuits: Never intentionally short-circuit battery terminals, as this can cause rapid discharge, overheating, and potential fire or explosion.
- Handle Leaking Batteries with Care: If a battery is leaking, wear gloves and eye protection. The fluid is corrosive. Dispose of leaking batteries immediately and clean the battery compartment thoroughly.
- Keep Out of Reach of Children and Pets: Small batteries, including 9V batteries, can be a choking hazard. Ingested batteries can cause serious internal injuries.
Mastering the art of testing a 9V battery is a valuable skill for anyone who uses electronics. By understanding the voltage readings, utilizing the right tools, and practicing safe handling, you can ensure your devices remain reliably powered and prolong the life of your batteries. A quick check can save you from unexpected disruptions, making your electronic experience smoother and more efficient.
Frequently Asked Questions
What’s the easiest way to test a 9V battery for a quick check?
The simplest way is often by connecting the 9V battery to the device it powers. If the device functions weakly or not at all, the battery might be low or dead. You can also briefly touch the terminals with a digital multimeter set to DC voltage.
What voltage should a healthy 9V battery read when tested?
A brand new 9V alkaline battery will typically read around 9.4 to 9.6 volts when fully charged. For most devices, a 9V battery is still considered good if it reads above 8.0-8.5 volts under a light load or without a load. Below 8.0 volts, its performance will likely degrade.
How do I use a multimeter to accurately test a 9V battery?
First, set your digital multimeter to measure DC voltage (VDC) and choose a range that accommodates 9V (e.g., 20V range). Connect the red positive probe to the smaller positive terminal (+) of the 9V battery and the black negative probe to the larger negative terminal (-). The reading on the display indicates the battery’s current voltage.
Can I test a 9V battery with just my tongue, and is it reliable?
You can test a 9V battery by briefly touching both terminals to your tongue; a strong tingle indicates it has a charge. However, this method is highly unreliable, not recommended, and only provides a very crude indication of whether *some* charge is present, not an accurate voltage reading.
What are the signs that my 9V battery is dying or dead without a tester?
Often, the device powered by the 9V battery will start to malfunction, such as a smoke detector chirping, a guitar pedal losing its effect, or a toy moving very slowly. Visible signs like corrosion around the terminals or a bulging battery case are strong indicators it’s time to replace the 9V battery.
As an Amazon Associate, I earn commission from qualifying purchases.


