How to Discharge Capacitors Safely? involves carefully releasing their stored electrical energy using a suitable resistor or a dedicated discharge tool. Mastering this fundamental technique is paramount for anyone working with electronics, preventing potential shocks and equipment damage.
This critical practice ensures that electrical components are de-energized before handling, making repairs or modifications significantly safer. Understanding the proper approach to releasing this stored charge is a vital skill for both hobbyists and professionals.
Quick Answers to Common Questions
Why bother discharging a capacitor at all?
Capacitors can hold a dangerous electrical charge even after power is off, capable of delivering a shock or damaging components. Learning **How to Discharge Capacitors Safely** is crucial to prevent serious injury and ensure safety during circuit work.
What’s the simplest way to discharge a capacitor safely?
The most common and effective method for **How to Discharge Capacitors Safely** is using a suitable power resistor connected across its terminals. This allows the stored energy to dissipate slowly and harmlessly as heat, avoiding sudden arcing or short-circuiting.
How do I know when a capacitor is fully discharged?
After using a discharge resistor, always verify the voltage across the capacitor terminals with a multimeter. A safe discharge typically means the voltage reading should be near zero, confirming you’re finished with **How to Discharge Capacitors Safely**.
📑 Table of Contents
- Why Discharging Capacitors is Essential for Safety
- Essential Safety Precautions for Discharging Capacitors Safely
- Common Methods for Discharging Capacitors
- Step-by-Step Guide: Discharging with a Resistor
- Special Considerations for Discharging High-Voltage Capacitors Safely
- When NOT to Discharge a Capacitor (and What to Do Instead)
- Recommended Discharge Resistor Values and Discharge Times
- Conclusion
Why Discharging Capacitors is Essential for Safety
Capacitors are unique electronic components capable of storing electrical energy, often long after the power source has been disconnected. This stored charge can pose significant hazards, ranging from minor shocks to life-threatening electrocution, depending on the capacitor’s voltage and capacitance.
The Hidden Danger of Stored Energy
Unlike batteries that dissipate their energy relatively slowly, a capacitor can discharge its entire stored energy almost instantaneously if its terminals are shorted. This rapid discharge can create a high current surge, leading to sparks, burns, or even an arc flash. Even seemingly small capacitors in consumer electronics can hold enough charge to deliver an unpleasant jolt, while larger power supply capacitors can be lethal.
Preventing Electrical Shocks and Component Damage
Beyond personal safety, accidental discharge can also damage sensitive electronic components. For instance, if you touch a charged capacitor and then inadvertently touch a circuit board, the discharge current could flow through delicate integrated circuits, frying them instantly. Proper discharge ensures that the circuit is truly de-energized, making troubleshooting, repair, and component replacement procedures safe and effective. It’s a non-negotiable step in any responsible electronics work.
Essential Safety Precautions for Discharging Capacitors Safely
Before you even think about touching a capacitor, especially one from a high-voltage circuit, a robust set of safety precautions is indispensable. Rushing this step can lead to serious injury or damage. Always prioritize your safety over speed.
Personal Protective Equipment (PPE)
Appropriate PPE is your first line of defense. This typically includes:
- Safety Glasses: To protect your eyes from accidental sparks or arcing.
- Insulated Gloves: Essential for preventing electrical contact. Ensure they are rated for the voltage you are working with and are free from defects.
- Non-Conductive Work Surface: Work on a rubber mat or wooden bench, not a metal surface.
- Removing Jewelry: Rings, watches, and other metallic jewelry can conduct electricity and cause severe burns or short circuits.
Disconnecting Power and Verifying Voltage
The very first step in any circuit work is to disconnect all power sources. This includes unplugging the device from the wall, removing batteries, and ensuring no residual power is being supplied. After disconnecting, always wait a few minutes for any built-in bleed resistors to do their job, if present. Then, use a properly rated multimeter to verify that the capacitor is indeed charged, and to measure its voltage. Never assume a capacitor is discharged just because the power is off. Always measure!
Understanding Capacitor Types and Ratings
Capacitors come in various types (electrolytic, ceramic, film, etc.) and have different voltage and capacitance ratings. Electrolytic capacitors, especially large ones found in power supplies, typically hold significant charge and retain it for longer periods. Understanding these ratings helps you select the appropriate discharge method and resistor value. High-voltage capacitors require specialized handling and may necessitate professional intervention.
Common Methods for Discharging Capacitors
While there are several ways to discharge a capacitor, some are safer and more controlled than others. The goal is to dissipate the stored energy slowly and predictably, without creating a dangerous short circuit.
Using a Discharge Resistor (The Gold Standard)
The most recommended and controlled method for discharging a capacitor involves connecting a suitable power resistor across its terminals. The resistor limits the discharge current, converting the electrical energy into heat, and allowing the capacitor to discharge gradually. The time it takes for a capacitor to discharge through a resistor is determined by the RC time constant (τ = R x C), where τ is in seconds, R in Ohms, and C in Farads. A capacitor is considered fully discharged after approximately 5 time constants (5τ).
- Example: For a 1000µF capacitor and a 10kΩ resistor:
- R = 10,000 Ω
- C = 0.001 F (1000 µF)
- τ = 10,000 Ω * 0.001 F = 10 seconds
- Full discharge (5τ) ≈ 5 * 10 = 50 seconds
Always ensure the resistor’s power rating (in watts) is sufficient to handle the energy dissipated without overheating or burning out. A resistor’s power rating is given by P = V²/R, where V is the initial capacitor voltage.
Dedicated Discharge Tools
For frequent work with high-voltage or large capacitors, specialized discharge tools are available. These tools often consist of a high-power resistor encased in an insulated housing with test probes, sometimes including an LED indicator or a built-in voltmeter to confirm discharge. They offer convenience and an added layer of safety due to their robust construction and insulation.
Built-in Discharge Circuits (for certain devices)
Many modern electronic devices, particularly those with high-voltage power supplies (like CRT monitors or medical equipment), incorporate internal “bleed” or discharge resistors. These resistors are permanently connected across the main filter capacitors and slowly drain their charge when the device is powered off. While these are helpful, they can still take time to fully discharge, and you should never solely rely on them without verification using a multimeter.
Step-by-Step Guide: Discharging with a Resistor
This method is practical, effective, and safe when performed correctly. Always follow these steps carefully.
Selecting the Right Resistor
Choosing the correct resistor is crucial. You need a resistor with a resistance value that allows for a reasonable discharge time (not too fast, not too slow) and a power rating (wattage) sufficient to dissipate the stored energy without burning up. A general guideline for lower voltage circuits (under 50V) might be a 1kΩ to 10kΩ resistor with a 0.25W to 1W rating. For higher voltage or capacitance, you may need higher resistance and certainly higher wattage resistors, possibly even several in series to increase resistance and spread out the power dissipation. As a rule of thumb, select a resistance that will limit the initial current to a safe level (e.g., V_initial / R < 1A) and ensure the resistor’s power rating can handle the expected peak power.
The Discharge Procedure
- Disconnect Power: Ensure the device is unplugged and all power sources are removed.
- Wear PPE: Don your safety glasses and insulated gloves.
- Identify Capacitor Terminals: Locate the positive (+) and negative (-) terminals. If it’s a non-polarized capacitor, either side works.
- Connect Resistor: Using insulated test leads with alligator clips, securely connect one end of the chosen resistor to one terminal of the capacitor.
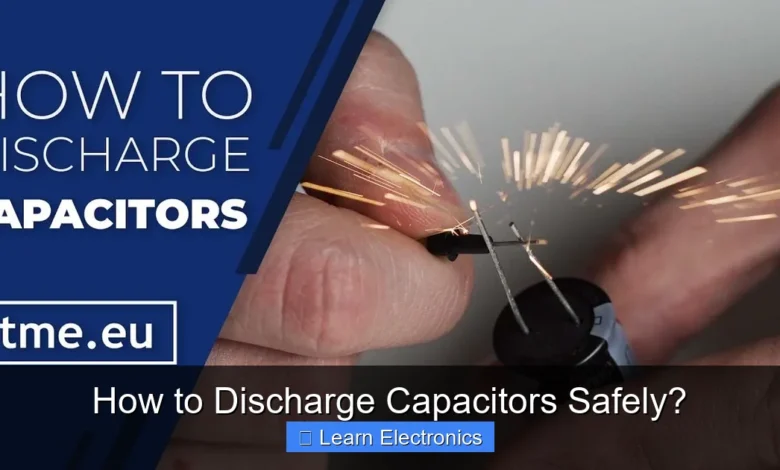
- Connect Second End: Carefully connect the other end of the resistor to the remaining capacitor terminal. Ensure good contact. You might see a small spark, especially with large, high-voltage capacitors; this is normal as the initial surge passes through the resistor.
- Monitor Discharge: Allow the capacitor to discharge for at least 5 times the calculated RC time constant. During this time, the resistor might get warm.
Verifying Discharge
After the estimated discharge time has elapsed, remove the resistor and immediately verify the capacitor’s voltage using your multimeter. Set the multimeter to the appropriate DC voltage range. Place the positive probe on the positive terminal and the negative probe on the negative terminal. The reading should be very close to 0V (e.g., less than 1V, ideally 0V). If there’s still a significant voltage, reconnect the resistor and allow more time, then re-verify. Never touch the capacitor terminals directly until you’ve verified a zero-volt reading.
Special Considerations for Discharging High-Voltage Capacitors Safely
Working with high-voltage capacitors (e.g., those found in microwave ovens, CRT televisions, or industrial power supplies) demands extreme caution. The energy stored can be lethal, and the discharge process needs to be handled with extra care.
Advanced Discharge Techniques
For very high voltages (e.g., above 400V), a single resistor might not be sufficient due to its voltage rating or power dissipation limits. In such cases, a chain of series-connected resistors can be used. This distributes the voltage drop and power dissipation across multiple resistors, preventing any single resistor from failing. Each resistor in the series should be rated for a fraction of the total voltage. For instance, if discharging a 1000V capacitor, you might use five 200V-rated resistors in series.
Series/Parallel Resistor Networks
To achieve both adequate resistance and sufficient power handling, you might construct a resistor network using both series and parallel combinations. Parallel resistors increase the total power rating, while series resistors increase the total resistance and voltage rating. This is a common practice for custom discharge tools designed for specific high-power applications.
Specialized Equipment
For professional environments dealing with high-voltage equipment regularly, dedicated high-voltage discharge wands or power supplies with integrated discharge capabilities are often employed. These tools are designed to handle extreme voltages and currents safely and reliably, often incorporating safety interlocks and clear visual indicators.
When NOT to Discharge a Capacitor (and What to Do Instead)
While the practice of discharging capacitors is critical, there are specific situations where you should refrain from attempting it yourself.
Capacitors in Sealed, Non-Serviceable Units
Many consumer electronics, especially modern appliances or fully sealed power supplies, are not designed for user servicing. Attempting to open these units to discharge internal capacitors can be dangerous, potentially exposing you to other hazards beyond just the capacitor. In such cases, if the device is faulty, it’s best to take it to a certified repair technician.
Seeking Professional Help
If you encounter a capacitor with an extremely high voltage or capacitance that you are unfamiliar with, or if you lack the appropriate tools and experience, it’s always safer to consult a qualified electronics technician or electrician. High-energy capacitors can be incredibly dangerous, and improper handling can lead to severe injury or fatality. Never take unnecessary risks.
Recommended Discharge Resistor Values and Discharge Times
The following table provides general guidance for discharging common capacitor sizes with suitable resistor values. Remember to always calculate 5RC for precise discharge time and check the resistor’s power rating for your specific application.
| Capacitance | Voltage (Max) | Recommended Resistor (R) | Approx. 5RC Discharge Time | Min. Resistor Power Rating (Estimate) |
|---|---|---|---|---|
| 100 µF | 50V | 1kΩ | 0.5 seconds | 0.25W |
| 470 µF | 100V | 10kΩ | 23.5 seconds | 1W |
| 1000 µF | 400V | 100kΩ | 500 seconds (~8.3 min) | 5W (or multiple in series) |
| 4700 µF | 25V | 1kΩ | 23.5 seconds | 0.5W |
| 22000 µF | 50V | 1kΩ | 110 seconds (~1.8 min) | 2W (or multiple in parallel for power) |
Note: These are approximations. Always verify calculations for your specific components and circuit. For high voltages, consider using multiple resistors in series to distribute power and voltage stress.
Conclusion
The safe discharge of capacitors is not merely a recommendation; it is an absolute necessity for anyone engaging with electronics. Neglecting this crucial step can lead to severe injury, equipment damage, and even loss of life. By understanding the principles of stored energy, adhering to strict safety protocols, and employing appropriate discharge techniques—primarily using a properly rated resistor—you can mitigate these risks effectively. Always prioritize your safety, verify your work with a multimeter, and when in doubt, seek professional assistance. Responsible electronics practice begins with acknowledging and respecting the hidden power within a capacitor.
Frequently Asked Questions
Why is it crucial to safely discharge capacitors?
It is absolutely crucial to safely discharge capacitors because they can store a lethal amount of electrical energy, even after the power source is removed. Failure to do so can result in severe electric shock, burns, or damage to components and test equipment. Always treat charged capacitors with extreme caution.
What is the recommended method to safely discharge a capacitor using a resistor?
The recommended method to safely discharge a capacitor involves connecting a suitable resistor across its terminals. The resistor’s value should be chosen to allow for a reasonably quick discharge without exceeding its power rating. This controlled discharge dissipates the stored energy as heat.
How long does it typically take to fully discharge a capacitor?
The time it takes to fully discharge a capacitor depends on its capacitance and the resistance used for discharging, often calculated using the RC time constant. As a general rule of thumb, it takes approximately five time constants for a capacitor to discharge to a safe voltage level. Always verify with a multimeter before handling.
Are there any immediate dangers if I don’t properly discharge capacitors?
Yes, failing to properly discharge capacitors can pose immediate and serious dangers. The primary risk is a potentially fatal electric shock or severe burns if you come into contact with charged terminals. Additionally, an undischarged capacitor can damage other components or test equipment when troubleshooting or making repairs.
As an Amazon Associate, I earn commission from qualifying purchases.


