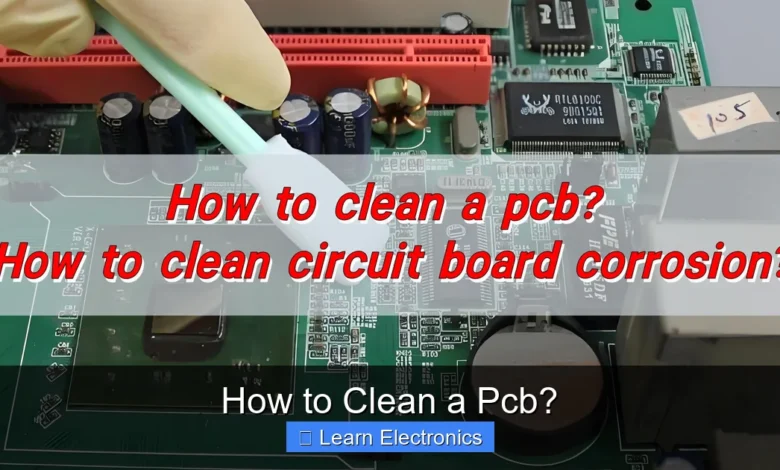
How to Clean a PCB? involves carefully removing contaminants like dust, flux residue, and corrosion to restore functionality, prevent damage, and extend the lifespan of electronic devices. This essential maintenance practice ensures optimal performance and reliability for your circuit boards. Properly maintaining these critical components requires specific tools, solutions, and a methodical approach to achieve the best results.
Quick Answers to Common Questions
What’s the best cleaning solution for a PCB?
For most situations, 90% (or higher) isopropyl alcohol (IPA) is your best bet! It effectively dissolves grime, flux residue, and dust, then evaporates quickly without leaving conductive residues, making it perfect to clean a PCB.
What tools do I need to clean a PCB safely?
Besides your IPA, grab a soft-bristle brush (like an old toothbrush or anti-static brush), cotton swabs for small areas, and some lint-free cloths. These simple tools will help you gently yet effectively clean a PCB without causing damage.
Can I just use water to clean a PCB?
While distilled water is sometimes used in industrial cleaning, it’s generally not recommended for home users due to slow drying times and the risk of mineral deposits or corrosion. Stick with isopropyl alcohol for a safer and more efficient way to clean a PCB.
📑 Table of Contents
Why Cleaning a PCB is Essential
Printed Circuit Boards (PCBs) are the backbone of almost all electronic devices, from smartphones to industrial machinery. Over time, these intricate components accumulate various contaminants that can severely impair their function or even lead to irreversible damage. Understanding why cleaning is crucial is the first step towards effective maintenance.
Common Contaminants and Their Effects
- Dust and Dirt: Microscopic particles can settle on the PCB, creating an insulating layer that traps heat, obstructs airflow, and can even become conductive when combined with moisture, leading to short circuits.
- Flux Residue: Leftover flux from soldering operations, if not properly cleaned, can be corrosive or conductive, attracting moisture and facilitating current leakage or shorting between traces.
- Corrosion and Oxidation: Exposure to humidity, chemicals, or simply the environment can lead to the oxidation of solder joints and copper traces, increasing resistance and degrading signal integrity.
- Oil and Grease: Fingerprints, splashes, or lubricants can leave behind oily residues that attract dust and other contaminants, forming a stubborn, insulative layer.
- Moisture and Water Damage: Accidental spills or condensation can lead to immediate shorts or long-term corrosion if not addressed promptly and thoroughly dried.
Benefits of Regular Maintenance
Regularly cleaning your circuit board offers several significant advantages:
- Improved Performance: Removing conductive contaminants eliminates unwanted current paths, ensuring signals travel efficiently and accurately.
- Extended Lifespan: Preventing corrosion, heat buildup, and short circuits dramatically prolongs the operational life of the PCB and the device it powers.
- Enhanced Reliability: A clean board is less prone to intermittent failures, unexpected shutdowns, or degraded performance, leading to more stable operation.
- Better Thermal Management: Removing insulating layers of dust allows heat to dissipate more effectively, preventing components from overheating.
- Aesthetics: A clean PCB simply looks better, which can be important for inspection, repairs, or in devices where the board is visible.
Essential Tools and Materials for PCB Cleaning
Successfully cleaning a PCB requires the right arsenal of tools and cleaning agents. Using inappropriate materials can cause more harm than good, so choose wisely.
Cleaning Solutions
- Isopropyl Alcohol (IPA): High-purity IPA (90% or higher, ideally 99% or 99.9%) is the go-to solvent for general PCB cleaning. It’s effective at dissolving flux residue, dirt, and some oils, and it evaporates quickly without leaving residue.
- Flux Remover/Cleaner: Specifically formulated to dissolve stubborn flux residues that IPA might struggle with. These often contain stronger solvents and are very effective for post-soldering cleanup.
- Distilled Water: For removing water-soluble contaminants or rinsing after certain cleaning agents. Never use tap water due to minerals and impurities.
- Electronic Contact Cleaner: Can be useful for cleaning connectors and switch contacts, but ensure it’s plastic-safe and non-residue.
Brushes and Swabs
- Anti-static Brushes: Essential for gently dislodging dust and debris. Always opt for anti-static brushes to prevent electrostatic discharge (ESD) damage.
- Cotton Swabs (Q-tips): Excellent for precision cleaning in tight spaces and around small components. Lint-free swabs are preferred.
- Microfiber Cloths: Useful for wiping larger surfaces and absorbing excess liquid.
Safety Equipment
- Safety Goggles: Protects your eyes from splashes of cleaning solutions.
- Gloves: Nitrile or latex gloves protect your skin from chemicals and prevent oils from your hands from contaminating the PCB.
- Ventilation: Work in a well-ventilated area to avoid inhaling solvent fumes, which can be hazardous.
Other Useful Tools
- Compressed Air Duster: For blowing away loose dust and quickly drying PCBs after wet cleaning. Avoid using air compressors unless equipped with a water/oil trap, as they can introduce moisture or oil.
- Magnifying Lamp or Loupe: Helps in identifying small contaminants and ensuring thorough cleaning, especially on densely populated boards.
- ESD Mat and Wrist Strap: Crucial for preventing static discharge, which can permanently damage sensitive electronic components.
Step-by-Step Guide to Cleaning a PCB
This comprehensive guide details the practical steps involved in cleaning a PCB, ensuring safety and effectiveness throughout the process. Following this approach will help maintain the integrity of your electronic components.
Preparation and Safety First
- Disconnect Power: Always ensure the PCB is completely de-energized and disconnected from its power source before you begin. If it’s part of a device, carefully remove it.
- ESD Protection: Put on your ESD wrist strap and connect it to an ESD mat, which should be placed on a grounded surface.
- Ventilation and PPE: Work in a well-ventilated area. Wear safety goggles and gloves to protect your eyes and skin from chemicals.
- Document Before Cleaning: Take photos of the PCB before cleaning, especially if it’s heavily contaminated or you suspect corrosion. This can help identify components and connections if something goes awry.
Initial Dry Cleaning
Start with dry cleaning to remove loose debris before introducing any liquids.
- Blow Away Dust: Use a can of compressed air or an air blower to gently remove loose dust and debris. Hold the can upright and use short bursts to avoid propellant residue or extreme cold.
- Brush Away Dirt: With an anti-static brush, gently brush away any remaining dust or stubborn dry dirt from the surface of the PCB and between components.
Wet Cleaning with Solvents
Once dry debris is removed, proceed with wet cleaning for residues.
- Apply Solvent to Brush/Swab: Do not spray or pour solvents directly onto the PCB, especially if it has sensitive components or unsealed switches. Instead, dampen an anti-static brush or a cotton swab with IPA or flux remover.
- Gentle Scrubbing: Gently scrub the contaminated areas. For flux residue, use small circular motions. Pay close attention to solder joints, component leads, and connectors. Replace swabs or clean brushes frequently to avoid spreading contaminants.
- Focus on Specific Areas:
- Flux Residue: Use flux remover for stubborn areas. Let it sit for a moment if recommended by the product instructions, then gently scrub.
- Corrosion: For light corrosion, IPA can sometimes help. For heavier corrosion, you might need a more specialized cleaner or even a gentle abrasive tool (like a fiberglass pen) with extreme caution, only on affected traces or pads, not component pins.
- Grease/Oil: IPA is generally effective.
Drying the PCB
Proper drying is critical to prevent moisture-related issues.
- Air Dry: Allow the PCB to air dry naturally in a well-ventilated area. This is often sufficient for IPA due to its rapid evaporation.
- Accelerated Drying: You can use compressed air (again, short bursts, holding the can upright) or a hairdryer on a low, cool setting to speed up the process. Maintain a safe distance to avoid overheating components.
- Ensure Complete Dryness: Critically, do not reapply power until you are absolutely certain the PCB is bone dry. Any residual moisture can cause shorts and permanent damage. This might take several hours, or even a day, depending on humidity and the amount of solvent used.
Final Inspection
Before reassembly, perform a thorough inspection.
- Visual Check: Use a magnifying lamp to inspect the PCB for any remaining residue, dislodged components, or new damage. Ensure all contacts and pads are clean and shiny.
- Functionality Check: If comfortable, carefully reassemble and test the device.
Specialized Cleaning Scenarios
While the general process applies, certain situations require specific considerations when cleaning a PCB.
Cleaning After Solder Flux Application
After soldering, especially with no-clean flux, you might wonder if cleaning is necessary. While no-clean fluxes are designed to be left on, some professional environments or specific applications might require their removal. For rosin or water-soluble fluxes, cleaning is almost always required. Use a dedicated flux remover, as IPA might not be strong enough for some types of flux. Apply directly to a brush or swab, scrub the soldered area, and then thoroughly dry.
Removing Corrosion and Oxidation
Corrosion can severely impact PCB functionality. For light surface oxidation, IPA or a gentle abrasive (like a pencil eraser or fine-grade fiberglass brush, used very carefully) can sometimes remove it. For more severe corrosion, particularly on copper traces or pads, consider specialized deoxidizers or contact cleaners. Always test on an inconspicuous area first. Be extremely cautious not to damage delicate traces or components. In advanced cases, professional repair might be necessary.
Water Damaged PCBs
A water-damaged PCB is an urgent cleaning scenario.
Immediately disconnect power. Do NOT try to power it on.
Rinse the PCB thoroughly with distilled water to remove corrosive contaminants, especially if it was exposed to saltwater or sugary liquids.
After rinsing, immediately proceed to clean with IPA to displace the water.
Use compressed air and low-heat drying methods extensively. The key here is quick action and ensuring complete, absolute dryness before considering powering it on. Often, water damage leads to irreversible corrosion and component failure, even with immediate cleaning.
Common Mistakes to Avoid When Cleaning PCBs
To ensure the best outcome and prevent damage, be aware of common pitfalls during the cleaning process.
Using Inappropriate Solvents
Never use harsh household cleaners, acetone (which can dissolve plastics), or tap water. These can corrode components, damage plastic parts, or leave behind conductive residues. Stick to high-purity IPA, dedicated flux removers, or distilled water.
Excessive Force
Scrubbing too hard can dislodge tiny surface-mount components, scratch the solder mask, or break delicate traces. Always use gentle pressure with anti-static brushes and cotton swabs. The goal is to dissolve and lift contaminants, not to aggressively abrade them.
Neglecting Safety
Failing to use ESD protection can lead to electrostatic discharge, which is an invisible killer of sensitive electronics. Ignoring eye and hand protection exposes you to potentially harmful chemicals. Always prioritize safety for both yourself and the PCB.
Improper Drying
This is one of the most critical errors. Reapplying power to a PCB that still has even microscopic moisture can cause immediate short circuits and permanent damage. Be patient and ensure the board is absolutely dry, using air drying or gentle forced air, before attempting to power it up.
Comparison of Common PCB Cleaning Solutions
| Solution | Primary Use | Pros | Cons | Evaporation Rate |
|---|---|---|---|---|
| 99% Isopropyl Alcohol (IPA) | General cleaning, light flux residue, dirt, oils | Safe for most plastics, evaporates quickly, widely available | Less effective on heavy or cured flux, can require scrubbing | Fast |
| Flux Remover | Heavy or stubborn flux residues (rosin, no-clean) | Very effective on all flux types, often faster acting | Can be stronger on plastics, may have stronger fumes, more expensive | Variable (Fast to Moderate) |
| Distilled Water | Water-soluble residues, initial rinse for water damage | Non-toxic, inexpensive, good for ionic contamination | Does not clean oil/grease, very slow drying, requires subsequent IPA rinse | Slow |
| Electronic Contact Cleaner | Cleaning connectors, switches, potentiometers | Restores electrical conductivity, removes oxidation | Some may leave residue, ensure plastic-safe formulation | Fast |
Best Practices for Maintaining PCB Cleanliness
Preventative measures are often more effective and less damaging than reactive cleaning. Adopting certain best practices can significantly reduce the need for intensive PCB cleaning.
Regular Inspection
Periodically inspect your PCBs for dust buildup, early signs of corrosion, or flux residue. Catching these issues early makes cleaning much easier and prevents them from escalating into serious problems.
Proper Storage
Store PCBs in anti-static bags, away from direct sunlight, high humidity, dust, and extreme temperature fluctuations. Environmental control is key to preventing contamination and degradation.
Preventing Contamination
- Always handle PCBs by their edges, minimizing contact with components and traces to avoid transferring skin oils.
- Work in a clean, dust-free environment whenever possible.
- If soldering, use appropriate no-clean flux or clean immediately after soldering with the correct flux remover.
- Ensure devices are used in environments suitable for their design, avoiding excessive dust, humidity, or corrosive atmospheres.
This method of proactive maintenance greatly contributes to the longevity and stable operation of electronic devices.
Mastering the art of cleaning your PCB is an invaluable skill for anyone working with electronics. By understanding the common contaminants, selecting the right tools, and meticulously following proper procedures, you can significantly extend the life and improve the reliability of your circuit boards. Remember that patience, attention to detail, and a commitment to safety are paramount in this delicate but essential maintenance task. A clean PCB is a happy PCB, ready to perform at its best.
Frequently Asked Questions
What is the safest method for cleaning a PCB?
The safest method often involves using isopropyl alcohol (IPA) with a purity of 90% or higher. Gently scrub the affected area with a soft-bristled brush or a lint-free cloth, avoiding excessive pressure on components. Always ensure the PCB is powered off and disconnected before beginning any cleaning.
What cleaning solutions are safe to use on a PCB?
For most general cleaning tasks, 90%+ isopropyl alcohol (IPA) is highly recommended due to its effectiveness and quick evaporation without leaving residues. For more stubborn contaminants like flux, specialized PCB cleaners or flux removers can be used, but always check their compatibility with your board’s components first.
Can I clean a PCB with regular tap water?
Generally, no, using regular tap water to clean a PCB is not recommended. Tap water contains minerals and impurities that can leave corrosive residues or cause short circuits if not completely removed and dried. If water is absolutely necessary for specific contaminants, use deionized or distilled water, and ensure extremely thorough drying afterwards.
How should I dry a PCB after cleaning it?
After cleaning your PCB, allow it to air dry completely in a dust-free environment for several hours or overnight. You can also use compressed air (not from a compressor that might introduce moisture or oil) to speed up the drying process and ensure all moisture is removed from under components. Never apply direct heat from a hairdryer or heat gun, as this can damage sensitive electronic parts.
What tools are essential for effectively cleaning a PCB?
Essential tools for cleaning a PCB include a soft-bristled brush (like an old toothbrush or an ESD-safe brush), lint-free cloths or cotton swabs, and a can of compressed air. A magnifying glass can also be helpful for inspecting intricate areas for dirt or damage. Always use tools that won’t scratch the board or leave fibers.
As an Amazon Associate, I earn commission from qualifying purchases.


