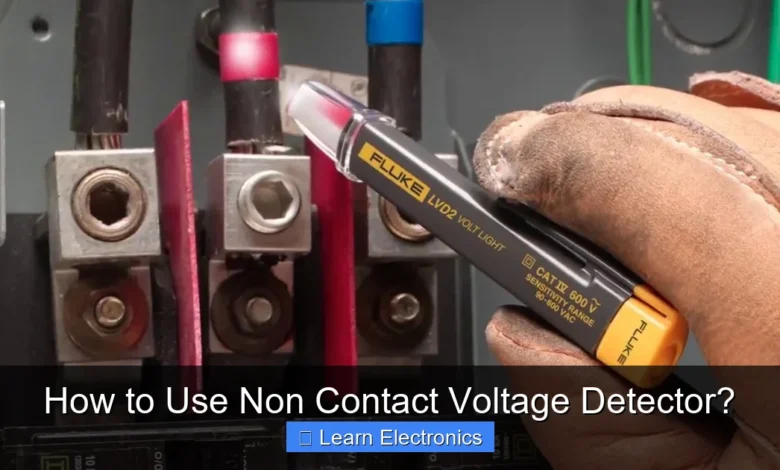
To directly address how to use a Non Contact Voltage Detector, simply turn the device on, place its tip near the wire or component you suspect is live, and observe its indication (light, sound, or vibration) to confirm the presence of electrical current. This essential tool offers a safe, quick way to check for voltage without needing direct metallic contact, significantly enhancing safety during electrical work. This practical approach is invaluable for electricians and DIY enthusiasts alike, providing immediate feedback on electrical presence.
Quick Answers to Common Questions
How do I test my non contact voltage detector to make sure it’s working properly?
A great first step! Simply hold your non contact voltage detector near a known live AC outlet or power cord to confirm it lights up and beeps, showing it’s ready to safely check for voltage elsewhere.
How close do I need to be with the non contact voltage detector to detect power?
For an accurate reading, gently touch the tip of your non contact voltage detector directly to the wire insulation, outlet slot, or electrical component you suspect is live. It’s designed to sense voltage in very close proximity!
What do the lights and beeps mean when I use my non contact voltage detector?
When your non contact voltage detector detects AC voltage, it will typically light up (often red) and emit an audible beeping sound, indicating the presence of electricity. No light or sound means no detected voltage, but always double-check if possible!
📑 Table of Contents
- Understanding Your Non-Contact Voltage Detector
- Essential Safety Precautions Before You Begin
- The Step-by-Step Process of Using a Non Contact Voltage Detector
- Practical Applications and Best Practices
- Common Mistakes to Avoid and Advanced Tips
- Comparative Overview of Voltage Detection Tools
- Conclusion
Understanding Your Non-Contact Voltage Detector
A non-contact voltage (NCV) detector is an indispensable tool in any electrician’s or serious DIYer’s kit. Unlike multimeters or clamp meters that require direct contact with the conductor, an NCV detector can sense the electromagnetic field emitted by alternating current (AC) voltage through insulation. This capability makes it incredibly safe and convenient for preliminary checks before handling electrical circuits.
What it is and How it Works
At its core, an NCV detector is a simple yet sophisticated device. It typically consists of a plastic housing, an internal antenna, a small circuit board, an indicator light (usually LED), and often an audible buzzer. When the tip of the voltage pen approaches an AC voltage source, the alternating electromagnetic field induces a small current in the detector’s antenna. The internal circuitry amplifies this signal and triggers the visual and/or audible indicators, alerting the user to the presence of voltage. It is important to remember that these devices typically only detect AC voltage, not DC voltage, due to the nature of electromagnetic fields generated by alternating current.
Key Features to Look For
When selecting an NCV detector, several features can enhance its utility and safety:
- Voltage Range: Ensure it covers the typical residential and commercial voltages you’ll encounter (e.g., 24V to 1000V AC). Some models offer low-voltage detection, which is useful for thermostats or doorbell wires.
- Sensitivity Adjustment: Higher-end models may offer adjustable sensitivity, allowing you to fine-tune the detection for precise applications or to avoid false positives in crowded electrical boxes.
- Audible and Visual Indicators: Most detectors feature both a flashing LED and a beeping sound. Some advanced models include a vibration alert, which is useful in noisy environments.
- Built-in Flashlight: A small LED flashlight integrated into the tip can be incredibly helpful when working in dimly lit areas like junction boxes or behind appliances.
- Durability and Ergonomics: Look for a robust casing that can withstand drops and a design that is comfortable to hold and use.
- Auto Shut-off: To conserve battery life, an auto shut-off feature is a valuable addition.
Essential Safety Precautions Before You Begin
Safety should always be your paramount concern when working with electricity. Even with a non-contact tool designed for safety, following established protocols is crucial to prevent accidents and ensure accurate readings. Never assume a wire is dead, even after testing; always treat electrical systems with extreme caution.
Prioritizing Your Well-being
Before you even pick up your voltage pen, take a moment to assess your surroundings and personal protective equipment (PPE). Always wear appropriate safety gear, which includes safety glasses to protect your eyes from potential arcs or flying debris. Insulated gloves are also highly recommended, especially when there’s any chance of direct contact with live parts. Ensure your work area is dry, well-lit, and clear of any tripping hazards. Remember, an NCV detector is a diagnostic tool, not a substitute for proper electrical safety practices and knowledge.
Verifying the Detector’s Functionality
A crucial step often overlooked is to verify that your NCV detector is working correctly immediately before and after each use. This practice is known as “proving out” the tester. To do this:
- Test on a Known Live Source: Before approaching the circuit you intend to test, touch the tip of your NCV detector to a known live outlet or power cord (e.g., a lamp that is plugged in and turned on).
- Confirm Indication: The detector should clearly indicate the presence of voltage with its light, sound, or vibration.
- Test on a Known Dead Source (Optional but Recommended): After testing the live source, briefly test a known dead source (e.g., an unplugged power cord) to ensure it doesn’t give a false positive.
- Post-Use Verification: After you have completed your testing on the target circuit, repeat the test on the known live source again. This confirms that the device remained functional throughout your task.
If the device fails to indicate voltage on a known live source at any point, do not proceed with your electrical work and replace the detector’s batteries or the device itself.
The Step-by-Step Process of Using a Non Contact Voltage Detector
Using a non-contact voltage detector is straightforward, but precision and attention to detail are key to accurate and safe results. This simple process allows for quick identification of live wires without the need for stripping insulation or direct contact, making it an invaluable first line of defense against electrical hazards. Here’s a detailed guide on how to use non contact voltage detector effectively.
Activating the Device
Most NCV detectors are battery-operated and feature a simple on/off button. To begin:
- Install Batteries: Ensure fresh batteries are installed correctly in the device.
- Power On: Press the power button. Many models will emit a quick beep and flash their LED to confirm they are active and ready for use. Some might have a default sensitivity setting or require you to select one.
- Perform a Self-Test: As mentioned in the safety section, always perform a self-test on a known live source (like a wall outlet) immediately after turning it on to confirm its proper operation.
Testing the Circuit
Once your NCV detector is confirmed operational, you can proceed to test the target circuit or component:
- Isolate the Area: If possible, clear the area around the wires or components you intend to test to ensure unobstructed access and visibility.
- Position the Tip: Hold the detector firmly and slowly bring its tip close to, but not touching, the wire, cable, outlet slot, or breaker you want to test. Aim to get the tip as close as possible to the conductor, even if it’s behind a plastic cover or insulation.
- Sweep Slowly: For cables or wires, it’s good practice to sweep the tip along the length of the conductor you’re testing. If you’re testing an outlet, insert the tip into each slot individually.
- Observe Indications: Pay close attention to the detector’s indicators. If voltage is present, the LED light will flash, and/or the buzzer will sound. The intensity or frequency of the beeps/flashes might increase as you get closer to a stronger voltage source.
Remember that NCV detectors are best for indicating the presence of voltage, not its precise value. For exact voltage measurements, you would need a multimeter.
Interpreting the Signals
Understanding what your detector is telling you is crucial:
- Light and Sound: A consistent flashing light and continuous beeping indicate that AC voltage is present in the wire or component you are testing.
- No Light or Sound: If there is no indication, it suggests that no significant AC voltage is present. However, always remember the caveat: “No indication” does not definitively mean “no voltage.” Factors like shielded wires, DC voltage, or very low AC voltage might not be detected.
- Intermittent Signals: If the signals are intermittent, it could indicate a weak voltage, an inductive ghost voltage, or the detector picking up ambient electrical noise. In such cases, further investigation with a multimeter is advisable.
Practical Applications and Best Practices
NCV detectors are incredibly versatile and find use in a wide array of electrical tasks, from simple household repairs to more complex troubleshooting. Mastering their use involves understanding their strengths and limitations.
Locating Live Wires
One of the primary uses of this non-contact method is to quickly identify live wires within an electrical box or behind a wall before performing any work. This is particularly useful when wires are bundled together and their function is unknown.
- In Junction Boxes: Carefully probe individual wires or terminals within a junction box to determine which ones are live.
- Behind Drywall: While not always precise, an NCV detector can sometimes detect live wires running behind drywall, allowing you to mark their approximate path and avoid them when drilling or cutting.
- Cable Tracing: When dealing with multiple cables, this tool can help trace which cable is hot at a given point, especially when troubleshooting lighting circuits or power outlets.
Identifying Faulty Connections
Loose or corroded connections can sometimes lead to intermittent power. While not a definitive diagnostic tool for all connection issues, an NCV detector can offer clues:
- If a device or outlet is not working, and a non-contact detector indicates voltage at the power source (e.g., the circuit breaker) but not at the device itself, it suggests an open circuit or a faulty connection somewhere in between.
- Testing different points along a suspected cable can help pinpoint where the voltage drops off, indicating a break or poor connection.
Troubleshooting Light Fixtures and Outlets
For common household issues, an NCV detector can be an efficient first-response tool:
- Dead Outlets: Test both slots of a dead outlet. If one slot indicates voltage and the other doesn’t, it might suggest an open neutral or faulty wiring within the outlet itself. If neither indicates voltage, the problem is likely further upstream (breaker, GFCI, or wiring).
- Non-Working Light Fixtures: Before disassembling a fixture, check the wires entering the fixture for voltage. If voltage is present but the light isn’t working, the problem is likely with the bulb, ballast, or fixture wiring.
Common Mistakes to Avoid and Advanced Tips
While an NCV detector is an excellent tool, it’s not foolproof. Understanding its limitations and common pitfalls can prevent misdiagnoses and ensure safety.
Environmental Factors
Several environmental factors can influence the accuracy of your NCV detector:
- Distance and Shielding: The detector works by sensing electromagnetic fields. Thick insulation, metallic conduit, or being too far from the conductor can significantly reduce or block the field, leading to a false negative.
- Capacitive Coupling: In certain situations, non-contact testers can pick up “ghost voltage” or “induced voltage” from adjacent live wires, even if the wire being tested isn’t directly connected to a power source. This is common in long runs of wire or bundled cables.
- Ambient Electrical Noise: Strong electromagnetic fields from other nearby electrical equipment, motors, or transformers can interfere with the detector, causing false positives or erratic readings.
False Positives and Negatives
The possibility of false readings is the most critical limitation of NCV detectors:
- False Negative (Most Dangerous): Occurs when the detector fails to indicate voltage on a live circuit. This can happen due to low battery, shielded wires, being too far from the source, or the detector malfunctioning. Always re-test with a known live source.
- False Positive (Less Dangerous, but Annoying): Occurs when the detector indicates voltage on a dead circuit. This is often due to ghost voltage or interference. If you get a positive reading but suspect the circuit is dead, confirm with a multimeter.
Never rely solely on a non-contact voltage detector to confirm that a circuit is dead, especially before touching any wires. Always use a reliable multimeter to perform a positive voltage check (phase-to-neutral, phase-to-ground) to confirm de-energization.
Complementary Tools
For comprehensive electrical safety and troubleshooting, an NCV detector should be used in conjunction with other tools:
- Multimeter: Essential for precise voltage, current, and resistance measurements, and for confirming the absence of voltage.
- Continuity Tester: Useful for checking if a circuit is complete or if a fuse is blown.
- Circuit Breaker Finder: Helps quickly identify which breaker controls a specific outlet or fixture.
Comparative Overview of Voltage Detection Tools
Understanding the strengths and weaknesses of different voltage detection tools helps in choosing the right instrument for the job. While an NCV detector excels in speed and non-contact safety, other tools offer precision and versatility.
NCV vs. Multimeter vs. Voltmeter
Each tool serves a specific purpose, and often, they are used in conjunction for comprehensive electrical diagnostics.
| Feature | Non-Contact Voltage Detector (NCV) | Digital Multimeter (DMM) | Analog Voltmeter |
|---|---|---|---|
| Detection Method | Senses electromagnetic field (AC only) | Measures electrical potential directly (AC/DC) | Measures electrical potential directly (AC/DC) |
| Contact Required | No (non-contact) | Yes (probe tips contact conductors) | Yes (probe tips contact conductors) |
| Primary Function | Presence/absence of AC voltage, quick check | Precise voltage, current, resistance, continuity measurement | Approximate voltage, current, resistance measurement |
| Accuracy | Low (Go/No-Go indication) | High (numerical display) | Medium (needle deflection) |
| Safety | High (no direct contact needed) | Medium (requires direct contact with live parts) | Medium (requires direct contact with live parts) |
| Typical Use | Initial safety checks, wire tracing, quick troubleshooting | Detailed electrical diagnostics, precise measurements, circuit verification | Educational use, where trend observation is preferred over exact numbers |
| Cost | Low to Moderate | Moderate to High | Low to Moderate |
While the NCV detector is excellent for a preliminary “is it hot?” check, a multimeter is the definitive tool for “how hot is it?” and for confirming a circuit is truly dead. Analog voltmeters, though less common now, offer a visual representation of change, which can be useful in some specific diagnostic scenarios.
Conclusion
Mastering the use of a non-contact voltage detector is a fundamental skill for anyone working with electrical systems. This simple yet powerful device provides an invaluable first line of defense, offering a quick, non-invasive method to detect the presence of AC voltage. By understanding its operation, adhering to strict safety protocols, and being aware of its limitations, you can significantly enhance your electrical safety and efficiency. Always remember to prove out your detector on a known live source, and for ultimate safety and accuracy, always back up NCV readings with a multimeter when confirming a circuit is truly de-energized. Integrate this essential tool into your electrical toolkit, and you’ll find it an indispensable companion for countless tasks.
Frequently Asked Questions
What is a non contact voltage detector and how does it function?
A non contact voltage detector is a safety tool designed to sense the presence of AC voltage without direct contact with electrical conductors. It works by detecting the electric field radiating from an energized wire, indicating voltage through an audible beep or flashing light.
How do I prepare my non contact voltage detector for safe operation?
Before using your non contact voltage detector, always check that its batteries are functioning correctly. It’s crucial to test the device on a known live electrical source, such as a working outlet, to confirm it’s detecting voltage accurately.
What do the indicators on a non contact voltage detector signify?
When your non contact voltage detector beeps, flashes its light, or both, it indicates the presence of AC voltage in the area it’s pointed at. The frequency of beeps or brightness of the light often increases as you get closer to the live source.
Can a non contact voltage detector measure the precise voltage level?
No, a non contact voltage detector is designed primarily to indicate the presence or absence of AC voltage, not its exact measurement. For precise voltage readings, you would need to use a multimeter or a dedicated voltage meter.
What are the limitations of a non contact voltage detector, and when should I use other tools?
Non contact voltage detectors may not detect voltage through thick insulation, shielded cables, or in DC circuits. Always use a multimeter to confirm a circuit is completely de-energized, especially before beginning any electrical work, as a non-contact detector is a preliminary safety check.
What is the correct way to use a non contact voltage detector on an electrical outlet or wire?
To use your non contact voltage detector, hold its tip near the electrical outlet slots or along the length of an insulated wire. Move it slowly, listening for beeps or watching for lights to confirm voltage presence, and test multiple points to ensure thorough checking.
As an Amazon Associate, I earn commission from qualifying purchases.


