How to Test an Amplifier? The most effective way to test an amplifier involves a systematic approach combining visual inspection, basic electrical measurements, and signal path diagnostics to pinpoint any issues. This comprehensive guide will walk you through the essential steps to evaluate your amplifier’s health and performance.
Understanding the proper methods for amplifier diagnostics is crucial for anyone involved in electronics, whether troubleshooting a home audio system or maintaining professional sound equipment. This technique helps identify problems like distortion, lack of power, or complete failure, ensuring you can address them effectively.
Quick Answers to Common Questions
How do I know if my amplifier is working correctly, or if it’s faulty?
You’ll often notice a problem if your amplifier isn’t working right, like no sound, distorted audio, unusual buzzing, or if it’s getting excessively hot. These are common signs that you might need to investigate further and begin the process of how to test an amplifier.
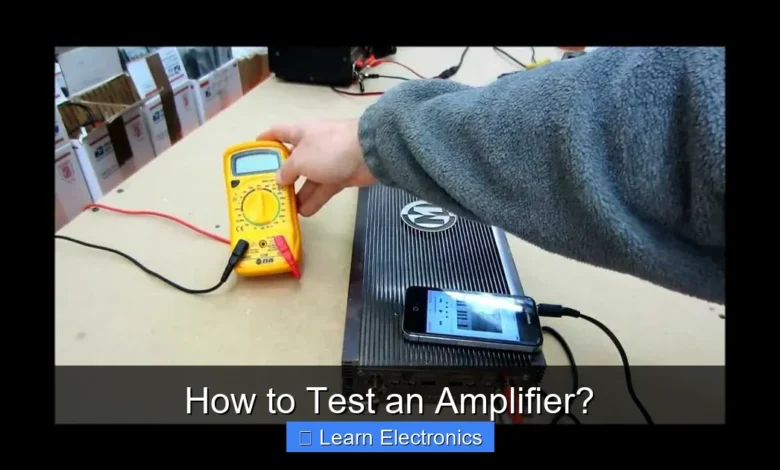
What basic tools do I need to begin testing an amplifier?
For basic amplifier testing, you’ll want a multimeter to check voltages and continuity, a reliable speaker, and a known good audio source like a phone or laptop. Having the right cables on hand will also make the process much smoother when you’re ready to test your amplifier.
What’s the very first step I should take when starting to test my amplifier?
Always begin with a thorough visual inspection! Look for any obvious damage, loose connections, or blown fuses before you even power it on, as these quick checks can often tell you a lot about how to test an amplifier effectively.
📑 Table of Contents
Preliminary Checks: Visual Inspection and Basic Setup
Before diving into electrical measurements, a thorough preliminary check can often reveal obvious issues and ensure safety. This initial phase sets the groundwork for more advanced troubleshooting.
Safety First
Always prioritize safety when working with electronics. Amplifiers can contain high voltages even after being unplugged, due to charged capacitors. Disconnect the amplifier from the mains power supply and wait a few minutes before opening the case. Use insulated tools and avoid touching internal components unnecessarily.
External Visual Inspection
With the unit unplugged, perform a detailed external inspection. Look for:
- Physical Damage: Dents, cracks, or loose components.
- Ventilation: Ensure vents are not blocked, indicating potential overheating.
- Cable Connections: Check for loose or frayed power cables, speaker wires, and input/output interconnects.
- Burn Marks/Smell: A burnt smell or visible scorch marks around components (e.g., resistors, capacitors) strongly indicates a fault.
Power Connections and Speaker Wiring
Confirm that all power cables are securely plugged into working outlets and the amplifier. Verify speaker wiring for correct polarity (positive to positive, negative to negative) and secure connections. Loose or incorrectly wired speakers can cause distorted sound or even damage the amplifier.
Understanding Your Amplifier’s Symptoms
Before any testing, identify the symptoms your amplifier is exhibiting. This diagnostic step helps narrow down potential problem areas and guides your testing strategy.
Common Amplifier Problems
- No Sound: Complete silence from one or all channels.
- Distorted Sound: Crackling, buzzing, muffled audio, or sound cutting in and out.
- Overheating: The amplifier gets excessively hot to the touch, often leading to automatic shutdown.
- Channel Imbalance: One channel is significantly louder or quieter than the other(s).
- Humming/Buzzing Noise: A persistent unwanted noise, often related to grounding issues or power supply problems.
Active Listening and Observation
Connect a known good audio source (e.g., a phone, CD player) to the amplifier and use a low-impedance speaker or headphones. Listen carefully to the sound. Does the distortion occur at all volumes or only high volumes? Does it affect both channels or just one? Observe any indicator lights—are they behaving as expected?
Essential Tools for Amplifier Testing
To perform a comprehensive assessment of an amplifier’s functionality, certain tools are indispensable. Having these on hand will significantly improve your diagnostic capabilities.
Multimeter (DMM)
A digital multimeter is crucial for measuring voltage (AC/DC), current, and resistance. It’s essential for checking power supply voltages, component continuity, and speaker impedance.
Oscilloscope
An oscilloscope allows you to visualize audio waveforms. This tool is invaluable for detecting distortion, clipping, frequency response issues, and noise. It provides a real-time graphical representation of the electrical signal.
Audio Signal Generator
A signal generator (or a smartphone app with test tones) provides a clean, consistent input signal (e.g., sine waves at various frequencies) for testing. This helps isolate amplifier issues from source problems.
Dummy Load Resistors
These are large power resistors designed to simulate a speaker load without actually connecting a speaker. They are critical for safely testing an amplifier at higher power levels without risking speaker damage or excessive noise. Ensure they match your amplifier’s rated speaker impedance (e.g., 4 or 8 ohms) and can handle the amplifier’s maximum output power.
Speaker/Headphone for Listening
A reliable speaker or a good pair of headphones is necessary for subjective listening tests and confirming audible symptoms.
Practical Tests to Evaluate Amplifier Performance
This section outlines key diagnostic procedures to effectively test an amplifier’s various stages, from power delivery to audio output integrity.
Continuity and Resistance Checks
With the amplifier unplugged and discharged, use your multimeter in continuity or resistance mode:
- Fuses: Check continuity of all fuses. A blown fuse indicates a short circuit somewhere in the amplifier.
- Speaker Terminals: Measure the resistance across the speaker output terminals with no speakers connected. In a healthy amplifier, you should typically see a very high resistance (open circuit). If you read a very low resistance (near 0 ohms), it suggests a short in the output stage.
- Power Transformer: Measure resistance across primary and secondary windings (if accessible and you know the pinout).
Power Supply Voltage Measurements
The power supply is the heart of an amplifier. With the amplifier powered on (and connected to a dummy load if testing the output stage):
- Rectified DC Voltages: Locate the main filter capacitors in the power supply section. Measure the DC voltage across them. Compare these readings to the amplifier’s service manual specifications. Incorrect voltages (too high or too low) suggest power supply issues (e.g., failing rectifier, faulty transformer, or stressed capacitors).
- Regulated Voltages: Many amplifiers have smaller regulated power supplies for pre-amp stages or specific circuits. Check these voltages as well.
DC Offset Measurement for How to Test an Amplifier?
DC offset is arguably one of the most critical measurements for solid-state amplifiers. Excessive DC offset at the speaker terminals can damage connected speakers over time. To perform this test:
- Connect your multimeter in DC voltage mode across the amplifier’s speaker output terminals (positive to positive, negative to negative) with no speaker or dummy load connected and no audio input.
- Turn the amplifier on and let it warm up for a few minutes.
- Read the DC voltage. Ideally, this reading should be as close to 0mV (millivolts) as possible.
- Acceptable Range: Generally, anything below 50mV is considered acceptable, with under 20mV being excellent. Values above 100mV indicate a problem in the output stage and should be addressed.
Signal Tracing and Gain Verification
Using an audio signal generator and an oscilloscope, you can trace the audio signal through different stages of the amplifier:
- Input Stage: Inject a known sine wave (e.g., 1kHz) into the amplifier’s input.
- Pre-amplifier: Use the oscilloscope to observe the waveform at the output of the pre-amplifier stage. Check for clean amplification and correct gain.
- Power Amplifier: Move the oscilloscope probe to the input of the power amplifier stage, then to its output (across the dummy load). Observe the waveform for distortion, clipping, or loss of signal. This allows you to visually identify where distortion is introduced.
Load Testing and Stability Checks
With a dummy load connected, gradually increase the input signal from your signal generator while monitoring the output on the oscilloscope. This helps to:
- Identify Clipping: Observe when the sine wave starts to flatten at the top and bottom, indicating clipping (overdriving the amplifier).
- Check Stability: Ensure the amplifier remains stable and doesn’t oscillate or shut down under load.
Interpreting Results and Troubleshooting Common Issues
After performing your tests, the next step is to interpret the data and link it to common amplifier faults. This practice helps efficiently diagnose problems.
What Do the Numbers Mean?
- High DC Offset: Often points to issues in the power output stage, such as failed output transistors, driver transistors, or biasing problems.
- Incorrect Power Supply Voltages: Could be due to a faulty transformer, rectifier diodes, filter capacitors, or excessive current draw from other sections.
- Distorted Waveforms: Visualizing distortion on the oscilloscope helps identify its nature (e.g., crossover distortion, clipping, hum).
- No Output Signal (but input present): Indicates a complete break in the signal path, potentially a faulty component in the pre-amp or power amp stage, or a protection circuit engaging.
Common Faults and Solutions
- Blown Fuses: Replace, but be aware they often blow for a reason (e.g., shorted output transistors). Address the underlying cause.
- Dry Solder Joints: Old amplifiers can develop poor connections. Reflowing solder can resolve intermittent issues.
- Failing Capacitors: Bulging, leaking, or excessively hot capacitors indicate failure. Replace them.
- Shorted Transistors: Output transistors are common failure points. Test them with a multimeter and replace as a matched set if faulty.
When to Seek Professional Help for Testing an Amplifier
While many basic diagnostics can be done at home, there are situations where professional intervention is necessary. Knowing your limits is crucial for both safety and effective repair when testing an amplifier.
Beyond Basic Diagnostics
If you’ve performed the standard tests and still can’t pinpoint the problem, or if the issue seems complex (e.g., involves integrated circuits, advanced digital processing, or surface-mount components), it might be time to consult an experienced electronics technician. They possess specialized equipment and deeper knowledge for intricate repairs.
Safety Considerations with High Voltage
Internal amplifier circuits, especially power supply sections, can carry lethal voltages. If you’re uncomfortable working around high voltages, or if you lack the proper safety gear and training, it’s always safer to hand the unit over to a professional. Never work on a live amplifier with the case open unless you are fully aware of the risks and have taken all necessary precautions.
| Test Performed | Expected Healthy Reading | Indicates Problem If… |
|---|---|---|
| Visual Inspection | No physical damage, clean vents, no smell | Burn marks, bulging capacitors, blocked vents, burnt smell |
| Fuse Continuity | Continuity (0 ohms) | Open circuit (infinite ohms) |
| Speaker Output DC Offset | < 50mV DC (ideally < 20mV) | > 100mV DC |
| Power Supply DC Voltage | Matches service manual ±5% | Significantly deviates from specification |
| Output Waveform (Oscilloscope) | Clean sine wave (no input), amplified sine wave (with input) | Distortion, clipping, noise, no signal |
Testing an amplifier effectively requires a blend of systematic checks, the right tools, and an understanding of electronic principles. By following this comprehensive guide, you can confidently diagnose many common amplifier problems, saving time and potentially costly repair bills. Remember to always prioritize safety, and when in doubt, consult a qualified professional.
Frequently Asked Questions
What should I do if my amplifier isn’t producing any sound?
Start by checking all connections, including power, input sources, and speaker cables, ensuring they are secure and correctly seated. Verify that the amplifier is powered on, not in standby mode, and that the correct input source is selected with the volume turned up from zero.
How can I test my amplifier for common sound quality issues like distortion or static?
Play familiar music at various volume levels and carefully listen for any unwanted noise, such as buzzing, crackling, or muffled sounds, which can indicate issues. Distorted output, especially at higher volumes, often points to a problem with the amplifier’s internal components or power supply.
Are there specific tools or methods to perform a more in-depth amplifier test?
For detailed amplifier testing, you can use a multimeter to check power supply voltages and continuity, and an oscilloscope to analyze output waveforms for clipping or distortion. Additionally, using a dedicated audio test CD or app with sine wave sweeps and frequency response tests can help identify specific performance anomalies.
How do I determine if a specific channel on my amplifier is faulty?
To diagnose a faulty channel, swap the left and right input cables, and then the speaker cables, observing if the problem follows the input source or the output channel. If the issue consistently remains on one particular output regardless of the input or speaker connected, it strongly suggests a fault within that specific amplifier channel.
As an Amazon Associate, I earn commission from qualifying purchases.


