How to Safely Discharge a Capacitor? The most reliable way to discharge a capacitor is by connecting a suitable high-power resistor across its terminals, allowing the stored electrical energy to dissipate as heat over a calculated period. This fundamental technique is crucial for anyone working with electronic circuits to prevent electric shock and equipment damage.
Understanding this critical practice is essential, as capacitors can store dangerous levels of charge even after the power supply has been disconnected. Implementing proper discharge methods ensures safety and longevity for both the technician and the components involved in electronic work.
Quick Answers to Common Questions
What’s the easiest method to safely discharge a capacitor?
The simplest and safest method is to use a high-value resistor connected across its terminals. This allows the stored energy to dissipate slowly as heat, preventing dangerous sparks or damage.
Do I need special tools to safely discharge a capacitor?
While you can rig something with a resistor and insulated wires, a dedicated capacitor discharge tool or probe with a built-in resistor and indicator light offers the safest and most convenient way to safely discharge a capacitor, especially for larger ones.
Can I just short the capacitor terminals to quickly discharge it?
Never directly short a charged capacitor! Doing so can create a dangerous arc, potentially damage the capacitor, and cause injury due to the sudden release of energy. Always use a resistor to safely discharge a capacitor gradually.
📑 Table of Contents
Why is Safe Capacitor Discharge Crucial?
Capacitors are vital components in electronic circuits, capable of storing electrical energy in an electrostatic field. While incredibly useful, this energy storage capability makes them potentially hazardous if not handled correctly. Ignoring the need for a controlled discharge can lead to severe consequences.
The Dangers of Stored Energy
A charged capacitor acts like a small, temporary battery. If touched directly, especially with significant voltage and capacitance, it can deliver a painful and potentially lethal electric shock. The shock severity depends on the stored energy (joules), voltage (volts), and current (amperes) that flows through the body. Capacitors found in power supplies, camera flashes, CRT monitors, and motor control circuits can hold enough charge to be extremely dangerous, even after the device is unplugged. Beyond immediate shock hazards, an uncontrolled discharge can also generate sparks, leading to fires or explosions if flammable materials are present.
Protecting Yourself and Your Equipment
Beyond personal safety, discharging a capacitor improperly can damage other sensitive components in a circuit. An uncontrolled discharge, such as shorting a capacitor with a metal tool, can create a sudden surge of current that fries microcontrollers, integrated circuits, or even entire power supplies. By learning and applying correct discharge procedures, you protect not only yourself from injury but also the integrity of the electronic equipment you are working with, saving time and costly replacements.
Essential Safety Precautions Before You Start
Before attempting any capacitor discharge, preparation is key. Following these preliminary safety steps can significantly reduce risks and ensure a smoother, safer process.
Personal Protective Equipment (PPE)
- Insulated Gloves: Always wear electrical-rated insulated gloves. These provide a critical barrier against accidental contact with live terminals.
- Safety Glasses: Sparks can occur during discharge, especially if connections are poor or components fail. Eye protection is non-negotiable.
- Non-Conductive Tools: Use tools with insulated handles to prevent current from flowing through you if you accidentally touch a live part.
Disconnecting Power and Verifying
The first and most critical step is to ensure that the circuit containing the capacitor is completely disconnected from its power source. Unplug the device, switch off the power supply, or remove batteries. Do not assume the circuit is de-energized just because the device is off. Always use a multimeter to verify that no voltage is present across the capacitor’s terminals before proceeding. This verification step is paramount, as residual charge can persist for surprisingly long periods.
Knowing Your Capacitor
Identify the capacitor’s voltage rating and capacitance value. This information is usually printed on the component itself. Knowing these values is essential for selecting the appropriate discharge resistor and calculating safe discharge times. A higher voltage or capacitance will require more robust discharge components and longer discharge periods.
Methods for How to Safely Discharge a Capacitor
Several methods exist for controlled capacitor discharge, each suitable for different situations. The most common and recommended approach involves using a power resistor.
The Resistor Discharge Method
This is the gold standard for discharging capacitors safely. A resistor limits the current flow, converting the capacitor’s stored electrical energy into heat at a controlled rate. To execute this technique:
- Select a resistor with appropriate resistance and power rating (see next section for details).
- Connect one end of the resistor to one terminal of the capacitor.
- Connect the other end of the resistor to the second terminal of the capacitor.
- Maintain the connection for the calculated discharge time.
- Verify the voltage with a multimeter after the calculated time has passed.
This method is safe, reliable, and prevents sudden surges that could damage other components or create dangerous arcing.
Using a Discharge Tool
For repetitive tasks or high-voltage applications, specialized capacitor discharge tools are available. These often consist of a high-power resistor encased in an insulated handle with probes, sometimes including an integrated voltmeter. They offer convenience and an added layer of safety due to their purpose-built design. Ensure any commercial discharge tool is rated for the maximum voltage and energy of the capacitors you intend to discharge.
Natural Discharge (for Smaller Capacitors)
Very small capacitors (typically less than 1µF) in low-voltage circuits may naturally discharge through internal leakage resistance or through parallel components in the circuit over time. However, relying on natural discharge is generally not recommended for safety-critical situations or for larger capacitors, as the discharge time can be unpredictable and excessively long. Always assume a capacitor might be charged and verify its status.
Calculating Discharge Resistor Values and Time
The resistor discharge method relies on understanding the relationship between resistance, capacitance, and time.
Understanding RC Time Constant
The RC time constant (τ, tau) is a measure of the time required for the voltage across a capacitor to discharge to approximately 36.8% (1/e) of its initial value when discharged through a resistor. It’s calculated using the formula: τ = R × C, where:
- R is the resistance in Ohms (Ω).
- C is the capacitance in Farads (F).
- τ is the time constant in seconds.
For a capacitor to be considered fully discharged (down to less than 1% of its initial voltage), approximately 5 time constants (5τ) are generally required. For example, if τ = 1 second, it will take about 5 seconds for the capacitor to be safely discharged.
Practical Resistor Selection
When selecting a discharge resistor, consider two main factors:
- Resistance Value: A lower resistance discharges the capacitor faster but results in higher initial current, potentially requiring a higher power resistor. A higher resistance takes longer. A good rule of thumb is to choose a resistor that allows for a reasonable discharge time (e.g., 5-10 seconds for moderate capacitance) without excessive initial current. Typical values range from 1 kΩ to 10 kΩ.
- Power Rating: The resistor must be able to dissipate the initial surge of power without overheating or burning out. The peak power (P) dissipated by the resistor occurs at the beginning of the discharge and can be calculated as P = V² / R, where V is the initial voltage across the capacitor. Choose a resistor with a power rating significantly higher than the calculated peak power (e.g., a 5W or 10W resistor for high-voltage applications).
Example Resistor Values for Common Capacitors
This table provides approximate guidelines. Always calculate for your specific situation.
| Capacitance (µF) | Initial Voltage (V) | Recommended Resistor (Ω) | Min. Power Rating (W) | Approx. 5τ Discharge Time |
|---|---|---|---|---|
| 10 | 100 | 10k | 1 | 0.5 seconds |
| 100 | 100 | 1k | 10 | 0.5 seconds |
| 470 | 400 | 500 | 300 | 1.2 seconds |
| 2200 | 450 | 100 | 2000 | 1.1 seconds |
Note: Power ratings can be very high for large capacitors at high voltages. Consider using multiple resistors in series to distribute the power dissipation or a dedicated high-power discharge resistor.
Step-by-Step Guide to the Resistor Method
Follow these steps carefully to ensure a safe and effective capacitor discharge using a resistor.
Gathering Your Materials
- Insulated Gloves and Safety Glasses: Already mentioned, but critical.
- Multimeter: For verifying initial charge and final discharge.
- Appropriate Resistor: Selected based on the capacitor’s voltage and capacitance, with sufficient power rating.
- Insulated Test Leads or Alligator Clips: To safely connect the resistor to the capacitor terminals. Avoid holding the resistor directly if it’s high power, as it can get hot.
The Connection Process
- Power Off & Verify: Ensure the device is unplugged and use your multimeter to check the voltage across the capacitor terminals. Note the initial voltage.
- Connect One Resistor Lead: Using insulated test leads or clips, securely attach one end of your discharge resistor to one terminal of the capacitor.
- Connect Second Resistor Lead: Carefully attach the other end of the resistor to the second terminal of the capacitor. Ensure good contact. You might see a small spark if the capacitor is highly charged, but this is why you use safety gear.
- Time the Discharge: Allow the resistor to remain connected for at least 5 times the RC time constant (5τ) you calculated. For very large capacitors, this could be several minutes.
Verifying Discharge
After the calculated discharge time has elapsed, remove the discharge resistor. Then, using your multimeter set to a suitable voltage range, measure the voltage across the capacitor terminals again. The reading should be very close to zero volts (e.g., less than 1 volt). If there’s still a significant voltage, reconnect the resistor for another discharge cycle and re-measure. Never consider a capacitor safe until it measures near zero volts.
Common Mistakes to Avoid
Even with the best intentions, certain practices can undermine safety during capacitor discharge.
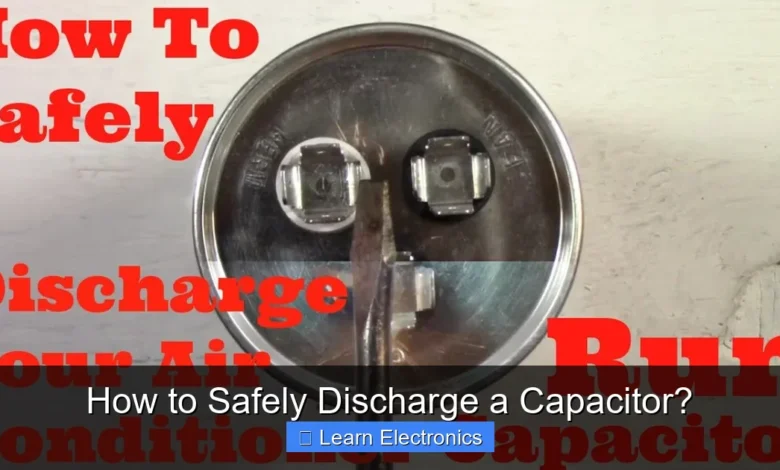
Shorting with a Screwdriver to Safely Discharge a Capacitor
One of the most dangerous and common mistakes is trying to short the capacitor terminals with a metal screwdriver or other conductive tool. This creates an uncontrolled, extremely high current discharge, which can cause:
- Arcing and Explosions: The sudden release of energy can create a bright flash, loud bang, and potentially cause the capacitor to explode, scattering hot debris.
- Tool Damage: The metal tip of the screwdriver can pit or melt due to the intense heat.
- Personal Injury: Beyond the immediate shock, flying debris from an exploding capacitor is a serious hazard.
Always use a current-limiting resistor for a controlled discharge.
Insufficient Discharge Time
Removing the discharge resistor too early means the capacitor hasn’t had enough time to fully dissipate its charge. Even a seemingly small residual voltage can be dangerous, especially for high-capacitance components. Always wait for at least 5τ and verify with a multimeter.
Overlooking Residual Charge
Some circuits may have multiple capacitors, or the discharge path might not be entirely clear due to other components. Always measure the voltage directly across the capacitor you are working on, even if you believe the circuit as a whole is de-energized. Additionally, some electrolytic capacitors can exhibit a “dielectric absorption” effect, where a small voltage reappears across their terminals a short while after discharge. It’s a good practice to discharge, wait a few minutes, and then re-measure before handling.
Safely discharging capacitors is not merely a recommendation; it is a fundamental safety procedure for anyone involved in electronics. By understanding the principles of stored energy, adhering to safety precautions, utilizing the appropriate discharge methods, and meticulously verifying the discharge, you can protect yourself, your colleagues, and your valuable equipment. Always prioritize safety, take your time, and never assume a capacitor is fully discharged until proven by measurement. Your diligence in this practice will make your electronics work safer and more efficient.
Frequently Asked Questions
Why is it crucial to safely discharge a capacitor before touching it?
Capacitors can store a dangerous electrical charge even after power is removed, which can cause severe electric shock or damage to components. Properly discharging them eliminates this hazard, ensuring your safety and protecting sensitive electronics from accidental damage during handling or repair.
What are the recommended methods to safely discharge a capacitor?
The most common and recommended method is to use a high-value power resistor connected across the capacitor terminals, allowing the stored energy to dissipate gradually and safely. Specialized capacitor discharge tools are also available that incorporate resistors and often have built-in indicators.
What safety precautions should I observe when attempting to safely discharge a capacitor?
Always wear appropriate personal protective equipment (PPE), including insulated gloves and safety glasses, to protect against electric shock and potential arcing. Ensure you are working in a dry environment and use tools with insulated handles to minimize any risk when you safely discharge a capacitor.
How can I verify that a capacitor has been safely discharged?
After attempting to safely discharge a capacitor, use a multimeter set to measure DC voltage to confirm that the voltage across its terminals has dropped to a safe level, ideally below 10 volts. Touch the probes to each terminal and hold for a few seconds, repeating the measurement after a short wait to ensure no residual charge remains.
As an Amazon Associate, I earn commission from qualifying purchases.


