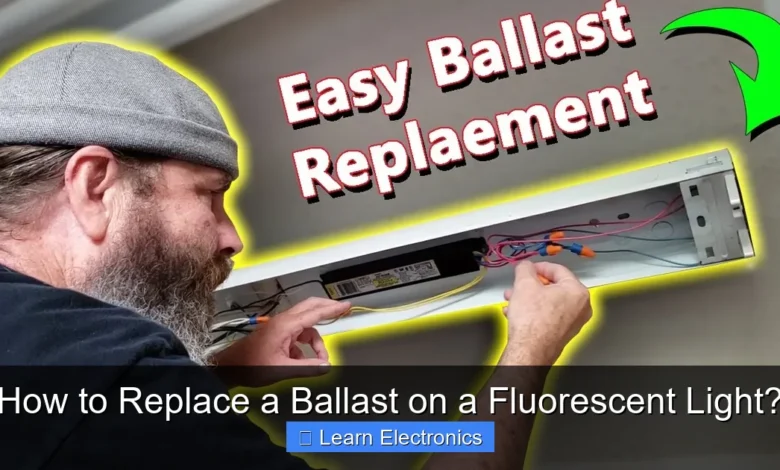
How to Replace a Ballast on a Fluorescent Light? It involves a straightforward process of safely disconnecting the old unit and wiring in a new, compatible replacement. This repair can breathe new life into a flickering or dead fluorescent fixture without the need for a complete replacement. The practice requires careful attention to electrical safety and proper wiring techniques to ensure a successful outcome.
Quick Answers to Common Questions
How can I tell if my ballast needs replacing?
If your fluorescent lights are flickering, buzzing loudly, or failing to turn on, these are strong indicators that it’s time to **replace a ballast**. Catching these signs early makes troubleshooting much easier!
What’s the most important safety step when replacing a ballast?
Always, always turn off the power at the circuit breaker before you even think about touching the fixture! This crucial step ensures your safety during the entire process to **replace a ballast**.
Can I switch to LED tubes when I replace my old ballast?
Absolutely! When you **replace a ballast**, it’s a perfect opportunity to upgrade to energy-efficient LED tubes. You can either choose “ballast-compatible” LEDs or opt to bypass the ballast entirely with “direct wire” LED tubes for even greater efficiency.
📑 Table of Contents
Understanding When a Ballast Needs Replacing
Fluorescent light ballasts are crucial components that regulate the current to the lamp, ensuring stable illumination. Over time, these ballasts can fail, leading to various issues with your lighting fixture. Recognizing these signs early can save you time and money by addressing the problem before it escalates.
Common Symptoms of a Failing Ballast
- Flickering Lights: One of the most common indicators is persistent flickering, even after replacing the fluorescent tube. This often occurs when the ballast struggles to maintain a stable current.
- Buzzing or Humming Noise: A loud, incessant buzzing or humming emanating from the fixture is a tell-tale sign of a magnetic ballast failing. Electronic ballasts typically operate silently, so any noise from them is a serious concern.
- Delayed Start: If your fluorescent light takes an unusually long time to turn on, or requires several attempts, the ballast might be weak or failing.
- Dim or Uneven Lighting: A ballast that isn’t providing the correct voltage or current can result in dim lighting or areas of the tube being brighter than others.
- Blackened Tube Ends: While sometimes caused by old tubes, persistently blackened ends on new tubes can indicate a ballast issue, as it may be overdriving the lamps.
- No Light At All: If the tubes are confirmed to be good, but the light fixture simply won’t turn on, a completely failed ballast is a likely culprit.
Diagnosing the Problem
Before assuming the ballast is at fault, always perform basic troubleshooting:
- Replace the Tubes: Start by trying new fluorescent tubes. Tubes have a finite lifespan and are often the first component to fail.
- Check the Starter (if applicable): Older fluorescent fixtures use a starter alongside the ballast. If present, try replacing the starter.
- Inspect Connections: Ensure all wiring connections within the fixture are secure and free from corrosion.
- Verify Power Supply: Use a voltage tester to confirm that power is reaching the fixture itself.
If these preliminary steps don’t resolve the issue, it’s highly probable that your ballast requires replacement.
Safety First: Essential Preparations
Working with electricity always carries risks. Prioritizing safety is paramount when undertaking any electrical repair, including replacing a fluorescent light ballast. Proper preparation ensures both your personal safety and the successful completion of the task.
Prioritizing Electrical Safety
- Turn Off Power at the Breaker: This is the absolute most critical step. Locate the circuit breaker that controls the light fixture and switch it to the “OFF” position. Don’t rely solely on the wall switch, as power can still be present in the fixture.
- Test for De-energization: Before touching any wires, use a non-contact voltage tester to confirm that there is no power flowing to the fixture. Test the wires and the fixture’s housing.
- Inform Others: If you’re not working alone, inform anyone else in the household that you’re working on the electrical system and that power to certain areas is off. Consider taping a note to the breaker box.
- Wear Protective Gear: Safety glasses can protect your eyes from debris, and insulated gloves can offer an extra layer of protection, though they should never be a substitute for de-energizing the circuit.
Gathering Your Tools
Having the right tools on hand will make the replacement process much smoother and safer.
- Non-contact voltage tester
- Screwdriver set (Phillips and flathead)
- Wire strippers
- Pliers (needle-nose and/or lineman’s)
- Wire nuts (matching the gauge of your fixture’s wires)
- Replacement ballast (ensure it’s compatible)
- New fluorescent tubes (optional, but good to have if you suspect old ones are contributing to the problem)
- Flashlight or headlamp (useful if working in dimly lit areas)
- Work gloves (optional, for grip and protection)
Types of Ballasts and Compatibility
Understanding the different types of ballasts and ensuring you choose a compatible replacement is crucial for the longevity and proper functioning of your fluorescent fixture. Installing an incorrect ballast can damage the light tubes or the fixture itself.
Magnetic vs. Electronic Ballasts
- Magnetic Ballasts: These are older, heavier ballasts, often identifiable by their buzzing sound. They are less energy-efficient and typically found in older fixtures. They require a “starter” component in some applications.
- Electronic Ballasts: Modern, lighter, and more energy-efficient, electronic ballasts operate silently and provide instant-on, flicker-free light. They do not require a separate starter. Most new fluorescent fixtures come with electronic ballasts.
When replacing a ballast, it’s generally recommended to replace a magnetic ballast with another magnetic one, or to upgrade to an electronic ballast if the fixture is compatible and you wish to improve efficiency. Upgrading often involves minor rewiring and ensuring the electronic ballast supports your specific lamp type.
Decoding Ballast Specifications (Voltage, Lamp Type, Number of Lamps)
The label on your existing ballast contains vital information you’ll need to match for a new one:
- Voltage: This must match your electrical supply (e.g., 120V for most residential applications in North America, 277V for commercial).
- Lamp Type: Ballasts are designed for specific fluorescent lamp types (e.g., T8, T12, T5). Ensure the new ballast supports the type of tubes you are using. Mixing T8 tubes with a T12 ballast (or vice-versa) can lead to poor performance or damage.
- Number of Lamps: Ballasts are rated to power a specific number of lamps (e.g., one, two, three, or four lamps).
- Lamp Wattage: The ballast must be rated for the wattage of your fluorescent tubes.
- Starting Method: Instant Start, Rapid Start, or Programmed Rapid Start. Most modern electronic ballasts are Programmed Rapid Start, which is gentler on lamps.
Always take a photo of the old ballast’s label or write down all its specifications before purchasing a new one. When in doubt, consult with an electrical supply expert.
The Step-by-Step Guide on How to Replace a Ballast on a Fluorescent Light Fixture
Once you’ve confirmed the need for a replacement and gathered your tools and a compatible new ballast, you’re ready to tackle the actual installation. This process is generally straightforward but requires attention to detail, especially during wiring.
Disconnecting the Old Ballast
- Remove the Diffuser and Tubes: Carefully remove any plastic or metal cover (diffuser) and then gently twist and remove the fluorescent tubes from their sockets.
- Access the Ballast: The ballast is typically located in the fixture’s metal housing. You may need to remove a metal cover or plate to access it. Sometimes, the entire fixture needs to be lowered slightly from the ceiling.
- Document the Wiring: This is a crucial step. Take clear photos of the existing wiring connections to the ballast. Note which wires from the fixture’s power supply (typically black, white, and ground) connect to the ballast, and how the various colored ballast wires connect to the lamp holders.
- Cut or Unscrew Wires: Using wire cutters, snip the wires connecting the old ballast. You can cut them close to the ballast, leaving as much length as possible on the fixture side for easier re-connection. For connections made with screws, unscrew them.
- Remove the Old Ballast: Unbolt or unscrew the old ballast from the fixture housing and remove it. It can be quite heavy if it’s a magnetic type.
Wiring the New Ballast
The new ballast will come with a wiring diagram. It is imperative to follow this diagram precisely, as wiring can vary slightly between manufacturers and ballast types. Refer back to your photos of the old wiring and the new ballast’s diagram.
- Mount the New Ballast: Secure the new ballast in the same position where the old one was, using the existing mounting holes if possible. Ensure it is firmly attached.
- Connect the Input Power Wires: These are the wires that bring power from your building’s electrical system to the ballast. Typically:
- Black Wire (Hot): Connect the fixture’s black (or hot) wire to the ballast’s designated input wire (often black or labeled “Line” or “L”). Use a wire nut for a secure connection.
- White Wire (Neutral): Connect the fixture’s white (or neutral) wire to the ballast’s designated input wire (often white or labeled “Neutral” or “N”). Use a wire nut.
- Green or Bare Copper Wire (Ground): Ensure the fixture’s ground wire is securely attached to the fixture’s metal housing and that the new ballast is also grounded, either through its mounting screws or a separate ground wire.
- Connect the Output Lamp Wires: These wires connect from the ballast to the lamp holders (tombstones). The colors and number of wires will depend on the ballast type and the number of tubes it powers. Carefully follow the new ballast’s wiring diagram for these connections. For example, a common two-lamp rapid-start ballast might have:
- Red wires connecting to one end of each lamp holder.
- Blue wires connecting to the other end of each lamp holder.
- Yellow wires (sometimes one shared, sometimes two separate) connecting to the remaining terminal on each lamp holder.
Strip about 1/2 to 3/4 inch of insulation from the ends of the wires (both from the ballast and the fixture) and twist them together tightly before securing them with appropriately sized wire nuts.
Reassembling the Fixture
Once all wiring connections are made and secured, it’s time to put everything back together.
- Neaten Wires: Carefully tuck all wires neatly into the fixture housing, ensuring no bare wires are exposed and they won’t be pinched by the cover or tubes.
- Replace Covers: Reattach any metal covers or plates you removed to access the ballast.
- Install Tubes: Insert the fluorescent tubes back into their sockets, ensuring they are properly seated and twisted into place.
- Replace Diffuser: Reattach the plastic or metal diffuser.
Common Wiring Configurations for Fluorescent Ballasts
Understanding standard wiring colors can be helpful, though always prioritize the diagram on your specific ballast. This table provides a general overview of common wire functions.
| Wire Color (Typically from Ballast) | Common Function | Notes |
|---|---|---|
| Black | Input Power (Hot) | Connects to fixture’s black/hot wire. |
| White | Input Power (Neutral) | Connects to fixture’s white/neutral wire. |
| Green or Bare Copper | Ground | Connects to fixture’s metal housing/ground wire. |
| Red | Output to Lamp Holder | Often connects to one end of the lamp holder(s). |
| Blue | Output to Lamp Holder | Often connects to the other end of the lamp holder(s). |
| Yellow | Output to Lamp Holder | Can be used for common returns or additional lamp connections, depending on ballast and number of lamps. |
Note: These are general guidelines. Always refer to the specific wiring diagram provided with your new ballast, as configurations can vary.
Testing and Troubleshooting
After all connections are made and the fixture is reassembled, the moment of truth arrives. It’s time to test your work. Don’t be discouraged if it doesn’t work perfectly on the first try; troubleshooting is a normal part of electrical repair.
Initial Power-Up
- Restore Power: Return to your electrical panel and flip the circuit breaker back to the “ON” position.
- Test the Light: Turn on the wall switch for the fluorescent light.
- Observe: The light should turn on immediately and operate without flickering, buzzing, or dimness.
Addressing Common Issues After Replacement
- Light Doesn’t Turn On:
- No Power: Double-check the breaker. Use your voltage tester to confirm power is reaching the fixture.
- Loose Connections: Turn off power, open the fixture, and check all wire nut connections. Ensure they are tight and secure.
- Incorrect Wiring: Carefully review the ballast’s wiring diagram against your connections. A single misconnected wire can prevent operation.
- Bad Tubes: If you didn’t replace the tubes earlier, try new ones now. Even new tubes can occasionally be faulty.
- Faulty Ballast: Although rare, a new ballast can sometimes be defective.
- Flickering or Dim Light:
- Loose Connections: As above, check all connections.
- Incompatible Ballast/Tubes: Ensure the ballast’s specifications (lamp type, wattage, number of lamps) perfectly match your fluorescent tubes.
- Environmental Factors: Extreme cold can sometimes affect fluorescent lamp performance.
- Buzzing Noise:
- Loose Ballast: Ensure the new ballast is firmly mounted to the fixture housing. Vibration can cause buzzing.
- Incorrect Ballast Type: If you replaced an electronic ballast with a magnetic one, buzzing is normal for magnetic ballasts. If an electronic ballast is buzzing, it may be faulty or improperly wired.
If you encounter persistent issues and are unable to resolve them after careful troubleshooting, it may be best to consult a qualified electrician.
Replacing a ballast on a fluorescent light fixture is a practical skill that can save you the cost of a new fixture and contribute to a more sustainable home. By carefully following safety protocols, understanding ballast compatibility, and meticulously executing each step of the wiring process, you can successfully restore your fluorescent lighting to full functionality. Always remember that when dealing with electricity, safety is the highest priority.
Frequently Asked Questions
How do I know if my fluorescent light ballast needs replacing?
Common signs include humming, flickering lights, delayed starting, or lights that don’t turn on at all. If your fluorescent tubes are new and the fixture still isn’t working correctly, a faulty ballast is often the culprit.
What tools and materials are required to replace a fluorescent light ballast?
You’ll typically need a screwdriver set, wire strippers, electrical tape, and a non-contact voltage tester for safety. Always ensure you have the correct replacement ballast that matches your existing fixture’s specifications.
Is it safe to replace a fluorescent light ballast myself, and what safety precautions should I take?
Yes, it can be done safely by a DIYer, but electrical safety is paramount. Always turn off the power to the fixture at the circuit breaker before beginning any work, and use a voltage tester to confirm the power is off.
How do I choose the correct replacement ballast for my fluorescent light fixture?
To select the right ballast, match its type (e.g., electronic or magnetic), wattage, and the number of lamps it controls to your existing unit. Check the specifications printed on your old ballast or the fixture’s label to ensure compatibility.
What are the basic steps involved in replacing a ballast for a fluorescent light?
After cutting power, remove the fixture cover and carefully disconnect the wiring from the old ballast. Install the new ballast, following the wiring diagram provided, and re-secure all connections. Finally, reassemble the fixture and restore power to test.
Can I replace a traditional fluorescent ballast with a ballast for LED tubes?
Yes, if you’re upgrading to “ballast-compatible” or “plug-and-play” LED tubes, you might use an LED driver designed for such tubes or bypass the ballast entirely for “ballast-bypass” LED tubes. Always check the specific requirements of your chosen LED tubes, as some require direct wiring and the removal of the old fluorescent ballast.
As an Amazon Associate, I earn commission from qualifying purchases.


