How to Crimp a Wire? It’s a fundamental skill in electronics and electrical work, involving the secure mechanical connection of a wire to a terminal or connector. This reliable method creates a gas-tight junction, crucial for safe and efficient electrical conductivity without the need for heat, unlike soldering.
Mastering this technique ensures robust and long-lasting connections, vital for everything from automotive repairs to complex circuit board assemblies. The practice is widespread due to its speed, consistency, and durability when performed correctly.
Quick Answers to Common Questions
What’s the most important tool for crimping?
You’ll definitely need a good quality wire crimper! Using the right crimping tool is crucial for creating a secure and reliable electrical connection every time you crimp a wire.
How do I know if my crimp is good?
A proper crimp should hold the wire firmly without cutting into the insulation too deeply. Give the wire a gentle tug; it shouldn’t pull out easily, which signals a strong and safe connection.
Why is it so important to crimp a wire correctly?
Learning how to crimp a wire properly ensures a durable, low-resistance connection that’s much safer and more reliable than just twisting wires. A bad crimp can lead to intermittent connections, overheating, or even short circuits.
📑 Table of Contents
Understanding the Basics of Wire Crimping
Wire crimping is a process that mechanically deforms a metal terminal around an electrical wire to create a robust electrical and mechanical connection. Unlike soldering, which uses a molten alloy to join components, crimping relies on pressure to cold-weld the wire strands to the terminal barrel.
What is Wire Crimping?
At its core, wire crimping is about creating a permanent, reliable connection. The terminal typically has a barrel or sleeve designed to encapsulate the stripped wire. When the crimping tool is applied, it compresses this barrel, forcing the metal of the terminal to flow and conform around the individual strands of the wire. This forms a “gas-tight” seal, which prevents oxygen and moisture from reaching the connection, thereby resisting corrosion and ensuring low electrical resistance.
Why Crimp? Benefits over Soldering
Crimping offers several distinct advantages over soldering, especially in applications subject to vibration, temperature fluctuations, or requiring quick assembly:
- Reliability: A properly crimped connection is often stronger mechanically and electrically more stable than a soldered joint, particularly under vibration, as solder can become brittle and crack.
- Speed: Crimping is generally much faster than soldering, making it ideal for high-volume production.
- Consistency: With the right tools, crimping offers highly repeatable results, leading to uniform quality across many connections.
- No Heat Required: Eliminates the risk of heat damage to sensitive components or wire insulation.
- Field Repairability: It’s often easier and safer to perform field repairs using crimping tools than soldering irons.
Key Components: Wire, Terminal, and Tool
Successful crimping depends on the synergy of three main components:
- Wire: The electrical conductor, usually copper, with insulation. Its gauge (AWG) is critical for selecting the correct terminal and tool setting.
- Terminal/Connector: The metal component that physically connects the wire to another electrical point (e.g., another wire, a component, or a circuit board). Terminals come in countless shapes and sizes, each designed for specific applications.
- Crimping Tool: The specialized hand tool or machine that applies the necessary pressure to deform the terminal around the wire.
Essential Tools and Materials for Crimping
Having the right equipment is paramount for achieving a high-quality crimp. Skimping on tools often leads to unreliable connections.
Types of Crimping Tools
Crimping tools vary greatly depending on the type of terminal and the volume of work:
- Non-Ratcheting Crimpers: Basic, inexpensive tools that require manual pressure. They don’t ensure a full crimp and are prone to user error, often leading to inconsistent results. Best for occasional, non-critical use.
- Ratcheting Crimpers: The most recommended type for DIYers and professionals. They feature a mechanism that prevents the handles from opening until a full crimp cycle is completed, ensuring consistent pressure and a proper crimp every time. They often come with interchangeable dies for different terminal types.
- Hydraulic/Electric Crimpers: Used for very large gauge wires or high-volume industrial applications. These tools provide significant force with minimal user effort.
Selecting the Right Terminals and Connectors
Terminals are designed for specific wire gauges and application types. They are usually color-coded for insulated terminals to indicate the compatible wire size (e.g., red for 22-18 AWG, blue for 16-14 AWG, yellow for 12-10 AWG). Ensure the terminal material is compatible with your environment (e.g., tin-plated for corrosion resistance).
Wire Strippers and Cutters
Precision is key when preparing wires. Good quality wire strippers allow you to remove the insulation without nicking or cutting the wire strands, which can weaken the connection. Cutters are needed to achieve clean, straight cuts.
Heat Shrink Tubing (Optional but Recommended)
For enhanced protection against moisture, abrasion, and strain relief, heat shrink tubing is highly recommended. It comes in various sizes and shrink ratios. Some terminals even have built-in heat shrink features.
Step-by-Step Guide: How to Crimp a Wire
Following a precise procedure is essential to achieve a perfect connection. This detailed guide walks through the process of how to crimp a wire effectively.
Step 1: Prepare the Wire
- Cut the Wire: Use sharp wire cutters to make a clean, straight cut to the desired length.
- Strip the Insulation: Using a wire stripper matched to your wire’s AWG (American Wire Gauge), carefully strip the insulation. The exposed wire length should be just enough to fill the terminal’s wire barrel without any insulation entering the crimp area and without any bare wire protruding past the terminal’s barrel once crimped. Typically, this is 1/4 to 3/8 inch (6-10 mm).
- Twist Strands (Optional but Recommended): For stranded wire, gently twist the exposed strands together to consolidate them and prevent stray strands from interfering with the crimp.
Step 2: Choose the Correct Terminal
Verify that the terminal’s wire barrel size matches your wire’s AWG. For insulated terminals, the color coding (red, blue, yellow) is a good indicator. For uninsulated terminals, consult the manufacturer’s specifications or use a wire gauge tool.
Step 3: Insert the Terminal into the Tool
Open your ratcheting crimping tool and select the correct die cavity for your terminal and wire size. Place the terminal into the die cavity, ensuring it sits securely. For insulated terminals, there are typically two crimp sections: one for the wire barrel and one for the insulation support. Position the terminal so its wire barrel aligns with the appropriate crimping jaw.
Step 4: Perform the Crimp
- Insert the Wire: Carefully insert the stripped end of the wire all the way into the terminal’s wire barrel. Ensure all strands are inside and no insulation is trapped in the crimp area.
- Squeeze the Handles: Squeeze the handles of the ratcheting crimping tool firmly and completely until the ratchet releases. This ensures a full and proper crimp cycle.
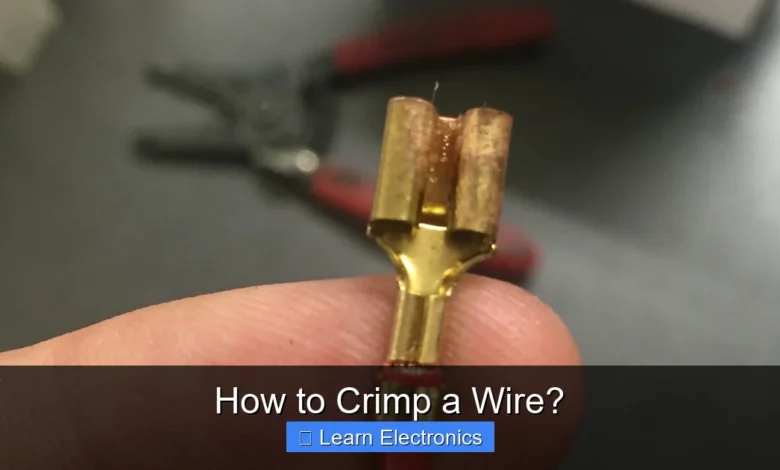
- Inspect the Crimp: Remove the crimped terminal from the tool. Visually inspect it. A good crimp should show the wire strands compacted tightly within the terminal barrel. For insulated terminals, the insulation grip should be snug, and a small portion of insulation might be visible through the inspection hole if present.
Step 5: Test the Crimp (Pull Test)
Gently tug on the wire and the terminal in opposite directions. A good crimp should not allow the wire to pull out of the terminal. This “pull test” is a quick and effective way to verify mechanical integrity.
Step 6: Insulate and Finish
If using non-insulated terminals or if extra protection is desired for insulated ones, slide a piece of heat shrink tubing over the crimped connection and apply heat with a heat gun (not a lighter, as it can char the tubing) until it shrinks tightly around the connection. This provides strain relief, electrical insulation, and protection from environmental factors.
Common Crimping Mistakes to Avoid
Even with the right tools, improper technique can lead to weak or dangerous connections. Avoiding these common errors is crucial for achieving high-quality results.
Using the Wrong Tool or Die
One of the most frequent mistakes is using a general-purpose plier or a crimper with the wrong die. This leads to improper compression, either too much (damaging the wire) or too little (loose connection). Always match the crimper and its die to the specific terminal type and wire gauge.
Incorrect Strip Length
If the wire is stripped too long, bare wire will protrude from the terminal, risking short circuits. If stripped too short, the wire strands won’t fully engage with the terminal barrel, resulting in a weak electrical and mechanical connection.
Over-crimping or Under-crimping
- Over-crimping: Applying too much pressure or using the wrong die can cut or excessively deform the wire strands, reducing the wire’s current-carrying capacity and mechanical strength.
- Under-crimping: Insufficient pressure or the wrong die leaves gaps between the wire and terminal, leading to high resistance, heat generation, and potential failure.
Misalignment
Failing to fully insert the wire into the terminal barrel or misaligning the terminal in the crimping die can result in an uneven or partial crimp, compromising the connection’s integrity.
Advanced Crimping Techniques and Considerations
Beyond basic crimping, there are specialized techniques and considerations for specific applications that improve connection reliability and performance. This section will delve into how to crimp a wire using these more advanced methods.
Different Terminal Types and Their Crimping Needs
The world of terminals is vast, with each type demanding a specific crimp profile:
- Open Barrel (F-Crimp): Common in automotive and electronics, these require a specific crimp tool that forms a B-shaped or F-shaped crimp, creating insulation support and wire core crimps simultaneously.
- Closed Barrel: Often used for larger wires or heavy-duty applications. These are typically round and require crimp tools that create an indent or hexagonal crimp.
- Splice Connectors: Used to join two wires end-to-end. They come in various forms, including butt connectors, requiring a full crimp on both ends.
- Pin & Socket (Deutsch, Weather-Pack): These systems use uninsulated pins and sockets that are crimped onto wires and then inserted into plastic housings. They require specialized open-barrel crimp tools and careful attention to the insulation crimp for environmental sealing.
Weather-Pack and Deutsch Connectors
These are popular in automotive, marine, and industrial environments due to their superior environmental sealing capabilities. They use open-barrel terminals that require precise crimping to ensure both the wire and insulation are correctly secured. The crimp typically involves a core crimp (for the conductor) and an insulation crimp (for strain relief and sealing). Specialized crimpers are essential for these connectors to ensure the crimp profile matches the terminal design for optimal performance and sealing.
Heat Shrink Terminals
These terminals come with an integrated heat shrink sleeve lined with an adhesive. After crimping, applying heat causes the sleeve to shrink and the adhesive to melt, providing an incredibly robust, watertight seal. This is ideal for applications exposed to moisture or harsh chemicals, offering superior corrosion resistance and strain relief compared to standard insulated terminals.
Wire and Terminal Compatibility Table
Understanding the compatibility between wire gauge and terminal size is crucial. This table provides a general guideline for common insulated terminals, which are often color-coded.
| AWG (American Wire Gauge) | Metric Equivalent (mm²) | Insulated Terminal Color | Typical Application |
|---|---|---|---|
| 22-18 AWG | 0.34 – 0.75 mm² | Red | Low-current electronics, automotive accessories, speaker wires |
| 16-14 AWG | 1.5 – 2.5 mm² | Blue | Automotive lighting, medium-current circuits, small appliances |
| 12-10 AWG | 4.0 – 6.0 mm² | Yellow | High-current automotive circuits, marine applications, power tools |
| 8 AWG | 10.0 mm² | (Often uninsulated or specialized) | Heavy-duty automotive, inverter connections, larger power systems |
| 6 AWG | 16.0 mm² | (Often uninsulated or specialized) | Battery cables, industrial machinery |
Understanding AWG and Terminal Sizes
AWG is a standard for designating wire diameter; a smaller AWG number indicates a larger wire diameter. Terminals are designed to accommodate specific AWG ranges. Always cross-reference the wire’s AWG with the terminal’s specified range to ensure a proper fit. Using a terminal too small will not allow the wire to enter or will result in an inadequate crimp. Using a terminal too large will result in an under-crimped connection with poor contact.
Conclusion
Mastering the art of wire crimping is an invaluable skill for anyone working with electronics or electrical systems. By understanding the fundamentals, investing in quality tools, and adhering to proper techniques, you can consistently create connections that are electrically sound, mechanically robust, and resistant to environmental factors. Remember, a good crimp is a gas-tight crimp, essential for preventing corrosion and ensuring long-term reliability. Always prioritize safety and quality, and with practice, you’ll achieve professional-grade results every time you make a connection.
Frequently Asked Questions
What is crimping a wire and why is it important?
Crimping is a method of joining a wire to a connector by deforming the connector around the wire to create a secure, gas-tight electrical and mechanical connection. This process is crucial because it provides a reliable, low-resistance connection that resists corrosion and vibration better than soldering, ensuring long-term electrical integrity for your circuit.
What essential tools do I need for effective wire crimping?
To crimp a wire effectively, you will primarily need a suitable crimping tool designed for the specific type of connector and wire gauge you are using, along with a wire stripper to properly prepare the wire ends. Occasionally, wire cutters might be necessary to trim the wire to the correct length before stripping and crimping.
How do I choose the right connector for my specific wire crimping application?
Selecting the correct connector involves matching its type (e.g., ring, spade, butt, quick disconnect) to your application’s requirements, and critically, ensuring its gauge matches the wire you intend to crimp. Also, consider the material and insulation type of the connector based on the environmental conditions and electrical load it will experience.
What are common mistakes to avoid when crimping wires?
A common mistake when crimping is using the wrong size crimp die for the terminal and wire, leading to an insecure or damaged connection. Another pitfall is not stripping enough insulation or stripping too much, which can result in exposed wire or an improper crimp that may fail prematurely.
As an Amazon Associate, I earn commission from qualifying purchases.


