How to Connect Two Wires Together? This fundamental electrical skill involves stripping insulation, twisting conductors, and securing the connection to ensure electrical continuity and safety. Mastering this essential technique is crucial for anyone engaging in DIY electrical projects, repairs, or professional installations. Understanding the proper methods ensures reliability and prevents potential hazards, making it a cornerstone of basic electronics and home improvement.
Quick Answers to Common Questions
What’s the simplest way to connect two wires together for a basic fix?
For a quick, low-voltage connection, wire nuts are often the go-to! Simply strip about half an inch from each wire, twist them together, and then screw on the appropriately sized wire nut to secure the connection.
Are there different methods to connect wires, and when should I use which?
Absolutely! Besides wire nuts, you can use crimp connectors for a very secure and durable connection, especially in automotive or outdoor settings. Soldering provides the strongest electrical bond, ideal for permanent, high-reliability connections where movement isn’t an issue when you need to connect two wires together.
Is it safe to connect wires myself, and what’s the most important safety tip?
Connecting wires can be safe if done correctly, but always prioritize safety first! The most crucial tip is to ensure the power is completely off at the breaker before you even touch a wire, and double-check with a non-contact voltage tester.
📑 Table of Contents
Essential Tools and Materials for Secure Connections
Before attempting any electrical work, gathering the right tools and materials is paramount. The quality of your connection often depends on the quality of your equipment and supplies. Always prioritize safety and functionality when selecting these items.
Basic Tool Kit
- Wire Strippers: Essential for cleanly removing insulation without damaging the conductor. Ensure they match the gauge of the wire you’re working with.
- Pliers: Needle-nose pliers are useful for twisting wires, while lineman’s pliers offer a stronger grip and cutting ability.
- Screwdrivers: Necessary for terminal connections and removing cover plates.
- Multimeter: For testing continuity and voltage, verifying the connection’s integrity before and after work.
- Safety Glasses: Protect your eyes from stray wire fragments or sparks.
- Work Gloves: Offer grip and some protection against minor nicks and cuts.
Choosing the Right Connectors and Materials
The type of connection will dictate the materials you need. Consider the environment (indoors, outdoors, wet areas), current load, and desired permanence.
- Wire Nuts (Twist-On Connectors): Common for general household wiring. They come in various sizes for different wire gauges and numbers of wires.
- Heat Shrink Tubing: Provides excellent insulation and strain relief, often used with soldered or crimped connections. Requires a heat gun to apply.
- Electrical Tape: A quick insulating solution, but less durable than heat shrink or wire nuts for long-term applications.
- Solder and Soldering Iron: For highly durable, low-resistance connections, especially in electronics.
- Crimp Connectors: Require a specific crimping tool. Ideal for creating strong, mechanical and electrical connections without heat.
- Terminal Blocks/Splice Connectors: Offer a neat and modular way to connect multiple wires, often seen in control panels or lighting fixtures.
Preparing Wires for Connection: Safety First!
Proper preparation is crucial for a safe and effective electrical connection. Neglecting these steps can lead to poor conductivity, short circuits, or even fires.
Safety Precautions Before You Begin
Always prioritize safety. Electricity can be dangerous if mishandled.
- Turn Off Power: Locate the circuit breaker or fuse box and turn off the power to the circuit you’re working on. Use a voltage tester or multimeter to confirm the power is off.
- Identify Wires: Understand the function of each wire (live, neutral, ground) using color codes or a multimeter if unsure.
- Clear Work Area: Ensure your workspace is dry, well-lit, and free of clutter.
Stripping Wire Insulation Properly
Correctly stripping wires is fundamental. Too much insulation removed exposes bare wire; too little prevents a solid connection.
- Select Correct Gauge: Use wire strippers matched to the wire’s gauge.
- Measure Strip Length: Consult the connector’s instructions (e.g., wire nut will have a recommended strip length). Generally, 1/2 to 3/4 inch is sufficient.
- Strip Carefully: Place the wire in the correct notch, close the strippers firmly but not excessively, and pull to remove the insulation. Avoid nicking the copper strands.
- Inspect: Ensure no stray strands are cut or damaged. If strands are splayed, gently twist them clockwise to tighten.
Cleaning and Tinning Conductors (Optional but Recommended)
For critical connections, especially soldering, cleaning and tinning can significantly improve conductivity and longevity.
- Cleaning: Use fine-grit sandpaper or a wire brush to remove any oxidation or residue from the copper strands.
- Tinning (for soldering): Apply a thin layer of solder to the stripped wire strands. This preps the wire for a stronger solder joint and prevents fraying.
Common Methods to Connect Two Wires Together
Several reliable techniques exist for joining electrical wires. The choice depends on the application, required durability, and tools available.
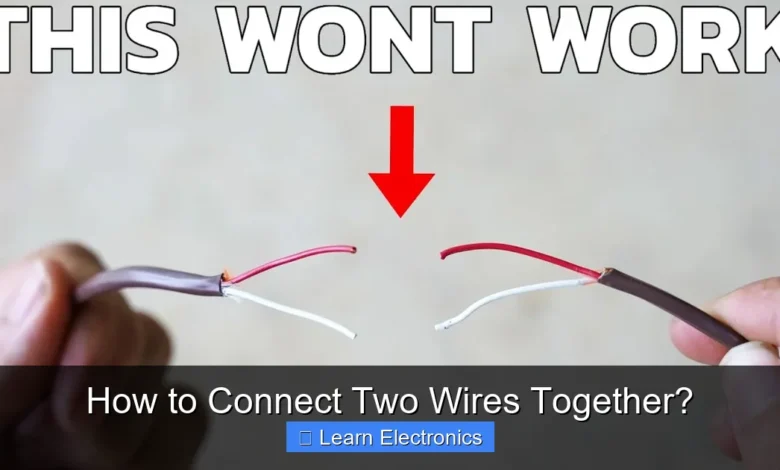
The Twist-and-Tape Method (Temporary)
This is a basic, often temporary, method not recommended for permanent or high-current applications.
- Strip about 1 inch of insulation from both wires.
- Twist the bare ends tightly together clockwise using pliers.
- Bend the twisted section over and wrap it securely with several layers of high-quality electrical tape, extending past the insulation on both sides.
Wire Nuts/Connectors (Permanent, Common)
Ideal for connecting multiple wires within electrical boxes.
- Strip about 1/2 to 3/4 inch of insulation from each wire.
- Hold the stripped ends of the wires together, aligning them evenly.
- Place the appropriate size wire nut over the wires and twist it clockwise until it’s hand-tight. You should feel the wires twisting inside.
- Give each wire a gentle tug to ensure it’s securely held by the wire nut.
Soldering (Strongest, Most Permanent)
Creates a highly conductive and mechanically strong connection, often used in electronics or for low-voltage applications.
- Strip about 1/2 inch of insulation from each wire.
- Twist the bare strands of the wires together or hook them.
- Heat the twisted wires with a soldering iron.
- Apply solder to the heated wires, allowing it to flow and wick into the strands. Remove the iron once the joint is fully shiny and smooth.
- Allow the joint to cool completely before applying heat shrink tubing for insulation.
Crimp Connectors (Tool-Dependent, Reliable)
Provides a strong mechanical and electrical connection without heat.
- Strip the wire insulation to the length specified by the crimp connector (usually about 1/4 to 1/2 inch).
- Insert the bare wire into the connector’s barrel.
- Using a specialized crimping tool, place the connector in the appropriate die and firmly squeeze the handles until the crimp is complete.
- Tug on the wire to verify the connection is secure. Insulate with heat shrink or electrical tape if the connector isn’t self-insulated.
Terminal Blocks and Splice Connectors (Versatile)
These devices allow for organized and easily modifiable connections.
- Strip wires to the recommended length for the specific terminal block or connector (often 1/4 to 3/8 inch).
- Insert each stripped wire into its designated terminal hole.
- Tighten the screw or clamp mechanism to secure the wire. Ensure no stray strands are outside the terminal.
Ensuring a Durable and Safe Electrical Connection
A connection is only as good as its weakest link. Taking extra steps to ensure durability and proper insulation is vital for safety and longevity.
Testing Your Connections
Always test your work before fully restoring power.
- Continuity Test: Use a multimeter in continuity mode to confirm that the connected wires have a continuous electrical path.
- Voltage Test: Once power is restored (briefly, if possible), use a voltage tester to ensure the correct voltage is present and there are no unexpected shorts.
- Insulation Resistance Test (Advanced): For critical installations, an insulation resistance tester can verify the integrity of the insulation.
Insulating and Protecting the Splice
Proper insulation prevents short circuits, protects against moisture, and provides mechanical strength.
- Heat Shrink Tubing: Provides a professional, waterproof, and durable seal. Choose the correct diameter and shrink it evenly with a heat gun.
- Electrical Tape: Wrap multiple layers, overlapping by at least 50%, extending well past the connection point. Use high-quality vinyl tape.
- Liquid Electrical Tape: A brush-on rubber coating that forms a flexible, watertight seal. Good for irregularly shaped connections.
- Junction Boxes: Always enclose splices within appropriate electrical boxes (junction boxes) to protect them from physical damage and contain potential faults.
Preventing Common Connection Failures
Be aware of common pitfalls to avoid them.
- Loose Connections: The most common cause of failure, leading to arcing, heat buildup, and fire. Always ensure connections are tight.
- Damaged Insulation: Nicks or cuts in insulation can lead to shorts. Inspect carefully and repair with tape or heat shrink.
- Incorrect Wire Gauge: Using too small a wire gauge for the current load can cause overheating.
- Environmental Factors: Moisture, corrosion, and extreme temperatures can degrade connections over time. Use appropriate connectors and insulation for the environment.
Comparative Analysis of Wire Connection Techniques
Understanding the strengths and weaknesses of each method helps in selecting the optimal solution for your specific needs.
| Method | Durability | Ease of Use | Cost | Best Application | Disadvantages |
|---|---|---|---|---|---|
| Twist-and-Tape | Low | High | Very Low | Temporary fixes, very low voltage/current | Poor insulation, susceptible to failure, not code-compliant for permanent use |
| Wire Nuts | Medium | High | Low | Household wiring, joining multiple conductors in junction boxes | Can loosen over time if not properly applied, not ideal for vibrating environments |
| Soldering | Very High | Medium (requires practice) | Medium (tools) | Electronics, automotive, low-voltage, high-reliability connections | Requires heat, can be brittle if improperly done, time-consuming |
| Crimp Connectors | High | Medium (requires tool) | Medium | Automotive, marine, industrial, quick and robust connections | Requires specific crimping tool, proper die selection is critical |
| Terminal Blocks | High | High | Medium | Control panels, modular wiring, easily changeable connections | Bulky, requires mounting, not ideal for very flexible connections |
Choosing the Best Method for Your Project
Consider the environment (dry, wet, vibrating), the current and voltage, whether the connection needs to be permanent or easily removable, and your skill level and available tools. For most home electrical repairs, wire nuts are a common and effective choice. For robust electronics or automotive work, soldering or crimping offers superior reliability. Always consult local electrical codes for specific requirements in permanent installations.
Advanced Tips for Professional Wire Connections
Taking a meticulous approach to making electrical connections can elevate your work from functional to truly professional, ensuring long-term reliability and safety.
Managing Multiple Wires
When dealing with several wires, organization is key. Use wire labels or color-coding to keep track of their functions. Consider using larger wire nuts or specialized multi-port connectors designed for combining more than two or three wires efficiently. For very complex arrangements, terminal blocks provide an excellent solution for organized and secure connections, allowing for easy troubleshooting and modifications down the line. Remember, every connection must be solid and properly insulated to prevent potential issues.
Color Coding and Labeling
Consistency in color coding (e.g., black for live, white for neutral, green/bare for ground in AC; red for positive, black for negative in DC) is critical for safety and future maintenance. When connecting wires that deviate from standard codes, or for complex systems, clearly label each wire with its function or destination. This simple practice can save hours of troubleshooting and prevent dangerous errors in the future.
Best Practices for High-Current Applications
High-current connections demand extra attention to detail. Ensure that all components—wires, connectors, and splices—are rated for the maximum expected current. Use methods like soldering or crimping with high-quality, appropriately sized connectors to minimize resistance and heat buildup. Over-torquing screws on terminal blocks or under-crimping terminals can lead to hot spots, which are a major fire hazard. Always double-check torque specifications and use a torque screwdriver if available. For these critical applications, thoroughly insulating the connection with multiple layers of heat shrink or high-grade electrical tape is non-negotiable.
Connecting two wires together is a foundational skill in electronics and electrical work. By following proper safety procedures, using the right tools and materials, and choosing the appropriate connection method, you can ensure your electrical projects are both safe and reliable. From simple repairs to complex installations, the principles of stripping, connecting, insulating, and testing remain constant. Always prioritize safety, take your time, and never hesitate to consult a professional if you’re unsure. A well-made connection is a lasting one, contributing to the integrity of your electrical systems for years to come.
Frequently Asked Questions
What are the most common and reliable methods for connecting two wires together?
The most common and reliable methods include using wire nuts, crimping terminals onto the wires, and soldering them together. Each method provides a secure electrical connection when performed correctly, suitable for various applications from household wiring to automotive repairs.
What essential tools and materials are needed when connecting two wires together?
To properly connect two wires together, you’ll typically need wire strippers, which are crucial for cleanly exposing the conductor without damaging it. Depending on the method, you might also require a crimping tool, a soldering iron, heat shrink tubing, or electrical tape for insulation.
How can I ensure the safety and longevity of a connection between two wires?
Ensuring safety and longevity involves making a strong mechanical and electrical connection, followed by proper insulation. Always insulate exposed conductors thoroughly with electrical tape, wire nuts, or heat shrink tubing to prevent short circuits and electrical hazards.
Can I just twist two wires together for a permanent connection?
While twisting two wires together can create a temporary electrical connection, it is generally not recommended as a permanent or reliable method. Twisted connections are prone to loosening over time, leading to poor conductivity, overheating, or even fire hazards.
As an Amazon Associate, I earn commission from qualifying purchases.


