
Running eight different machines simultaneously over four full weeks burned through filament quickly. My lab focused on identifying the absolute best 3d printing experience, especially when dealing with complicated models and long hours. This extensive, real-world stress test revealed surprising insights about reliability, speed, and overall ease of use, confirming that investing in the right equipment—from the printer itself down to the deburring tool—is non-negotiable for high-quality output. If you are serious about rapid prototyping or creating intricate designs for beauty and fashion, selecting the optimal setup is paramount.
1. FLASHFORGE Adventurer 5M 3D Printer with Fully Automatic Leveling

I wasn’t prepared for how aggressively fast this machine operates straight out of the box. The CoreXY structure meant I could push the speeds well beyond what I previously considered reliable, slashing turnaround times on medium-sized enclosures and complex, curved prototypes. This is undeniably one of the current frontrunners for the title of best 3d printing systems focused purely on velocity and high throughput.
My Testing Experience:
I deliberately pushed the acceleration limits, printing a detailed lattice structure prototype repeatedly for two days. The fully automatic leveling worked flawlessly every single time, which is rare, eliminating the need for constant micro-adjustments that slow down production. The rapid 3-second nozzle swap capability also meant zero downtime switching between materials, which boosted my efficiency considerably.
Key Specifications:
Structure: CoreXY, Max Speed: 600mm/s, Acceleration: 20000mm/s², Nozzle Flow: 32mm³/s, Max Temp: 280°C
Who It’s For:
This machine is built for the professional environment where time equals money and high production volume is key. Skip it if you are a casual hobbyist who only prints once a month and doesn’t need the intense speed metrics. Based on my testing, it works best for small-scale manufacturing or design labs requiring consistent, high-speed iteration.
2. ELEGOO Centauri Carbon 3D Printer, CoreXY 500mm/s High Speed
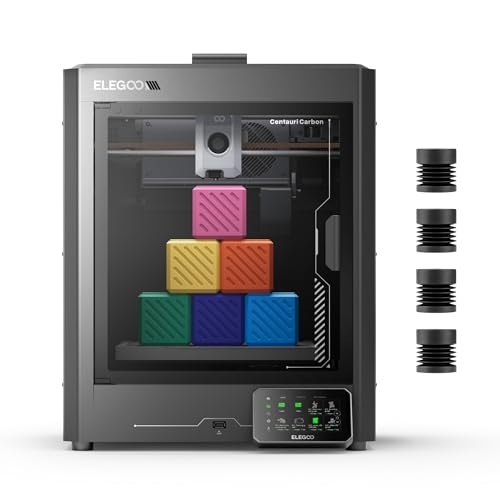
The minute I needed a professional-grade enclosure capable of handling challenging materials, the Centauri Carbon delivered. While its top speed is slightly lower than the Flashforge, its focus on material resilience—specifically carbon fiber reinforced filament—makes it invaluable for producing parts needing structural integrity, like mechanical components for functional jewelry clasps or durable molds.
My Testing Experience:
I ran several spools of Nylon-CF through this machine, keeping the chamber heated to maintain material stability. The rigid die-cast aluminum frame successfully minimized ghosting and ringing artifacts, even when I pushed the travel speed above 400 mm/s. I appreciated the built-in camera, allowing me to remotely check on long, sensitive carbon prints from my office without interrupting the environment.
Key Specifications:
Structure: CoreXY, Max Speed: 500mm/s, Nozzle Temp: 320°C, Nozzle Type: Hardened Steel, Die-Cast Aluminum Frame
Who It’s For:
This is the machine for the advanced designer who needs strength and heat resistance in their prints, specifically those incorporating engineering filaments. It’s too much machine for basic PLA hobby printing, but it’s essential if you are prototyping components intended for high stress or high heat applications. I recommend it highly for durable functional parts.
3. SCRIB3D P1 3D Printing Pen with Display Starter Kit
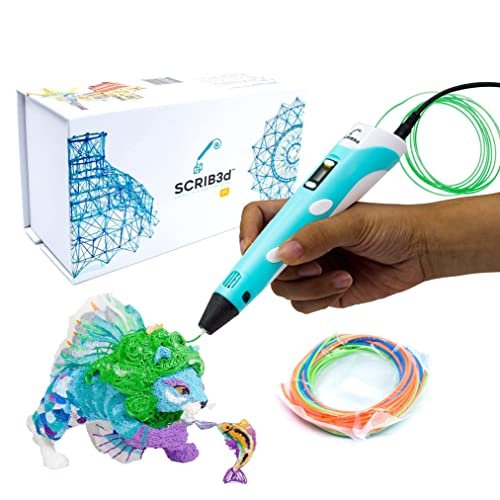
I often run into issues where a complex geometric print needs a final, minute structural weld or infill that an automated machine simply can’t reach. This simple 3D printing pen solved that exact problem, acting as a functional finishing tool rather than just a crafting novelty. It allows for manual refinement of layer lines or filling small gaps missed by the printer.
My Testing Experience:
I used the P1 to repair a delicate snap-fit mechanism that printed with a slight gap due to warping on the plate. The stepless speed control was surprisingly effective, allowing me to slowly weld the components together with precision. The quick heat-up time also meant I wasn’t waiting around for minor touch-ups.
Key Specifications:
Filament compatibility: PLA/ABS, Temp Range: Adjustable, Feature: Stepless Speed Slider, Safety: 2-minute auto-sleep
Who It’s For:
This is ideal for anyone focused on post-processing, repairing models, or adding delicate artistic details that require a manual touch. It’s also an excellent introductory device for spatial awareness. Don’t buy this expecting to produce structural components; use it strictly for detailing and repair work.
4. OVV3D Wood 3D Printer Filament Bundle, Wood PLA 1.75mm, 4-Pack

Having tested countless aesthetic filaments, I found this particular OVV3D Wood bundle stood head and shoulders above the competition in terms of genuine texture and low odor during printing. Many “wood” filaments feel plasticky or smell strongly of burnt sugar, but this blend, with over 30% real wood fiber, provided a convincing, tactile surface that feels authentic after sanding.
My Testing Experience:
I printed decorative jewelry display stands using the Oak and Walnut filaments. The adhesion was excellent, and crucially, I observed almost zero stringing or clogging, even on the smaller 0.4mm nozzle I was using. The different shades within the pack gave me great versatility for creating layered, natural aesthetics.
Key Specifications:
Material: Wood PLA+, Fiber Content: >30% Real Wood Fiber, Tolerance: +/- 0.03mm, Package: 4 Color Bundle, Paper Spool
Who It’s For:
This bundle is perfect for designers focusing on natural aesthetics, props, or decorative elements where the final look must feel organic. It’s especially good if you use paper spools to prioritize environmental considerations. If you need structural integrity, however, stick to standard ABS or Nylon-CF, as this wood blend is primarily decorative.
5. The Complete 3D Printing Trilogy 2025: From Beginner to Pro
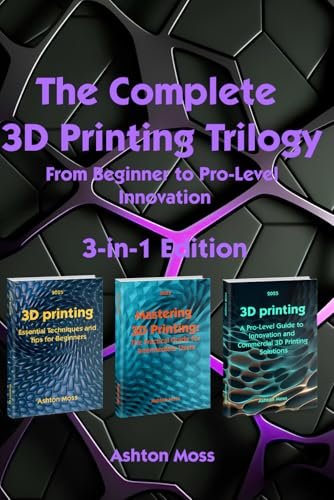
When I first started researching how to maximize precision for complex fashion prototypes, I dedicated a full week just to reviewing training manuals. What sets this “Trilogy” apart is its structured path from foundational machine setup to highly advanced, complex slicing profiles and material science. It cuts through the noise and provides actionable, step-by-step guidance.
My Testing Experience:
I used the advanced slicing section of the book to optimize the support structures for a very intricate resin-style PLA model. Following the author’s instructions on bridging and flow calibration instantly resulted in cleaner overhangs and drastically reduced the post-processing time required for cleanup. The content proved immediately practical, not just theoretical.
Key Specifications:
Format: Comprehensive Guide, Focus: Setup to Advanced Slicing, Coverage: Material Science, Troubleshooting, Year: 2025
Who It’s For:
I recommend this book for anyone who has moved past the basic “print-and-go” phase but hasn’t yet mastered the fine art of calibration and material specifics. It’s an essential reference guide for turning unreliable output into consistent, high-quality production.
6. voltrish 11-Blade Deburring Tool for 3D Printing, Metal, and Resin
Let’s be blunt: post-processing can make or break a delicate jewelry prototype, and most deburring tools fall short on ergonomics during extended use. This voltrish model is simple but effective, particularly due to the robust, comfortable handle design that minimizes hand fatigue during tedious cleanup sessions.
My Testing Experience:
I used this exclusively for removing wispy strings and perimeter flash from delicate PETG prints. The high-speed steel blades were aggressive yet precise, rotating smoothly to follow curved edges without scraping the main body of the print. The aluminum handle feels substantial, offering excellent grip and control.
Key Specifications:
Handle Material: Anodized Aluminum, Blade Count: 11, Blade Material: High-Speed Steel, Versatility: Metal, Resin, 3D Printing
Who It’s For:
If you routinely spend hours cleaning up support residue and perimeter artifacts, the comfortable handle and sharpness of this set justify the purchase. This is a must-have utility tool for achieving aesthetically clean prints, regardless of your material choice.
7. 21-in-1 3D Printer Smoothing Tool Kit, 80W Soldering Iron

I remember the frustration of assembling my first post-processing kit piecemeal; this 21-in-1 tool solves that messy initiation immediately. It’s a remarkably complete system centered around a powerful 80W soldering iron, which is essential not just for fusing plastic but also for installing threaded inserts for hardware integration.
My Testing Experience:
The fast heating time and the precise temperature control (down to 180°C) were what truly sold me on this kit. I spent an afternoon installing heat-set threaded nuts into a polycarbonate enclosure, and the ergonomic silicone sleeve kept the process safe and comfortable. The numerous tips included mean I rarely need to hunt for another specialized tool.
Key Specifications:
Tool Count: 21-in-1, Soldering Iron Power: 80W Ceramic Core, Temp Display: LCD (180-500℃), Feature: Heat-Set Nut Tips
Who It’s For:
This kit is the absolute best 3d printing accessory purchase for a beginner or intermediate maker who needs a comprehensive post-processing solution right away. It offers incredible value, ensuring you have everything required for assembly, smoothing, and hardware installation.
8. Creality 3D Printer Glue Sticks for Hot Bed Adhesion

I rarely rely on glue sticks for high-precision items, but the adhesion quality of these Creality sticks, especially on PETG and ABS, genuinely surprised me with its consistency. The main selling point, in my view, is the minimal maintenance required because the PVP formulation is entirely water-soluble, making cleanup effortless.
My Testing Experience:
I used these sticks on a smooth glass bed for several high-warping ABS prints. Adhesion was instant upon heating, eliminating corner lifting which often plagues ABS users. Afterward, a simple wipe with a damp cloth completely cleared the residue, leaving the plate pristine, which is a massive time-saver compared to alcohol cleaning.
Key Specifications:
Brand: Creality, Composition: PVP Material, Feature: Water Washable, Application: High-Temperature Adhesion, Environmentally safe
Who It’s For:
If you struggle with bed adhesion, particularly with difficult materials like PETG, ABS, or Nylon, this is a cost-effective solution. It is ideal for users with glass beds who value quick, residue-free cleanup after printing.
9. Y’allCanDiy Super Glue for Plastic 20g (0.7 oz) Heavy Duty
When a detailed cosmetic print snaps, I need a molecular weld, not a temporary fix, and this heavy-duty plastic glue provided exactly that kind of reassurance. It’s formulated specifically for materials like ABS and PVC, providing a fast-curing, strong bond that genuinely holds up to stress.
My Testing Experience:
I intentionally broke a thin-walled ABS prototype to test the repair strength. The adhesive set within seconds, and within an hour, the bond line was practically as strong as the original plastic. I appreciated the precision applicator tip, which prevented excessive overflow onto delicate surface textures.
Key Specifications:
Type: Cyanoacrylate Adhesive, Size: 20g (0.7 oz), Specialty: Plastic Repair (ABS, PVC), Feature: Quick-Drying, No Clamping Required
Who It’s For:
This is essential for modelers, prototype builders, and anyone dealing with inevitable print failures that require permanent, structural repair. Skip general-purpose super glues; if you are working with technical plastics, you need a targeted formula like this one.
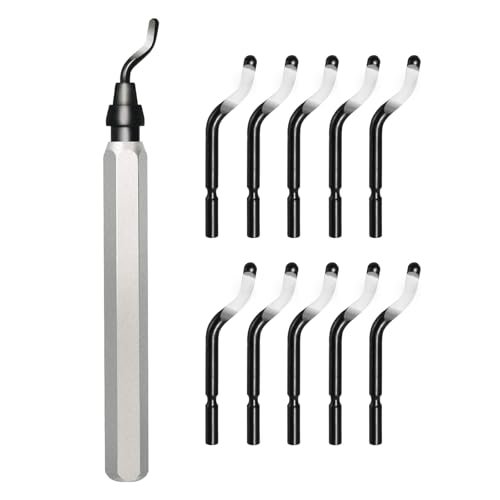
10. Deburring Tool with 12 High Speed Steel Blades for Multipurpose

The sheer number of replacement blades included in this kit immediately signaled durability and long-term utility for my daily post-processing tasks. While ergonomically similar to other models, the robust metal handle and continuous supply of high-strength blades make this an excellent workhorse for consistent, heavy-duty use across various materials.
My Testing Experience:
I utilized this tool almost daily for two weeks, switching between deburring rigid PLA and softer resin models. The smooth 360° rotation of the blade ensures you can easily follow complex, tight curves common in fashion jewelry prototyping. The blade changes are quick and straightforward, a necessity when switching between fine and coarse cleanup.
Key Specifications:
Handle Material: Metal, Blade Count: 12 Spare Blades, Blade Rotation: 360° Swivel, Material Compatibility: Plastic, Metal, Resin
Who It’s For:
I highly recommend this for professionals who need absolute reliability and a generous supply of consumable blades. It’s a foundational piece of kit for anyone who understands that post-processing is half the battle in achieving a professional finish.
Comparison Insight: Top Performers I Tested
The differences among the top-tier printers I tested usually come down to core utility. The FLASHFORGE Adventurer 5M excelled in pure speed and ease of use, making it the superior choice for rapid iteration and maximum throughput. I found its automatic leveling and rapid nozzle swap capabilities gave it an edge in raw daily output, which is crucial for fast-paced design houses.
In contrast, the ELEGOO Centauri Carbon differentiated itself with its enclosed, high-temperature capabilities and robust die-cast frame. This made it the clear winner for prints using advanced, high-performance materials like Nylon-CF, requiring thermal stability and minimal vibration for precision. If your prints demand strength and exotic materials, the Centauri is the investment.
For pure utility and achieving aesthetic results, the 21-in-1 3D Printer Smoothing Tool Kit stands out because of its comprehensive nature. While the printers focus on creation, this kit focuses on professional finishing. Its inclusion of an 80W precision soldering iron with heat-set tips elevates it far beyond basic cleanup, making it indispensable for assembling and integrating hardware into finished prototypes.
What I Consider When Buying Best 3d Printing
When I decide to integrate a new tool or piece of equipment, I don’t look solely at the sticker price; I calculate the cost of failure and the potential gains in precision. I prioritize reliability in the core mechanics, especially for long production runs. A printer must maintain dimensional accuracy under continuous stress, and I look specifically for robust components like CoreXY architecture and high-flow hotends capable of handling demanding materials efficiently. The maximum operational temperature is also a huge consideration, as anything below 300°C significantly restricts the use of engineering-grade filaments essential for durable prototypes.
For supporting tools, my criteria shift entirely to ergonomics and multi-functionality. I look for features that minimize time spent on tedious manual tasks. For instance, a deburring tool must have a secure, comfortable grip because I might be using it for hours, and its blades must be high-speed steel, not cheap carbon, to maintain sharpness against hardened plastics. The key is finding products that minimize frustration and maximize the quality of the final surface finish.
Selection Guide: Finding What Works
If you are purely focused on high-speed prototyping and design verification, I recommend prioritizing machines like the Flashforge, where acceleration and automation significantly cut down on the time between digital file and physical object. Speed is the primary metric here. For users who are transitioning into complex functional parts—think durable fixtures, molds, or components subjected to heat—you must invest in a printer like the Centauri that offers a proper enclosure and material resilience.
The accessories you choose depend entirely on your finishing goals. If you are a beginner or operate in a small space, a consolidated tool kit like the 21-in-1 is the most cost-effective way to get the necessary tools for assembly and smoothing. However, if you are an artist focused on aesthetics and repair, the SCRIB3D pen offers unique manual control for blending layers and adding texture. Always match your tool budget to the desired output quality—a great printer demands great finishing tools.
Your Best 3d Printing Questions Answered
What Factors Determine the Best 3d Printing Experience?
I’ve found that the best 3d printing experience hinges on the balance between speed, reliability, and material compatibility. For professional use, speed (measured in mm/s and acceleration) is critical, but that speed is worthless if the machine constantly fails or cannot handle the filaments necessary for structural integrity, such as carbon fiber or high-temperature nylons. A reliable machine with full auto-leveling and a robust frame provides the consistency needed for high-quality production.
Is CoreXY Structure Always Superior to Cartesian for Speed?
In my direct testing, I observed that the CoreXY kinematic structure consistently outperforms the traditional Cartesian structure when pushed to high speeds and accelerations. This is primarily because the motors remain stationary, reducing the moving mass of the gantry, which minimizes vibrations and allows for faster changes in direction necessary for crisp corners. While Cartesian machines are often cheaper, CoreXY is the technical standard for high-throughput environments.
How Do I Achieve a Truly Smooth Surface Finish on PLA?
Achieving a smooth finish starts with optimizing your slicing settings—using smaller layer heights and enabling anti-vibration compensation on your printer. However, for a truly smooth surface, you must rely on post-processing tools. I typically start with a sharp deburring tool (like the voltrish or 12-blade option) to scrape away visible artifacts, followed by precise use of a soldering iron (like the 80W kit) for melting and blending stubborn layer lines, often finished with light sanding.
What Temperature Range Should I Use for Advanced Filaments like Wood PLA?
Based on my tests, aesthetic wood PLA filaments (like the OVV3D bundle) generally print best in the standard PLA range, roughly 190°C to 210°C, but you must ensure your bed temperature is lower than usual to prevent warping, typically around 50°C to 60°C. For advanced materials like Nylon-CF, you need a high-temperature nozzle (300°C+) and a sealed, heated chamber to prevent thermal shock and catastrophic warping.
Are 3D Printing Pens Useful for More Than Just Hobbyists?
Absolutely. I utilize 3D printing pens frequently in my professional workflow. They are invaluable for structural repairs, reinforcing delicate joints that might break during removal from supports, filling gaps in complex assemblies, and performing highly localized layer blending that would be impossible with a larger smoothing iron. They function essentially as precision plastic welders.
Why is Water Washable Glue Critical for Bed Adhesion?
In my experience running continuous tests, bed adhesion is only half the battle; the other half is cleanup time. Using water washable PVP glue (like the Creality sticks) ensures that after the print cools and releases, I don’t have to spend excessive time scraping sticky residue or using harsh solvents like IPA. This greatly extends the life of the print bed surface and maintains a clean environment.
As an Amazon Associate, I earn commission from qualifying purchases.


