How to Repair Garage Door Sensor? involves a systematic approach to identify and fix common issues like misalignment, wiring problems, or obstructed beams. Addressing these problems ensures your garage door operates safely and efficiently, preventing potential accidents. This method often requires basic tools and a careful eye, making it a manageable DIY task for many homeowners.
Quick Answers to Common Questions
My garage door sensors seem to be blocked, but I don’t see anything. What should I do first?
Often, a dirty lens can mimic an obstruction. Gently wipe the lenses on both your garage door sensors with a soft, clean cloth to ensure a clear path for the beam.
My garage door sensor lights are blinking. What does that mean, and how do I fix it?
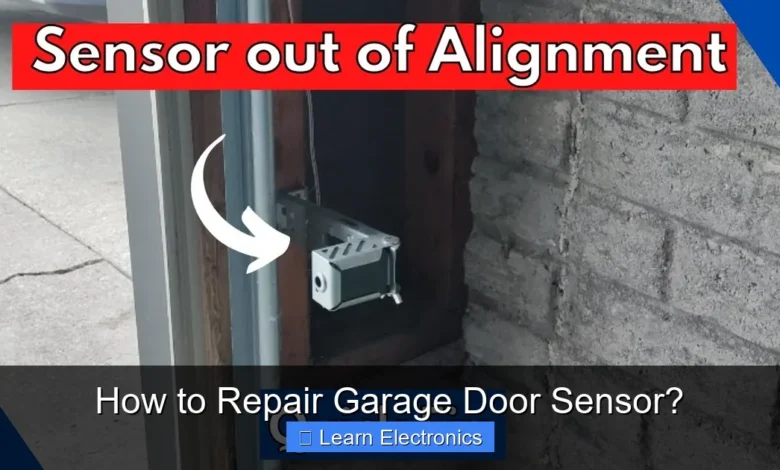
Blinking lights usually indicate your garage door sensors are misaligned. Carefully adjust each sensor until both indicator lights glow steady, ensuring they face each other directly across the door opening.
My garage door sensor lights are completely off. Is it broken?
Not necessarily! First, check for any power disruptions or loose wiring connecting to your garage door sensor. Also, ensure there isn’t a physical object, even a small cobweb, directly blocking the safety beam.
📑 Table of Contents
- Understanding Garage Door Safety Sensors
- Essential Tools and Safety Precautions for Sensor Repair
- Step-by-Step Guide to Troubleshooting Garage Door Sensors
- Implementing Solutions: Fixing Common Sensor Problems
- Common Garage Door Sensor Issues and Quick Fixes
- Advanced Sensor Diagnostics and When to Call a Professional
- Preventative Maintenance for Optimal Sensor Performance
Understanding Garage Door Safety Sensors
Garage door safety sensors are crucial components of any modern garage door opener system, designed to prevent the door from closing on an obstruction. These photoelectric eyes work by projecting an invisible infrared beam across the garage door opening. If the beam is broken while the door is closing, the opener automatically reverses direction, preventing injury or damage. Understanding their function is the first step in addressing any issues.
The Role of Photoelectric Sensors
Typically mounted 4-6 inches above the garage floor on either side of the door track, the sensors consist of a transmitter and a receiver. The transmitter emits the infrared light, and the receiver detects it. An indicator light on each sensor usually confirms their operational status – often a green light on the receiver and an amber light on the transmitter. When these lights flicker, go out, or if the door refuses to close, it’s a clear sign that the sensor system requires attention. This critical safety feature is mandated by law for all garage door openers manufactured after 1993.
Common Causes of Sensor Malfunctions
Malfunctions in garage door sensors can stem from several common issues. The most frequent problem is misalignment, where one sensor is knocked out of line with the other, breaking the infrared beam. Other causes include obstructed beams from debris like leaves or cobwebs, damaged wiring from rodent activity or accidental cuts, dirty or scratched sensor lenses, or even direct sunlight interfering with the receiver. Understanding these common culprits simplifies the diagnostic process for repairing garage door sensors.
Essential Tools and Safety Precautions for Sensor Repair
Before attempting any garage door sensor repair, it’s vital to gather the necessary tools and prioritize safety. Working with garage doors involves springs and electrical components, so caution is paramount.
Required Tools
- Screwdriver Set: For adjusting mounting brackets and tightening terminal screws.
- Wire Strippers/Cutters: Needed for repairing or replacing damaged wiring.
- Multimeter: Useful for advanced electrical diagnostics, checking continuity and voltage.
- Clean Cloth and Mild Cleaner: For cleaning sensor lenses.
- Pencil or Marker: For marking sensor positions.
- Level: To ensure accurate sensor alignment.
- Measuring Tape: For checking sensor height.
- Step Ladder: For reaching mounted sensors safely.
Safety First
Always disconnect power to the garage door opener before working on electrical components. This prevents accidental electrocution or unexpected door movement. Wear appropriate safety glasses and gloves, and ensure the garage door is in the fully open position or secured with vice grips on the track before performing any manual adjustments or repairs that might involve moving parts. Never attempt to disengage the emergency release cord if the door is open, as this could lead to the door crashing down.
Step-by-Step Guide to Troubleshooting Garage Door Sensors
Effectively troubleshooting garage door sensors requires a systematic approach. By following these steps, you can pinpoint the exact cause of the problem and address it efficiently.
Visual Inspection for Obstructions and Alignment
Begin by visually inspecting both sensors. Look for any physical obstructions blocking the beam, such as dirt, leaves, spiderwebs, or even a child’s toy. Clear any debris you find. Next, check the alignment. The sensors should be directly facing each other. Often, one sensor is simply nudged slightly out of position. Look for flickering or off indicator lights. If a light is off, it usually indicates a misalignment or an obstruction preventing the beam from reaching the receiver. Use a level to ensure both sensors are at the same height and pointing straight across.
Checking Power and Indicator Lights
Confirm that both sensors are receiving power. Most sensors have an LED indicator light. The transmitter typically has an amber light, and the receiver a green light. Both should be illuminated steadily when properly aligned and powered. If one light is off or flickering, it points to either a power issue, a wiring problem, or a persistent misalignment. Ensure the power to the opener is on and test other garage door functions to rule out a general power outage.
Examining Wiring Connections
Faulty wiring is a common culprit. Carefully inspect the wires running from the sensors to the garage door opener motor unit. Look for any visible damage, such as cuts, fraying, or chew marks from pests. Check the connections at both the sensor ends and the terminal screws on the opener unit. Loose connections are a frequent cause of intermittent sensor failures. Gently tug on the wires to ensure they are securely fastened. If wires appear corroded or damaged, they may need to be stripped and reconnected, or entirely replaced.
Testing Sensor Functionality
Once you’ve cleared obstructions, checked alignment, and examined wiring, test the sensors. Stand in the path of the door and attempt to close it. If the door starts to close and then reverses, the sensors are likely detecting you, indicating they are functioning. If the door doesn’t move at all, or only moves a few inches before stopping, there’s still an issue. Try breaking the beam with your foot or a small object to confirm the reversal mechanism is active. This testing helps confirm if the basic safety feature is engaging, or if the fault lies elsewhere in the sensor circuit.
Implementing Solutions: Fixing Common Sensor Problems
Once the troubleshooting steps have identified the issue, you can move on to fixing garage door sensors. The solutions vary depending on the root cause.
Aligning Misaligned Sensors
This is often the quickest fix. Loosen the wing nut or screw holding the sensor bracket in place. Gently adjust the sensor until its indicator light becomes solid (green on the receiver, amber on the transmitter). You might need to move it slowly up, down, or side-to-side until the light stabilizes. Have someone on the other side of the garage communicate when the beam is connected. Once the light is steady, tighten the wing nut or screw. Test the door by opening and closing it. Sometimes, just nudging the sensor back into place can complete this sensor repair.
Addressing Wiring Issues
If you found damaged or corroded wiring, you’ll need to repair it. For minor damage, you can carefully strip the insulation back and use wire nuts to reconnect the wires securely, ensuring proper polarity. For extensive damage, it’s best to replace the entire length of wire from the sensor to the opener. Always use low-voltage bell wire, typically 22-gauge, twisted pair. Ensure all connections are tight and insulated to prevent shorts. Disconnect power to the opener before working with any wiring.
Replacing Damaged Components
In cases where a sensor is physically cracked, has water damage, or shows no signs of life after troubleshooting power and wiring, it might need replacement. Garage door sensor kits are readily available and usually come with a pair of sensors, new wires, and mounting brackets. Follow the manufacturer’s instructions for installation. Ensure the replacement sensors are compatible with your garage door opener model. This aspect of the sensor repair process is often straightforward if the wires are in good condition.
Cleaning Dirty Sensor Lenses
Dust, dirt, and grime can accumulate on sensor lenses, weakening the infrared beam. Use a soft, clean cloth and a mild glass cleaner to gently wipe the lenses on both the transmitter and receiver. Avoid abrasive materials that could scratch the plastic. Ensure they are completely dry before retesting. This simple maintenance step can often resolve intermittent sensor issues.
Common Garage Door Sensor Issues and Quick Fixes
Here’s a quick reference table for common sensor problems and their immediate solutions:
| Problem Symptom | Likely Cause | Quick Fix |
|---|---|---|
| Door won’t close, opener lights flash | Misaligned sensors | Adjust sensor angle until indicator lights are solid. |
| Door stops/reverses halfway down | Obstruction in beam path | Clear debris (leaves, cobwebs) from sensor area. |
| One or both sensor lights are off | No power, damaged wire, or faulty sensor | Check wiring connections, inspect for damage; consider sensor replacement if wires are good. |
| Door only closes when holding wall button | Sensor malfunction (safety feature bypass) | Troubleshoot alignment, wiring, and obstructions. |
| Sensor lights flicker intermittently | Loose wiring connection or unstable mounting | Tighten wire terminals, secure sensor brackets. |
Advanced Sensor Diagnostics and When to Call a Professional
While most sensor issues can be resolved with basic troubleshooting, some situations might require more advanced diagnostics or the expertise of a professional.
Multimeter Testing
For persistent electrical problems, a multimeter can be invaluable. You can use it to test for continuity in the sensor wires, ensuring there are no breaks. You can also check for voltage at the sensor terminals if you suspect a power supply issue from the opener unit. Refer to your garage door opener manual for specific voltage ratings. If no voltage is present or continuity is broken, the issue might be with the main logic board of the opener or a severed wire. Always exercise caution when testing live electrical circuits.
Recognizing Irreparable Damage
There are instances where a DIY repair might not be sufficient. If sensors have suffered significant physical damage (e.g., impact from a car), water damage leading to corrosion within the unit, or if after all troubleshooting, they still fail to operate, replacement is the best option. Additionally, if the issue points to a fault in the main logic board of the garage door opener itself, it’s usually beyond the scope of a typical homeowner’s repair capabilities. Attempting complex electrical repairs without proper knowledge can be dangerous and void warranties.
When you’ve exhausted all troubleshooting steps and still can’t resolve the problem, or if you’re uncomfortable performing any of the electrical work, it’s time to call a qualified garage door technician. They have specialized tools and expertise to diagnose and fix complex issues safely and efficiently. Investing in professional service ensures the integrity and safety of your garage door system, providing peace of mind.
Preventative Maintenance for Optimal Sensor Performance
Regular maintenance can significantly extend the life of your garage door sensors and prevent future issues. A little proactive effort goes a long way in keeping your garage door operating smoothly and safely.
Regular Cleaning and Inspection
Make it a habit to clean your sensor lenses every few months. Dust, dirt, and spiderwebs are common culprits for beam obstruction. Use a soft, damp cloth for cleaning. While cleaning, visually inspect the sensors and their brackets. Ensure they are securely mounted and haven’t been knocked out of alignment. Check the wires for any signs of wear or damage. This routine inspection can catch minor issues before they become major problems, keeping the sensor repair process minimal.
Proper Wiring Management
Ensure all sensor wiring is neatly routed and secured along the garage door tracks or wall. Avoid leaving loose wires dangling where they can be snagged, chewed by rodents, or accidentally cut. Use cable ties or staples (being careful not to pierce the wire insulation) to keep wires taut and out of the way. Proper wire management not only improves aesthetics but also protects the integrity of the electrical connections to your safety sensors.
Repairing garage door sensors is a manageable task for many homeowners, significantly contributing to the safety and functionality of their garage door system. By understanding the basics, systematically troubleshooting, and implementing appropriate solutions, you can often restore your garage door’s operation with minimal fuss. Remember that consistent preventative maintenance is key to avoiding future sensor issues. However, never hesitate to seek professional help if you encounter problems beyond your comfort level to ensure the safety and longevity of your garage door.
Frequently Asked Questions
What are the common signs that my garage door sensor is malfunctioning?
Common signs include the garage door refusing to close completely, closing partway then reversing, or the opener lights flashing when you try to close it. You might also notice that the indicator lights on the sensors themselves are off, flickering, or solid but the door still won’t close.
How do I check if my garage door safety sensors are properly aligned?
To check alignment, locate the small indicator lights on each sensor; one should be steadily lit, indicating a clear beam connection. If a light is off or flickering, gently adjust the sensor bracket until the light turns solid, ensuring they are pointed directly at each other.
Can dirt or debris affect my garage door sensor’s performance, and how do I clean it?
Yes, dirt, dust, spiderwebs, or even leaves can obstruct the infrared beam between the sensors, preventing the door from closing. To clean them, simply use a soft, dry cloth to gently wipe the lenses of both sensor units.
What should I do if I suspect a wiring problem with my garage door sensor?
First, visually inspect the wires running from the sensors to the garage door opener for any cuts, fraying, or loose connections. If you find any damage, you may need to strip and reattach the wire, or in some cases, replace the entire wiring segment.
When should I consider replacing my garage door safety sensors instead of repairing them?
Consider replacing your sensors if they have sustained physical damage, such as a broken lens or housing, or if troubleshooting steps like alignment and cleaning don’t resolve the issue. If the indicator lights never illuminate or if the sensors are very old and unreliable, replacement is often the most effective solution.
Should I call a professional if I can’t fix my garage door sensor myself?
Yes, if you’ve tried basic troubleshooting steps like cleaning, alignment, and checking simple wiring connections without success, it’s best to call a professional. A qualified technician can accurately diagnose more complex electrical issues, test components, and ensure your garage door system operates safely and correctly.
As an Amazon Associate, I earn commission from qualifying purchases.