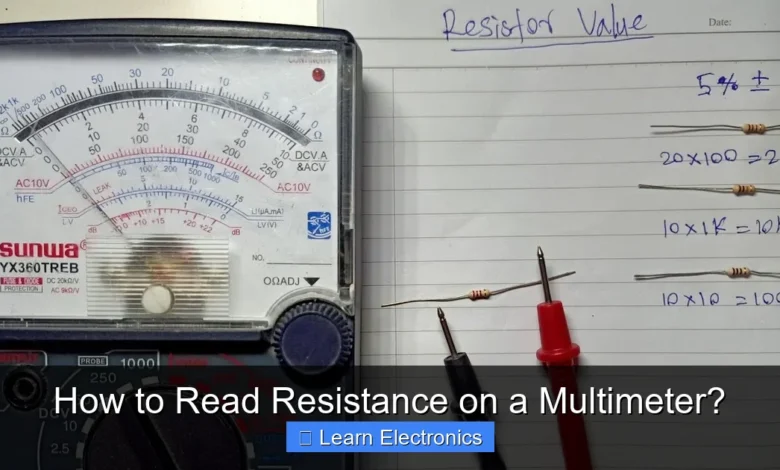
How to Read Resistance on a Multimeter? This fundamental skill is essential for anyone working with electronics, allowing you to measure the opposition to current flow in a component or circuit. Mastering this technique provides crucial insights into component health and circuit functionality.
Understanding the process involves setting up your multimeter correctly, making proper connections, and accurately interpreting the displayed values. This method is invaluable for diagnosing issues, verifying component specifications, and ensuring electrical safety.
Quick Answers to Common Questions
How do I set up my multimeter to read resistance?
To read resistance on a multimeter, turn the dial to the Omega symbol (Ω), which represents ohms. Then, plug the black probe into the COM jack and the red probe into the VΩmA jack.
What do the different resistance ranges (like 200, 2k, 200k) mean?
These numbers indicate the maximum resistance value your multimeter can measure at that specific setting. It’s usually best to start with a higher range if you don’t know the approximate resistance, then adjust downwards for a more precise reading.
My multimeter just shows “OL” when I try to read resistance. What does that mean?
“OL” stands for Over Limit or Open Loop, meaning the resistance you’re trying to read is higher than the selected range or it’s an open circuit. Try switching to a higher resistance range on your multimeter, or it could indicate a break in the circuit you’re testing.
📑 Table of Contents
- Understanding Electrical Resistance and Multimeters
- Preparing Your Multimeter for Accurate Resistance Measurement
- How to Read Resistance on a Multimeter: A Step-by-Step Guide
- Interpreting Your Resistance Readings and Units
- Troubleshooting Common Issues When You Read Resistance on a Multimeter
- Practical Applications and Real-World Examples
- Conclusion
Understanding Electrical Resistance and Multimeters
Before diving into the practical steps, it’s vital to grasp what resistance is and how a multimeter functions in measuring it. Electrical resistance is a measure of the opposition to the flow of electric current in an electrical circuit. It is measured in Ohms (Ω), named after German physicist Georg Simon Ohm.
A multimeter is a versatile electronic measuring instrument that can combine several measurement functions in one unit. For resistance, it typically functions as an ohmmeter. It works by sending a small, known current through the component being tested and then measuring the voltage drop across it. Using Ohm’s Law (V=IR), the multimeter calculates and displays the resistance.
Types of Multimeters
- Digital Multimeters (DMMs): These are the most common type, featuring a digital display that shows precise readings. They are generally easier to read and often have auto-ranging capabilities.
- Analog Multimeters: These use a needle and a scale for readings. While some professionals prefer them for observing trends, they can be harder to read accurately, especially for beginners.
For most modern applications, a digital multimeter is recommended due to its ease of use and accuracy.
Preparing Your Multimeter for Accurate Resistance Measurement
Proper preparation is key to obtaining accurate resistance readings. This involves inspecting your equipment and setting up the multimeter correctly.
Safety First
Always prioritize safety when working with electronics. Before measuring resistance, ensure the circuit or component you are testing is completely powered off and discharged. Resistance measurements must always be performed on de-energized circuits. Measuring resistance on a live circuit can damage your multimeter and pose a significant safety risk.
Multimeter Setup
- Insert Test Leads: Connect the black test lead into the “COM” (common) jack. Connect the red test lead into the jack labeled with “Ω” (Ohms) or sometimes “VΩmA” or “mA”. Avoid using the “10A” or “A” jack, as those are typically for high-current measurements.
- Select Ohms Function: Turn the multimeter’s rotary dial to the resistance (Ω) setting. On some multimeters, you might see several Ohm ranges (e.g., 200Ω, 2kΩ, 20kΩ, 2MΩ).
- Choose Appropriate Range (Manual Ranging Multimeters): If your multimeter is manual ranging, you’ll need to select a range that is higher than the expected resistance. If you don’t know the approximate resistance, start with a high range and decrease it until you get a stable reading. If the reading shows “OL” (overload) or “1.”, it means the resistance is higher than the selected range, and you should switch to a higher one.
- Auto-Ranging Multimeters: Most modern DMMs are auto-ranging, meaning they automatically select the appropriate range for the measurement, simplifying the process.
- Zero the Multimeter (Optional but Recommended): Touch the two test leads together. The display should read very close to 0Ω (ideally 0.0Ω). This checks the internal resistance of the leads and ensures accuracy. If it doesn’t read zero, some meters have a “relative” or “zero” button to subtract the lead resistance.
How to Read Resistance on a Multimeter: A Step-by-Step Guide
Once your multimeter is prepared and the circuit is de-energized, you can proceed with the measurement.
Performing the Measurement
- Isolate the Component: For the most accurate reading, it’s best to remove the component from the circuit entirely. If not possible, ensure at least one leg of the component is disconnected from the circuit to prevent parallel paths that can skew your reading.
- Touch Test Leads: Place the tip of one test lead on one terminal of the component and the tip of the other test lead on the other terminal. It doesn’t matter which lead goes on which terminal for resistance measurement, as resistance is non-polar.
- Read the Display: Observe the reading on your multimeter’s display. The number displayed, along with the unit (Ω, kΩ, MΩ), is the resistance value.
- Stability: Wait for the reading to stabilize. Small fluctuations are normal, especially for low resistances or in the presence of electrical noise.
Measuring Specific Components
- Resistors: Simply connect the leads across the two ends. Compare the reading to the resistor’s marked value (often indicated by color bands).
- Wires/Cables: Measure the resistance from one end of a wire to the other. A good wire should have very low resistance (close to 0Ω). High resistance indicates a break or poor connection.
- Switches: Measure resistance across the terminals. A closed switch should read very low resistance (near 0Ω), while an open switch should read “OL” or infinite resistance.
- Fuses: A good fuse should have very low resistance. An “OL” reading means the fuse is blown.
Interpreting Your Resistance Readings and Units
Understanding the units and what the numbers mean is crucial for effective troubleshooting and design.
Understanding Resistance Units
Resistance is measured in Ohms (Ω). However, you’ll frequently encounter larger units:
- Ohms (Ω): Basic unit.
- Kilohms (kΩ): 1 kΩ = 1,000 Ω.
- Megohms (MΩ): 1 MΩ = 1,000,000 Ω.
Your multimeter will typically display the appropriate prefix (k or M) alongside the numerical value. For example, “4.7 kΩ” means 4,700 Ohms.
What the Readings Indicate
- Close to 0Ω: This indicates a very low resistance, often suggesting a short circuit, a closed switch, or a good conductor.
- Specific Value: This is the expected resistance of a component. For resistors, it should match the marked value within a certain tolerance. For other components, it indicates their functional resistance.
- “OL” or “1.” (Overload/Infinite): This indicates a very high resistance, effectively an open circuit. This could mean a broken wire, an open switch, a blown fuse, or simply that the component’s resistance is higher than the selected range on a manual multimeter.
Example Resistance Values for Common Components
Here’s a quick reference for typical resistance characteristics:
| Component | Expected Resistance (Ideal) | Notes |
|---|---|---|
| Good Wire/Trace | < 1 Ω | Low resistance indicates good conductivity. |
| Blown Fuse | OL (Infinite) | No continuity. |
| Good Fuse | < 1 Ω | Good continuity. |
| Closed Switch | < 1 Ω | Current flows freely. |
| Open Switch | OL (Infinite) | No current flow. |
| Resistor (e.g., 1kΩ) | 1 kΩ ± Tolerance | Should match marked value (color code or label). |
Troubleshooting Common Issues When You Read Resistance on a Multimeter
Even with careful preparation, you might encounter issues. Here’s how to troubleshoot them.
Common Problems and Solutions
- Fluctuating Readings:
- Cause: Poor contact between test leads and component, static electricity, or resistance of your own body.
- Solution: Ensure firm, clean contact. Avoid touching both leads or component terminals with your bare hands, as your body has resistance that can affect the reading, especially for high-value components (above 10kΩ).
- “OL” or Infinite Reading on a Component You Expect to Have Resistance:
- Cause: Component is genuinely open (broken), or multimeter range is too low (for manual ranging meters).
- Solution: If manual ranging, increase the range. If still “OL”, the component is likely faulty.
- 0Ω Reading on a Component You Expect to Have Resistance:
- Cause: Component is shorted (faulty), or there’s a parallel path in the circuit.
- Solution: Disconnect the component fully from the circuit and re-test. If it still reads 0Ω, the component is shorted.
- Inaccurate Readings:
- Cause: Dirty test leads, low multimeter battery, or uncalibrated multimeter.
- Solution: Clean lead tips. Replace battery. For critical applications, consider professional calibration.
Tips for Accuracy
- Clean Contacts: Ensure the component terminals and test lead tips are clean and free of corrosion.
- Stable Connection: Hold the probes steady against the component.
- Test Leads Zeroing: Always zero your leads by touching them together to subtract their inherent resistance, especially for very low resistance measurements.
Practical Applications and Real-World Examples
Measuring resistance isn’t just an academic exercise; it has numerous practical applications in electronics and beyond.
Circuit Diagnosis and Repair
- Checking Resistor Values: Verify that a resistor’s actual value matches its specified value (from color codes or markings). A significant deviation might indicate a faulty component.
- Continuity Testing: Check if a wire, cable, or circuit trace has a break (open circuit) or a short circuit. A good path shows low resistance, while a break shows “OL”. This is crucial for troubleshooting connectivity issues.
- Component Health Check: Test components like fuses, switches, and even some types of sensors (e.g., thermistors or photoresistors, whose resistance changes with temperature or light) to ensure they are functioning within their expected resistance range.
- Identifying Shorts: A dead short in a circuit will often present as very low resistance between two points that should normally have high resistance. This can help pinpoint problematic areas.
Component Selection and Verification
- When building or repairing circuits, you can use a multimeter to verify the resistance of components before soldering them in place, preventing costly mistakes.
- Comparing a known good component’s resistance to a suspicious one can quickly identify defects.
By regularly practicing this essential skill, you will gain confidence in diagnosing and repairing electronic circuits, making your electronics projects smoother and more successful.
Conclusion
Mastering how to read resistance on a multimeter is a cornerstone skill for anyone involved in electronics. From basic circuit continuity checks to in-depth component diagnostics, this measurement technique is indispensable. By following the steps outlined, ensuring safety, and understanding how to interpret your readings, you can effectively troubleshoot, verify, and maintain a wide array of electronic devices. Practice makes perfect, so don’t hesitate to measure resistance on various components to build your confidence and expertise in this fundamental aspect of electronics.
Frequently Asked Questions
What is electrical resistance and why measure it with a multimeter?
Electrical resistance is a measure of the opposition to the flow of electric current in a circuit or component. Measuring resistance with a multimeter helps identify faulty components, check continuity, and verify circuit specifications. It’s a fundamental test for troubleshooting electronics and electrical systems.
How do I prepare my multimeter to measure resistance?
To prepare your multimeter, first turn the rotary dial to the resistance setting, typically indicated by the Greek letter Omega (Ω). Select an appropriate range if your multimeter is manual-ranging; otherwise, an auto-ranging multimeter will adjust automatically. Ensure the black probe is connected to the “COM” jack and the red probe to the “VΩmA” or “Ω” jack.
What do the symbols Ω, kΩ, and MΩ mean on a multimeter’s resistance setting?
These symbols represent different units of resistance. Ω stands for Ohms, which is the base unit of resistance. kΩ means kilo-Ohms (1,000 Ohms), and MΩ means mega-Ohms (1,000,000 Ohms). Your multimeter uses these prefixes to display resistance values across a wide range, indicating the magnitude of the measured resistance.
How do I connect the multimeter probes to measure resistance on a component?
Before connecting the probes, ensure the component or circuit is completely de-energized and isolated from any power source. Touch one multimeter probe to each end or terminal of the component you wish to measure. The polarity of the probes typically does not matter when measuring resistance.
How do I interpret the resistance reading displayed on my digital multimeter?
Once the probes are connected, the multimeter’s display will show a numerical value followed by the unit (e.g., Ω, kΩ, MΩ). This is your resistance reading. Compare this value to the expected resistance for the component, often found in datasheets or circuit diagrams, to determine if it is functioning correctly.
What does “OL” or “1” mean when my multimeter is measuring resistance?
If your multimeter displays “OL” (Over Limit) or a “1” on the far left of the display, it indicates an open circuit or a resistance value higher than the multimeter’s maximum measurable range. This typically means there’s a break in the circuit, or the component has extremely high resistance, often indicating a fault.
As an Amazon Associate, I earn commission from qualifying purchases.


