How to Stop a Ceiling Fan from Making Noise? The direct answer often involves identifying and rectifying loose components, balancing blades, or lubricating the motor. Implementing this technique not only restores quiet operation but also extends the lifespan of your appliance. This comprehensive guide will walk you through various methods to address common fan noise issues effectively.
A noisy ceiling fan can be a constant annoyance, disrupting the peace of your home and indicating potential underlying problems. Addressing these sounds promptly can prevent further damage and improve your comfort. This approach often requires a systematic inspection and some basic DIY skills.
Quick Answers to Common Questions
My ceiling fan is wobbling and making noise. What’s the easiest fix?
Often, a wobbly fan just needs balancing! Use a fan balancing kit to correct uneven blades, or simply tighten any loose screws on the blade arms or mounting bracket to help stop a ceiling fan from making noise.
I hear a clicking or grinding sound from my fan, what should I check?
A clicking sound usually points to loose screws on the blade attachments, motor housing, or light kit. Make sure everything is snug to eliminate that annoying noise.
Why is my ceiling fan humming even on low settings?
A persistent hum can be caused by an incompatible dimmer switch or loose electrical connections. If it’s not the dimmer, the motor itself might be starting to wear out.
📑 Table of Contents
- Understanding How to Stop a Ceiling Fan from Making Noise by Identifying Culprits
- Safety First: Before You Begin Any Repairs
- Troubleshooting Loose Components and Securing Hardware
- Balancing the Blades for Quieter Operation
- Addressing Motor Issues and Lubrication
- Electrical and Mounting Concerns
- Troubleshooting Table: Quick Fixes for Common Noises
- Conclusion
Understanding How to Stop a Ceiling Fan from Making Noise by Identifying Culprits
Ceiling fans can produce a variety of noises, from subtle hums and clicks to distracting wobbles and grinding sounds. pinpointing the exact source is the first critical step in the process of silencing your fan. Different noises often point to different problems, requiring distinct solutions. A careful observation of the fan’s behavior, especially when it starts making noise, can offer significant clues.
Common Types of Fan Noise:
- Clicking or Ticking: Often indicates loose screws, interfering wiring, or issues with the pull chain mechanism.
- Humming: Typically an electrical issue, possibly related to the speed control, dimmer switch, or motor itself.
- Grinding or Whirring: Usually points to dry bearings, a failing motor, or internal component friction.
- Wobbling: Almost always a sign of unbalanced blades, loose mounting, or a bent blade holder.
- Rattling: Implies loose hardware somewhere in the fan assembly, such as canopy screws or blade attachment screws.
Safety First: Before You Begin Any Repairs
Working with any electrical appliance requires strict adherence to safety protocols. Before attempting to fix your noisy ceiling fan, ensure you take the necessary precautions to prevent injury or electrical shock. This step is non-negotiable for any home electronics project.
Essential Safety Precautions:
- Turn Off Power at the Breaker: Locate the circuit breaker panel for your home and switch off the breaker that controls the ceiling fan circuit. Do not rely solely on the wall switch, as power might still be present.
- Confirm Power is Off: Use a non-contact voltage tester to ensure no power is flowing to the fan’s wiring.
- Use a Sturdy Ladder: Ensure your ladder is stable and placed on a level surface. Have someone spot you if possible.
- Wear Safety Glasses: Protect your eyes from falling dust or debris, especially when working above your head.
- Gloves: Consider wearing work gloves to protect your hands.
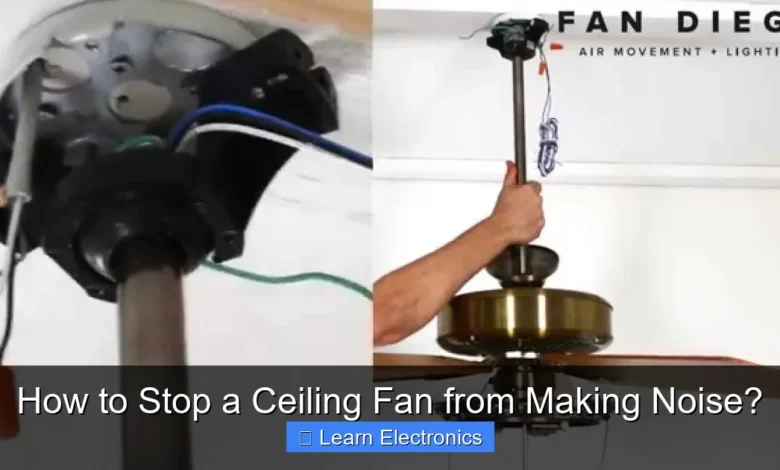
Troubleshooting Loose Components and Securing Hardware
Many fan noises stem from loose hardware that vibrates during operation. Tightening these components is often a simple yet effective way to silence a noisy fan. This particular method addresses the most common mechanical causes of sound.
Inspecting and Tightening Key Areas:
- Canopy Screws: The canopy is the decorative cover that attaches the fan to the ceiling mount. Ensure the screws holding it are tight.
- Mounting Bracket Screws: These attach the entire fan assembly to the electrical box in the ceiling. While difficult to access without lowering the fan, ensure they are snug. If the fan wobbles significantly, these may be loose.
- Downrod Set Screws: If your fan uses a downrod (the pole connecting the motor housing to the mounting bracket), check the set screws that secure it.
- Motor Housing Screws: The screws that hold the motor housing together can loosen over time. Gently tighten them, being careful not to overtighten and strip the threads.
- Blade Screws and Blade Holders: Each blade is attached to a blade holder, which then attaches to the motor. Check all screws connecting the blade to the holder and the holder to the motor housing. Loose screws here are a very common cause of clicking or rattling.
- Light Fixture Screws (if applicable): If your fan has a light kit, ensure all screws holding the light fixture and its glass shades are tight.
Balancing the Blades for Quieter Operation
A wobbling fan is not only noisy but can also put undue stress on the motor and mounting hardware. Fan wobble is almost always due to unbalanced blades, which can be caused by bent blade holders, warped blades, or inconsistent blade weight. This technique specifically targets vibrational noise.
The Blade Balancing Kit Method:
Most ceiling fan balancing kits include a plastic clip and several small weights with adhesive backing. Here’s how to use them:
- Clean the Blades: Ensure blades are free of dust buildup, which can subtly alter their weight and balance.
- Visually Inspect Blades: Look for any visibly bent blade holders or warped blades. Replace severely damaged ones if necessary.
- Use the Balancing Clip: Turn the fan on to a medium speed. Attach the balancing clip to the trailing edge of one fan blade, about halfway between the motor and the blade tip.
- Observe and Move: If the wobble lessens, try moving the clip along the trailing edge of that blade, or to a different blade, until the wobble is minimized.
- Apply Weights: Once you’ve found the blade and position where the clip best reduces wobble, remove the clip and attach an adhesive weight to the top surface of the blade, directly over the spot where the clip made the most difference. Start with one weight, then add more if needed.
- Test and Repeat: Run the fan again to check the balance. If it still wobbles, you might need to repeat the process on a different blade or adjust the weight placement.
It’s important to remember that sometimes, a blade can simply be slightly heavier or lighter than others from the factory, or have accumulated dirt unevenly. This method helps compensate for such minor discrepancies.
Addressing Motor Issues and Lubrication
If the fan noise persists after tightening hardware and balancing blades, the motor itself might be the source. Grinding, whirring, or a loud hum often indicates issues within the motor, particularly with bearings or insufficient lubrication. This approach requires a bit more technical insight.
Lubricating the Bearings:
Older fan motors, especially those that have been running for many years, can dry out. Some fans have lubrication ports (small holes near the top of the motor housing, often covered by a rubber stopper) that allow for periodic oiling. If your fan has these:
- Remove the stopper.
- Apply a few drops of non-detergent 20-weight motor oil (sometimes called “sewing machine oil”) into the port. Avoid using WD-40, which is a degreaser and not a lubricant for this purpose.
- Wipe away any excess oil.
If your fan does not have lubrication ports, the motor is likely sealed and not designed for user lubrication. Attempting to force lubrication into a sealed motor can cause more harm than good.
Investigating Motor Hum:
A persistent hum can indicate an electrical problem. This could be due to:
- Incompatible Dimmer Switch: Standard dimmer switches are not designed for motor loads and can cause humming. Ensure you’re using a fan-specific speed control switch or a standard on/off switch.
- Loose Wiring: Check the wiring connections inside the canopy for any loose splices.
- Motor Wear: Over time, the internal components of the motor can wear down, leading to a louder operation. In such cases, the motor may need replacement or, if the fan is old enough, it might be more cost-effective to replace the entire unit.
Electrical and Mounting Concerns
Sometimes, the noise isn’t directly from the fan’s moving parts but rather from its electrical supply or how it’s mounted to the ceiling structure. Addressing these fundamental issues can be crucial for a truly quiet operation. This method focuses on the foundational integrity of the installation.
Checking the Electrical Box and Wiring:
- Secure Electrical Box: Ensure the electrical box in the ceiling is securely mounted to a joist or a fan-rated brace. A loose electrical box can cause vibrations to transmit through the ceiling.
- Proper Wiring Connections: Double-check all wire nuts to ensure they are tight and properly securing the connections. Loose connections can cause intermittent buzzing or humming.
Inspecting Mounting Hardware and Structure:
- Fan-Rated Box: Always ensure the fan is mounted to a UL-listed, fan-rated electrical box, which is designed to support the weight and dynamic motion of a ceiling fan. Standard electrical boxes are often insufficient and can lead to wobbling and eventual failure.
- Secure Junction Box Brace: If using a fan brace, confirm it is tightly installed between the ceiling joists. Any play here will transfer motion to the fan.
- Ceiling Joist Integrity: In rare cases, the ceiling joist itself might have an issue, but this is usually apparent with other structural signs in the room.
Troubleshooting Table: Quick Fixes for Common Noises
Here’s a handy table summarizing common fan noises and their typical solutions to help you quickly identify and address the problem.
| Noise Type | Potential Cause(s) | Recommended Action |
|---|---|---|
| Clicking/Ticking | Loose screws (blades, housing, canopy), interfering pull chain, wiring rubbing | Tighten all accessible screws; reposition pull chain or wires |
| Humming/Buzzing | Incompatible dimmer, loose electrical connections, motor hum | Replace dimmer with fan-specific control; tighten wiring; assess motor wear |
| Grinding/Whirring | Dry motor bearings, failing motor, internal friction | Lubricate bearings (if applicable); consider motor/fan replacement |
| Wobbling/Shaking | Unbalanced blades, bent blade holder, loose mounting hardware | Balance blades with kit; tighten mounting bracket/canopy screws |
| Rattling | Loose light kit, decorative trim, fan blades | Tighten all light kit screws, ensure glass shades are secure |
Conclusion
Successfully addressing how to stop a ceiling fan from making noise requires a systematic approach, starting with safety and progressing through various diagnostic and repair steps. From tightening loose screws and balancing blades to lubricating the motor or checking electrical connections, most fan noise issues can be resolved with a bit of patience and the right tools. By following these detailed instructions, you can restore peace and quiet to your room and ensure your ceiling fan operates smoothly and efficiently for years to come. Remember, if you’re ever unsure or uncomfortable performing an electrical repair, it’s always best to consult a qualified electrician.
Frequently Asked Questions
Why is my ceiling fan making noise, and what are the common fixes?
Ceiling fan noise often stems from loose screws, imbalanced blades, or issues with the motor or mounting. Common solutions include tightening all fasteners, balancing the blades, or ensuring the fan is securely mounted to the electrical box. Regularly cleaning and lubricating can also help reduce the noise.
How can I stop my ceiling fan from wobbling and making noise?
Wobbling is usually caused by unbalanced blades or an improperly secured fan. First, ensure the mounting bracket is tight and the fan is firmly attached to the ceiling junction box. Then, use a ceiling fan balancing kit to correct any blade imbalance, which often includes weights and clips.
Why is my ceiling fan humming or buzzing, and how can I make it stop?
A humming or buzzing sound often indicates an electrical issue, such as a faulty dimmer switch not rated for ceiling fans, or loose wiring connections. Check the fan’s wiring to ensure they are secure and consider replacing older dimmer switches with fan-rated controls. Sometimes, motor wear can also contribute to this type of noise.
What causes a clicking or grinding noise in my ceiling fan?
Clicking or grinding noises often point to mechanical problems within the fan motor or loose components. Check for any obstructions, loose screws on the fan’s housing, or the blade arms that might be rubbing. If the noise persists, the motor bearings might be worn and could require lubrication or replacement.
What regular maintenance can I do to prevent my ceiling fan from making noise?
To prevent future ceiling fan noise, routinely check and tighten all screws on the blades, light kit, and mounting bracket. Keep the blades clean to avoid dust buildup that can cause imbalance. Periodically, you can also lubricate the motor if your fan model has oil ports, following manufacturer guidelines.
As an Amazon Associate, I earn commission from qualifying purchases.


