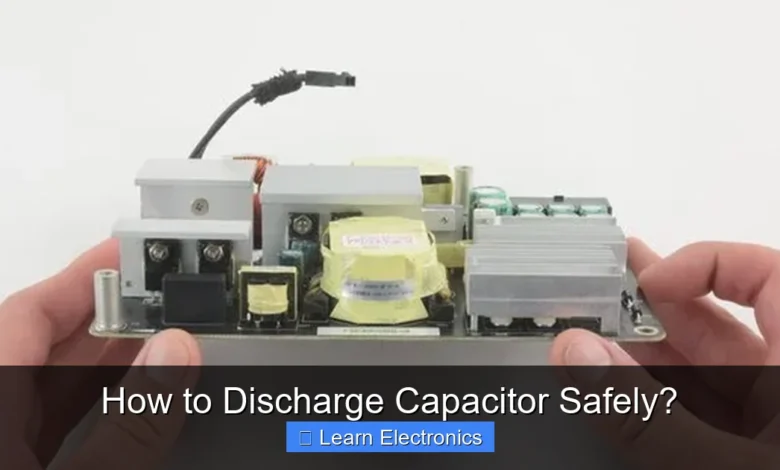
How to Discharge Capacitor Safely? Discharging a capacitor safely involves carefully releasing its stored electrical energy, typically by connecting a suitable resistor across its terminals to dissipate the charge over time, or by using a dedicated discharge tool, always adhering to strict safety protocols. This practice is absolutely crucial for preventing electrical shocks and damage to components when working with electronic circuits.
Understanding the correct procedures for releasing stored energy from these vital components is paramount for anyone involved in electronics, from hobbyists to seasoned professionals. The practice of properly managing this stored energy ensures not only personal safety but also the longevity and integrity of electronic equipment.
Quick Answers to Common Questions
Why is discharging a capacitor safely so important?
Discharging a capacitor safely is crucial because even after power is off, it can store a dangerous charge that could deliver a painful or even lethal shock. Always prioritize safety and ensure the capacitor is fully discharged before handling it.
What’s the simplest method to discharge a capacitor if I don’t have fancy tools?
For a reliable and simple approach, you can use a resistor with appropriate wattage and resistance connected across the capacitor’s terminals. This allows the stored energy to dissipate safely through the resistor as heat, effectively helping you discharge capacitor safely.
How can I confirm a capacitor is fully discharged before touching it?
The best way to confirm is by using a multimeter set to measure DC voltage. Touch the probes to the capacitor terminals; if it reads near zero volts, you’ve successfully managed to discharge capacitor safely and it’s generally safe to handle.
📑 Table of Contents
Understanding Capacitors and Why Discharge is Crucial
Before delving into the methods, it’s essential to grasp what a capacitor is and why its discharge is such a critical step in electronics work.
What is a Capacitor?
A capacitor is a passive electronic component that stores electrical energy in an electric field. It consists of two conductive plates separated by a dielectric (insulating) material. When voltage is applied, charge builds up on the plates, creating a stored electrical potential. They come in various sizes and types, from tiny surface-mount devices to large industrial units, with some capable of storing significant and dangerous amounts of energy.
The Dangers of Stored Energy
The energy stored in a charged capacitor can be quite hazardous. Even after a device has been unplugged, a capacitor can retain its charge for an extended period. This residual charge poses several risks:
- Electrical Shock: Contact with the terminals of a charged capacitor can deliver a painful, and potentially fatal, electrical shock. High-voltage capacitors, especially in power supplies, camera flashes, or CRT displays, can store enough energy to cause serious injury or cardiac arrest.
- Component Damage: Accidentally shorting a charged capacitor, or touching its terminals with a metal tool, can cause a sudden, uncontrolled discharge. This can lead to arcing, sparks, and potentially damage other sensitive components in the circuit, or even the capacitor itself.
- Unexpected Operation: A charged capacitor can cause a circuit to power on unexpectedly, even when disconnected from its main power source, leading to unpredictable behavior during repair or inspection.
When to Discharge Capacitors
It’s crucial to discharge capacitors in several scenarios:
- Before performing any maintenance, repair, or modification on an electronic circuit.
- Before handling or storing capacitors that may have been previously charged.
- When salvaging components from old equipment.
Essential Safety Precautions Before Starting
Safety should always be your top priority. Adhering to these precautions will significantly minimize risks when working with capacitors.
Personal Protective Equipment (PPE)
Always wear appropriate PPE:
- Safety Glasses or Goggles: Protect your eyes from potential sparks or arcing.
- Insulated Gloves: Provide a barrier against electrical shock. Ensure they are rated for the voltage you are working with.
Power Disconnection and Verification
Never assume a device is safe just because it’s unplugged. Always follow these steps:
- Disconnect All Power: Unplug the device from the wall outlet and remove any batteries.
- Wait: Allow some time for smaller capacitors to naturally self-discharge, although this is not sufficient for larger ones.
- Verify Power Off: Use a multimeter set to measure AC and DC voltage to confirm that no residual voltage is present at the power input points of the circuit.
Working in a Safe Environment
- Ensure your workspace is clean, dry, and well-lit.
- Avoid working alone, especially with high-voltage circuits.
- Keep metal tools away from circuit boards until all capacitors are confirmed as discharged.
Methods for Discharging Capacitors Safely
There are several methods for safely discharging capacitors, with the resistor method being the most recommended for its controlled and predictable nature.
The Resistor Method: Safely Discharging Capacitors Using a Resistor
This is the preferred and safest approach for discharging most capacitors. A resistor limits the current flow, allowing the capacitor to discharge gradually and predictably.
Choosing the Right Resistor
- Resistance (R): The value depends on the capacitor’s capacitance (C) and the desired discharge time. A higher resistance will take longer to discharge but will limit the peak current more. A common rule of thumb is to choose a resistor that allows for a reasonable discharge time (e.g., a few seconds to a minute for large capacitors).
- Wattage (Power Rating): The resistor must be able to dissipate the energy stored in the capacitor without overheating or burning out. Calculate the peak power dissipation (P = V²/R, where V is the initial voltage). Choose a resistor with a wattage rating significantly higher than the calculated peak power. For high-voltage capacitors, you might need multiple resistors in series to handle the voltage and power.
Step-by-Step Guide for Resistor Method:
- Identify Capacitor Terminals: Locate the positive and negative terminals of the capacitor.
- Select Resistor: Choose a suitable resistor (or resistors in series) based on the capacitor’s voltage and capacitance, ensuring adequate power rating.
- Connect Resistor: Using insulated alligator clips, connect one end of the resistor to one terminal of the capacitor and the other end of the resistor to the other terminal. Ensure good, secure connections. For high-voltage capacitors, use test probes with insulated handles to hold the resistor.
- Monitor Voltage: While the resistor is connected, use a multimeter (set to DC voltage) to continuously monitor the voltage across the capacitor terminals.
- Wait for Discharge: Wait until the voltage reading drops to near zero (ideally below 1-2 volts). For large capacitors, this might take several minutes.
- Disconnect Resistor: Once discharged, remove the resistor.
Using a Dedicated Discharge Tool
Commercial discharge tools are available, often consisting of a resistor network built into a probe with an indicator light. These tools simplify the process and provide an added layer of safety, especially for frequent work on various circuits. Always follow the manufacturer’s instructions when using such tools.
Natural Discharge
Small capacitors (e.g., in low-power signal circuits) often self-discharge relatively quickly through leakage currents within the circuit or through the dielectric material itself. However, this method is unreliable for larger capacitors or those in circuits with high impedance, and should never be solely relied upon for safety.
Shorting Method (Not Recommended)
This method involves directly shorting the capacitor terminals with a screwdriver or a piece of wire. This is highly discouraged. It results in a sudden, uncontrolled discharge, causing a large spark, loud pop, and potential damage to the capacitor, the tool, or nearby components, and can be dangerous due to the arc flash. Only in extreme, controlled circumstances (e.g., testing capacitor failure under specific conditions) and with extreme caution might this be considered, but never for general safety discharge.
Calculating Discharge Time and Resistor Values
Understanding the physics behind capacitor discharge helps in selecting the appropriate resistor and predicting discharge time. The core concept is the RC time constant.
The RC Time Constant Formula
The time constant (τ, tau) of a resistor-capacitor (RC) circuit is given by the formula:
τ = R × C
Where:
τis the time constant in seconds.Ris the resistance in Ohms.Cis the capacitance in Farads.
After one time constant (1τ), the capacitor will have discharged approximately 63.2% of its initial voltage. It will have discharged to about 36.8% of its initial voltage.
Practical Discharge Time Rule (5τ Rule)
For practical purposes, a capacitor is considered fully discharged after approximately 5 time constants (5τ). At 5τ, the capacitor voltage will be less than 1% of its initial voltage, which is generally considered safe for handling.
Example Calculation:
Let’s say you have a 1000 µF (0.001 F) capacitor charged to 400 V, and you want to discharge it using a 10 kΩ (10,000 Ω) resistor.
- Calculate τ: τ = 10,000 Ω × 0.001 F = 10 seconds.
- Calculate 5τ: 5τ = 5 × 10 seconds = 50 seconds.
So, it would take approximately 50 seconds for the capacitor to discharge to a safe level.
Data Table for Resistor Selection Example
Here’s an example of how choosing different resistors affects discharge time for a 1000 µF capacitor:
| Capacitor (C) | Resistor (R) | Time Constant (τ = R*C) | Approx. Full Discharge (5τ) | Peak Power (P=V²/R, V=400V) |
|---|---|---|---|---|
| 1000 µF | 1 kΩ | 1 second | 5 seconds | 160 W |
| 1000 µF | 10 kΩ | 10 seconds | 50 seconds | 16 W |
| 1000 µF | 100 kΩ | 100 seconds | 500 seconds (~8.3 min) | 1.6 W |
Note: The peak power calculation (P=V²/R) represents the initial power dissipated by the resistor. For high voltage and low resistance, this can be very high, requiring high-wattage resistors or series configurations. Always check the resistor’s power rating.
Verifying Complete Discharge
Once you’ve applied a discharge method, always verify the capacitor is indeed discharged before proceeding.
Using a Multimeter
The only reliable way to confirm a capacitor is discharged is to measure the voltage across its terminals with a multimeter:
- Set your multimeter to the appropriate DC voltage range (higher than the capacitor’s initial voltage).
- Carefully place the multimeter probes across the capacitor terminals, ensuring good contact.
- Read the voltage. It should be close to 0 V (e.g., less than 1-2 V). If it shows a significant voltage, repeat the discharge process.
Importance of Double-Checking
Never rush this step. Even a small residual charge in a large capacitor can be surprising. Taking an extra minute to verify with a multimeter can prevent accidents and damage.
Post-Discharge Best Practices and Storage
After successfully discharging a capacitor, there are a few more practices to consider.
Proper Handling
Even after discharge, handle capacitors by their insulated bodies, not by their leads, to avoid re-charging them through static electricity or accidental contact with charged surfaces.
Long-Term Storage Considerations
If you’re storing capacitors long-term, especially large electrolytic types, it’s often recommended to store them in a discharged state. Some manufacturers suggest periodically reforming electrolytic capacitors if stored for very long periods, but for general purposes, discharged storage is best for safety.
When to Seek Professional Help
If you are dealing with very high voltage capacitors (e.g., above 500V or in industrial equipment), extremely large capacitance values, or if you are uncertain about any step of the process, it is always best to consult a qualified electrician or electronics technician. Their expertise can prevent serious injury and damage.
The process of safely discharging capacitors is a fundamental skill in electronics. By understanding the risks, applying the correct techniques—especially the resistor method—and always verifying your work with a multimeter, you can significantly enhance safety and protect both yourself and your equipment. Prioritizing this crucial safety practice is a hallmark of responsible electronics work.
Frequently Asked Questions
Why is it important to safely discharge a capacitor?
Capacitors can store dangerous amounts of electrical energy even after power is removed, posing a severe shock hazard. Safely discharging a capacitor prevents accidental electrocution and damage to sensitive electronic components or test equipment. It’s a critical safety step before handling any circuit containing high-voltage capacitors.
What tools are typically used to discharge a capacitor?
Common tools for safely discharging a capacitor include a high-wattage resistor connected to insulated leads, a specialized capacitor discharge tool, or a multimeter with a voltage measurement function for verification. Always ensure the tools are rated for the voltage and current of the capacitor you are working with.
How can I tell if a capacitor is still charged?
The most reliable way to determine if a capacitor is still charged is by measuring its voltage with a multimeter. Connect the multimeter leads across the capacitor terminals, ensuring it’s set to the appropriate DC voltage range. If the reading is anything above zero, the capacitor still holds a charge.
What are the common methods for safely discharging a capacitor?
A common method involves using a power resistor with suitable insulation and wattage, connected across the capacitor terminals to dissipate the stored energy slowly. Another approach is using a dedicated capacitor discharge tool, which often includes a resistor and built-in safety features. Always verify the discharge with a multimeter afterward.
How long should I wait after powering off equipment before attempting to discharge a capacitor?
The waiting time can vary depending on the circuit and capacitor size, but it’s generally good practice to wait several minutes, or even longer for very large capacitors, after disconnecting power. Many circuits have internal bleed resistors that will slowly discharge the capacitor over time. Always verify with a multimeter before proceeding.
Are there any safety precautions I should always follow when discharging capacitors?
Absolutely. Always wear appropriate personal protective equipment, such as safety glasses and insulated gloves. Before touching any components, ensure the power source is completely disconnected and confirm the capacitor’s voltage with a multimeter to ensure it is fully discharged.
As an Amazon Associate, I earn commission from qualifying purchases.


