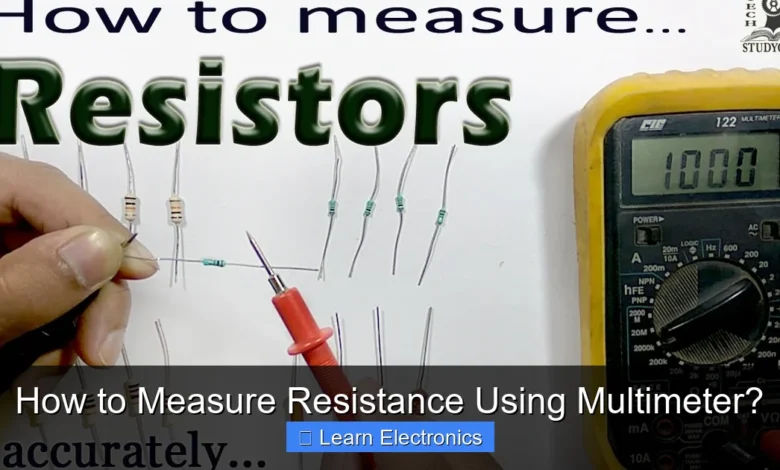
How to Measure Resistance Using Multimeter? This fundamental skill in electronics involves setting your multimeter to the ohms (Ω) function and connecting its probes across the component to obtain a reading. Mastering this technique allows for accurate troubleshooting and component verification in various electrical circuits.
The practice of resistance measurement is crucial for diagnosing issues, confirming component integrity, and understanding circuit behavior. It’s an indispensable step for anyone working with electronics, from hobbyists to professional engineers, providing immediate feedback on a component’s electrical opposition.
Quick Answers to Common Questions
What setting should I use on my multimeter to measure resistance?
To measure resistance, always set your multimeter to the Ohms (Ω) symbol. If your meter has auto-ranging, it will figure out the right scale, otherwise, start with the highest range and work your way down for a more precise reading.
Does it matter which way I connect the probes when measuring resistance?
Nope, when you’re measuring resistance using a multimeter, polarity doesn’t matter for passive components like standard resistors. You can connect the red and black probes in either direction across the component.
Can I measure resistance of a component while it’s still in a circuit?
For accurate and safe readings, always disconnect the component from the circuit before you measure resistance using a multimeter. Otherwise, other components or power sources in the circuit could interfere with your measurement or even damage your meter.
📑 Table of Contents
- Understanding Resistance and Your Multimeter
- Essential Multimeter Features for Measuring Resistance Using a Multimeter
- Step-by-Step Guide: How to Measure Resistance Using Multimeter
- Interpreting Resistance Readings and Common Scenarios
- Advanced Considerations and Best Practices for Resistance Measurement
- Table of Common Resistor Values and Multimeter Interpretation
- Conclusion
Understanding Resistance and Your Multimeter
Before diving into the steps of using this method, it’s essential to grasp what resistance is and how a multimeter works in this context. Resistance is a fundamental property of an electrical conductor that opposes the flow of electric current. Measured in Ohms (Ω), it dictates how much current will flow through a component given a certain voltage difference across it.
What is Resistance?
- Definition: Resistance is the opposition to the flow of electric current in an electrical circuit.
- Unit: The standard unit of resistance is the Ohm (Ω), named after Georg Simon Ohm.
- Components: Resistors are components specifically designed to provide a certain amount of resistance, but all electrical components have some inherent resistance.
What is a Multimeter?
A multimeter is a versatile electronic measuring instrument that combines several measurement functions in one unit. For the practice of measuring resistance, its ohmmeter function is key. Modern multimeters can be digital (DMM) or analog, but DMMs are far more common due to their precision and ease of reading.
- Functions: Typically measures voltage (volts), current (amperes), and resistance (ohms).
- Components: Consists of a display, a function knob, input jacks, and test leads (probes).
Essential Multimeter Features for Measuring Resistance Using a Multimeter
To effectively perform this measurement, familiarity with specific multimeter features is critical. These features ensure you set up your device correctly and interpret readings accurately.
Ohm Symbol (Ω) and Range Selection
Every multimeter will have a setting specifically for measuring resistance, denoted by the Greek letter Omega (Ω). This symbol represents Ohms. Many modern digital multimeters are “auto-ranging,” meaning they automatically select the correct resistance range. However, some older or less expensive models may require you to manually select a range (e.g., 200Ω, 2kΩ, 20kΩ, 200kΩ, 2MΩ, etc.).
- Auto-Ranging: Simplifies the process by automatically adjusting to the correct scale, ideal for when you don’t know the expected resistance.
- Manual Ranging: Requires the user to select a range higher than the expected resistance value. If the reading shows “OL” (Overload) or “1.”, you need to select a higher range.
Probe Connections
Multimeters typically have several input jacks. For resistance measurements, you will almost always use the “COM” (common) jack for the black test lead and the “VΩmA” or “VΩ” jack for the red test lead. Always ensure your probes are securely inserted.
- Black Probe: Connects to the “COM” (Common) jack. This is the negative lead, serving as the reference point.
- Red Probe: Connects to the jack marked with “Ω” (Ohms) or “VΩmA”. This is the positive lead, through which a small test current is sent.
Step-by-Step Guide: How to Measure Resistance Using Multimeter
Follow these steps carefully to ensure accurate and safe resistance measurements with your multimeter.
1. Safety First: Disconnect Power
This is arguably the most critical step in this measurement process. Never attempt to measure the resistance of a component while it is powered on or connected to a live circuit. Doing so can damage your multimeter, the component, or even pose a safety hazard. Always remove the component from the circuit or ensure the circuit is completely de-energized and unplugged.
- Isolate Component: Ideally, desolder one lead of the component from the circuit or remove it entirely. This eliminates parallel paths that can skew your reading.
- Discharge Capacitors: If working with circuits containing capacitors, ensure they are fully discharged before proceeding to avoid unexpected voltage spikes or damage.
2. Prepare the Circuit and Component
Confirm that the power supply to the circuit or device you are working on is completely off and unplugged. If the component is part of a larger assembly, ensure it is isolated to prevent other components from interfering with the resistance reading.
3. Setting Up Your Multimeter
- Turn On: Power on your multimeter.
- Function Selection: Rotate the function dial to the Ohms (Ω) setting. If your multimeter is manual ranging, start with a higher range than you expect, then adjust down if necessary for a more precise reading.
- Connect Leads: Insert the black test lead into the “COM” jack and the red test lead into the “VΩmA” or “VΩ” jack.
4. Connecting the Probes to the Component
Touch the bare metal tips of the test probes to the two ends of the component you wish to measure. For resistors, it doesn’t matter which probe touches which lead, as resistance is not polarized. Ensure good, firm contact for an accurate reading.
- Good Contact: Press the probes firmly against the component leads to avoid intermittent readings caused by loose connections.
- Avoid Touching Metal Tips: Try to avoid touching the metal tips of the probes with your fingers, especially when measuring high resistance values. Your body has its own resistance, which can be measured in parallel with the component, interfering with the accuracy of the reading.
5. Reading the Measurement
Once the probes are connected, the multimeter display will show the resistance value in Ohms (Ω), kilohms (kΩ), or megohms (MΩ). If you are using a manual ranging multimeter and see “OL” or “1.” on the display, increase the range until a numeric value appears. If the value is very small (e.g., 0.00Ω), you might need to select a lower range for better precision.
Interpreting Resistance Readings and Common Scenarios
Understanding what your multimeter display indicates is as important as taking the measurement itself. This knowledge helps you diagnose component health and circuit conditions.
Open Circuits (OL/OVER)
If your multimeter displays “OL” (Overload), “OVER”, or sometimes just a “1.” on the far left of the display when measuring a component, it indicates an open circuit. This means there’s an infinite resistance, or the component is broken, preventing current flow. This is a common indication of a faulty component like a blown fuse, a broken wire, or a failed resistor.
Short Circuits (0 Ohms)
A reading of approximately 0 Ohms (or a very low value, close to zero) indicates a short circuit. This means there’s virtually no resistance, allowing current to flow unimpeded. While this is expected for a simple wire, a closed switch, or a robust connection, it can indicate a fault in other components where some resistance is expected, such as a shorted coil or a damaged semiconductor.
Variable Resistors (Potentiometers)
When measuring a potentiometer (variable resistor), you can measure the total resistance across its two outer pins, which should remain constant regardless of shaft position. Measuring from one outer pin to the center wiper pin will show a resistance that changes as you rotate the shaft. Measuring between the other outer pin and the wiper will show a resistance that varies inversely to the first measurement; the sum of these two readings should equal the total resistance across the outer pins.
Troubleshooting Tips
- Inconsistent Readings: Could be due to poor probe contact, a faulty component, or parallel paths in the circuit if measured in-circuit.
- Unexpected High Readings: May indicate a component starting to fail (e.g., a resistor that has gone “open”) or an intermittent connection.
- Temperature Effects: Resistance can change with temperature, especially for certain materials like thermistors. Allow components to cool if you suspect this is affecting your readings.
Advanced Considerations and Best Practices for Resistance Measurement
For more advanced work or specific troubleshooting, these practices can help improve the accuracy and efficiency of resistance measurements.
Measuring Resistance In-Circuit vs. Out-of-Circuit
For the most accurate resistance measurement, it is almost always recommended to measure components out-of-circuit. When a component is part of a larger circuit, other components connected in parallel can provide alternative paths for the multimeter’s test current, leading to an inaccurate, typically lower, reading. If you must measure in-circuit, desolder at least one lead of the component to isolate it from the rest of the circuit.
Temperature Effects
The resistance of many materials, particularly metals, changes with temperature. For critical measurements, ensure components are at a stable, known temperature, ideally room temperature, to avoid deviations from their specified values. Thermistors, for instance, are specifically designed to have their resistance vary significantly with temperature, which is utilized in temperature sensing applications.
Lead Resistance Compensation
For very low resistance measurements (e.g., below 1 Ohm), the resistance of your multimeter’s test leads themselves can introduce errors. Some higher-end multimeters have a “relative” or “zero” function that allows you to subtract the resistance of the leads from your measurement. To do this, touch the two probe tips together and activate the function; the meter will then display zero or a very low value, compensating for lead resistance.
Using Auto-Ranging vs. Manual Ranging
While auto-ranging multimeters are convenient and user-friendly, manual ranging can sometimes be faster if you already have a good idea of the resistance value you expect. Selecting the correct range ensures the display shows the most significant digits, providing greater precision. Always start with a higher range and work your way down when using a manual-ranging meter if you’re unsure of the component’s value, to avoid “OL” readings and potentially damaging the meter on too low a range.
Table of Common Resistor Values and Multimeter Interpretation
This table provides a quick reference for common resistor values you might encounter and how they typically appear on a multimeter display, aiding in the interpretation of your measurements.
| Resistor Nominal Value | Multimeter Display Example (Auto-Ranging) | Multimeter Display Example (Manual Ranging – Best Scale) | Notes |
|---|---|---|---|
| 10 Ω (Ohm) | 10.0 Ω | 10.0 Ω (on 200 Ω scale) | Low resistance, often used for current limiting small LEDs. |
| 100 Ω | 100.0 Ω | 100.0 Ω (on 200 Ω scale) | Common value for various low-power applications. |
| 1 kΩ (1,000 Ω) | 1.000 kΩ | 1.00 kΩ (on 2 kΩ scale) | Widely used in digital logic pull-up/down circuits and timers. |
| 10 kΩ (10,000 Ω) | 10.00 kΩ | 10.0 kΩ (on 20 kΩ scale) | Typical for base resistors in transistor circuits and voltage dividers. |
| 100 kΩ (100,000 Ω) | 100.0 kΩ | 100 kΩ (on 200 kΩ scale) | Used in sensor circuits, timing applications, and high-impedance paths. |
| 1 MΩ (1,000,000 Ω) | 1.000 MΩ | 1.00 MΩ (on 2 MΩ scale) | High resistance, often found in high-impedance inputs or leakage testing. |
| Open Circuit | OL or 1. | OL or 1. (on any scale) | Indicates infinite resistance (a break in the circuit or component). |
| Short Circuit | 0.0 Ω | 0.0 Ω (on 200 Ω scale) | Indicates negligible resistance (a direct connection or faulty component). |
Conclusion
Measuring resistance with a multimeter is a foundational skill in electronics that empowers you to diagnose, troubleshoot, and understand circuits more deeply. By following the correct safety procedures, setting up your multimeter properly, and understanding how to interpret the readings, you can accurately assess the condition of components and the integrity of electrical paths. This technique is invaluable for anyone aspiring to work with electronics, ensuring components are functioning as expected and helping pinpoint where problems lie. Consistent practice will build your confidence and proficiency in this essential measurement, making you a more capable electronics enthusiast or professional.
Frequently Asked Questions
How do I measure resistance using a multimeter?
First, ensure the circuit or component you want to test is de-energized and disconnected from any power source. Select the resistance (Ω) setting on your multimeter, choosing an appropriate range if your meter is not auto-ranging. Connect the multimeter’s probes across the component, and the display will show its resistance value in ohms.
What precautions should I take before measuring resistance?
Always ensure the circuit or component you are testing is completely powered off and disconnected from any voltage source to prevent damage to the multimeter or yourself. For components like capacitors, it’s also crucial to discharge them fully before testing their resistance.
What does an “OL” or “1” reading mean when I measure resistance?
An “OL” (Over Load) or a “1” on the far left of the multimeter’s display typically indicates an open circuit or a resistance value that is higher than the multimeter’s selected range. This means there’s a break in the circuit, or the component’s resistance is extremely high, possibly infinite.
Can I measure resistance of components while they are still in a circuit?
It is generally not recommended to measure resistance of components while they are still connected within an active circuit. Other components in parallel can create alternative paths for current, leading to inaccurate or misleading readings. For precise measurements, always isolate the component by disconnecting at least one of its leads from the circuit.
As an Amazon Associate, I earn commission from qualifying purchases.


